These Christmas cookies have been on my "to make" list for a number of years. You might remember that I made colourful shamrock cookies and rainbow cookies in the past. But, this super fun and festive pinwheel Christmas cookies were still on my list. These cookies are part of our 12 days of Christmas cookies advent calendar...be sure to check it out!
I love how they turned out, trimmed with sprinkles. Who doesn't love a sugar cookies? Who doesn't love a colourful cookie? These are going to be your new favourite...I just know it!
Festive Pinwheel Sugar Cookies
1 cup unsalted butter
¾ cup granulated sugar
2 large egg yolks
1 teaspoon vanilla
2 ¼ cup all-purpose flour
½ teaspoon salt
3 tablespoon festive Christmas sprinkles...sugar sprinkles, not chocolate
Begin by creaming together the butter and sugar until fluffy and light, in an electric mixer or with a handheld mixer.
Beat in the egg yolks, one at a time and add the vanilla.
In a small mixing bowl whisk together flour and salt.
Add the dry ingredients to the wet ingredients, in two batches, until the dough comes together. As you mix the dough, it will pull away from the sides of the electric mixer's bowl when it is done. I love it when the dough comes together so beautifully.
Now, divide dough in half and shape it into two disks.
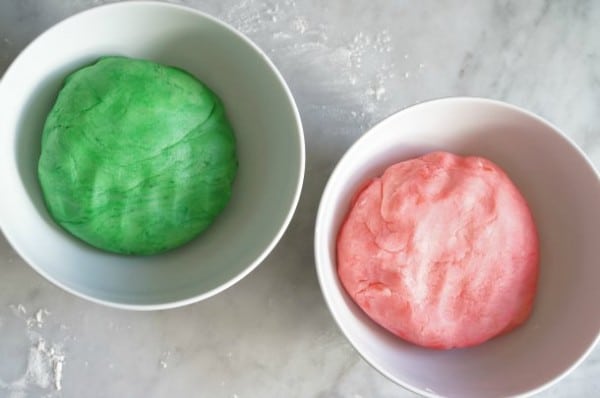
Now it's time to colour the dough. Since food colouring can be pretty messy, dip the end of a toothpick, into the red food colouring to one disk and spread a toothpick with green food colouring to the other disk. Then knead the colouring into the dough until the colour is evenly distributed in the dough. Add as much colour as you like, just know that the colour will get darker when the cookie is baked....so don't worry if the red dough looks a little pink. Now, wrap the disks in plastic wrap and place them in the fridge to chill for at least 1 hour.
Remove the dough from the fridge and let it sit on the counter for about 10 minutes...to slightly soften.
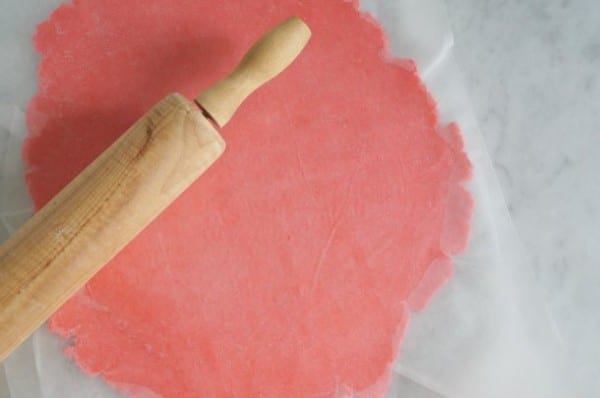
Place one disk of dough between two sheets of waxed paper. Use a rolling pin to roll the dough to ⅛ inch thickness.
Set aside and repeat with the second disk of dough.
Now that both red and green doughs are rolled, out it is time to combine the doughs. Peel the top sheet of waxed paper off each sheet of dough and carefully, flip one dough over the top of the other dough.
You should have the two colours of dough, between two sheets of waxed paper. Gently press the rolling pin across the top of the waxed paper, gently pressing the two sheets together. Peel the top piece of waxed paper off.
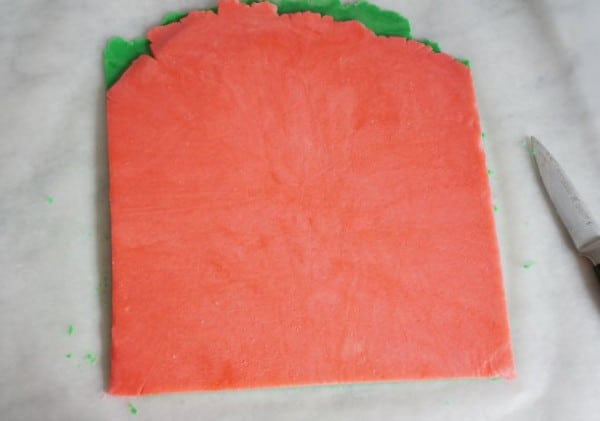
Use a sharp knife to trim off the jagged edges of the dough, make a clean-edged square or rectangle.
Using the bottom piece of waxed paper to help, begin tightly rolling the dough away from your body. Much like rolling sushi - if you have ever done that before. Roll, smooth the dough and pull up the waxed paper and repeat.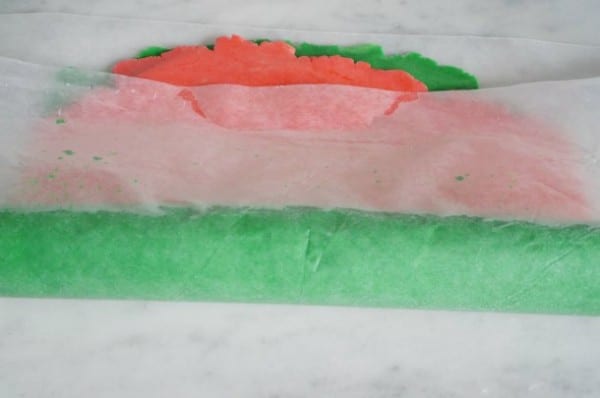
When you reach the end of the dough, you will now have a log of cookie dough. Use your hands to press and roll the log of dough - making sure the dough is smooth.
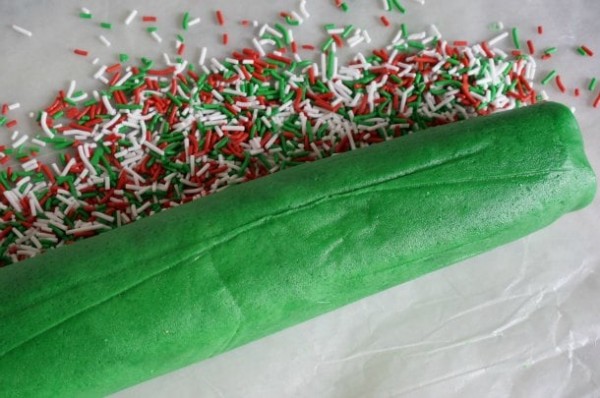
Press and roll the cookie dough log through a pile of festive sprinkles. Tightly wrap the cookie dough log in plastic wrap and place it in the freezer for at least 24 hours. The dough can be left in the freezer for up to a month.
When you are ready to bake the cookies, preheat the oven to 350°F and remove the dough from the freezer and let the dough sit on the counter for 10 minutes.

With a sharp knife, cut the dough log into ¼" disks.
If there are any air gaps, or if the dough has crumbled as a result of being sliced, use your warm hands to press the dough back together.
Bake the cookies, on a parchment paper-lined baking sheet for 10-12 minutes, until lightly golden on the bottom.

Remove from the oven and place on a rack to cool.
Enjoy.
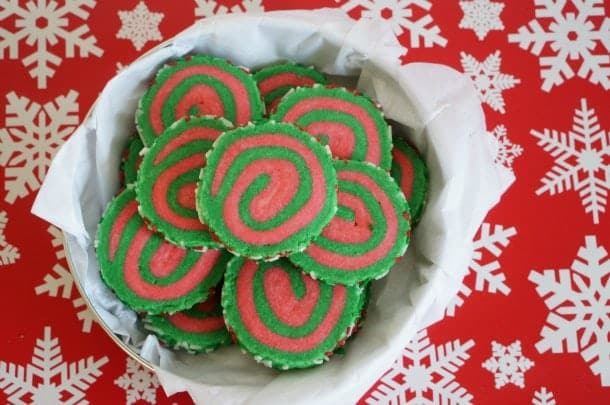
Festive Pinwheel Sugar Cookies
Ingredients
- 1 cup unsalted butter
- ¾ cup granulated sugar
- 2 large egg yolks
- 1 teaspoon vanilla
- 2 ¼ cup all purpose flour
- ½ teaspoon salt
- 3 tablespoon festive Christmas sprinkles...sugar sprinkles not chocolate
Instructions
- Begin by creaming together the butter and sugar until fluffy and light, in an electric mixer or with a hand held mixer.
- Beat in the egg yolks, one at a time and add the vanilla.
- In a small mixing bowl whisk together flour and salt.
- Add the dry ingredients to the wet ingredients, in two batches, until dough comes together. As you mix the dough, it will pull away from the sides of the electric mixer's bowl when it is done. I love it when dough comes together so beautifully.
- Now, divide dough in half and shape into two disks.
- Now it's time to colour the dough. Since food colouring can be pretty messy, dip the end of a toothpick, into the red food colouring to one disk and spread a toothpick with green food colouring to the other disk. Then knead the colouring into the dough until the colour is evenly distributed in the dough. Add as much colour as you like, just know that the colour will get darker when the cookie is baked....so don't worry if the red dough looks a little pink. Now, wrap the disks in plastic wrap and place them in the fridge to chill for at least 1 hour.
- Remove the dough from the fridge and let it sit on the counter for about 10 minutes...to slightly soften
- Place one disk of dough between two sheet of waxed paper. Use a rolling pin to roll the dough to ⅛ inch thickness.
- Set aside and repeat with the second disk of dough.
- Now that both red and green doughs are rolled, out it is time to combine the doughs. Peel the top sheet of waxed paper off each sheet of dough and carefully, flip one dough over top of the other dough.
- You should have the two colours of dough, between two sheets of waxed paper. Gently press the rolling pin across the top of the waxed paper, gently pressing the two sheets together. Peel the top piece of waxed paper off.
- Use a sharp knife to trim off the jagged edges of the dough, make a clean edged square or rectangle.Using the bottom piece of waxed paper to help, begin tightly rolling the dough away from your body. Much like rolling sushi - if you have ever done that before. Roll, smooth the dough and pull up the waxed paper and repeat.
- When you reach the end of the dough, you will now have a log of cookie dough. Use your hands to press and roll the log of dough - making sure the dough is smooth.
- Press and roll the cookie dough log through a pile of festive sprinkles. Tightly wrap the cookie dough log in plastic wrap and place in the freezer for at least 24 hours. The dough can be left in the freezer for up to a month.
- When you are ready to bake the cookies, preheat the oven to 350°F and remove the dough from the freezer and let the dough sit on the counter for 10 minutes.
- With a sharp knife, cut the dough log into ¼" disks.If there are any air gaps, or if the dough has crumbled as a result of being sliced, use your warm hands to press the dough back together.
- Bake the cookies, on a parchment paper lined baking sheet for 10-12 minutes, until lightly golden on the bottom.
- Set on rack to cool. Serve and enjoy.
Notes
Nutrition
Don't you love how these cookies turned out? It's like magic when you slice them and the pinwheels appear. These make a great teacher gift or cookie exchange treat to bake and share with friends.
Related Posts


Make sure you are following along...
SUBSCRIBE TO KITCHEN COUNTER CHRONICLES TO HAVE OUR DELICIOUS RECIPES, FUN CRAFTS & ACTIVITIES DELIVERED DIRECTLY TO YOUR INBOX.
FOLLOW KITCHEN COUNTER CHRONICLES ON
FACEBOOK:: PINTEREST :: TWITTER::INSTAGRAM


