Here is a craft project that has been on my "to-make" list for quite some time. A few years ago (has it really been that long?) I shared how to make felt balls and even how to make felt acorns. Finally, I am getting around to sharing how to make a felt ball necklace. You're gonna want to make this one.
Disclosure: There are Amazon Affiliate links in this article which means, at no additional cost to you, we could receive compensation for our recommendations. You can read our full disclosure policy on our Disclosure Page for more details.
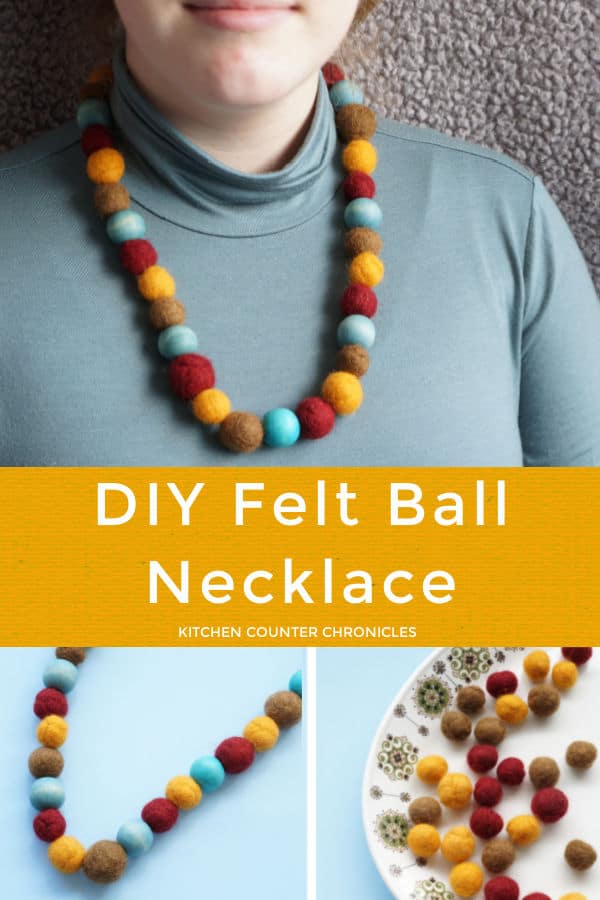
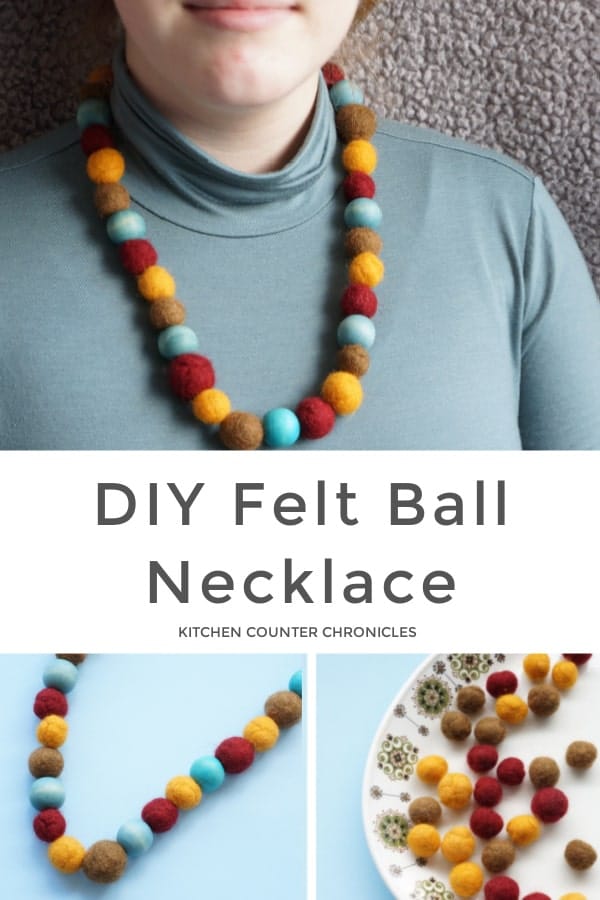
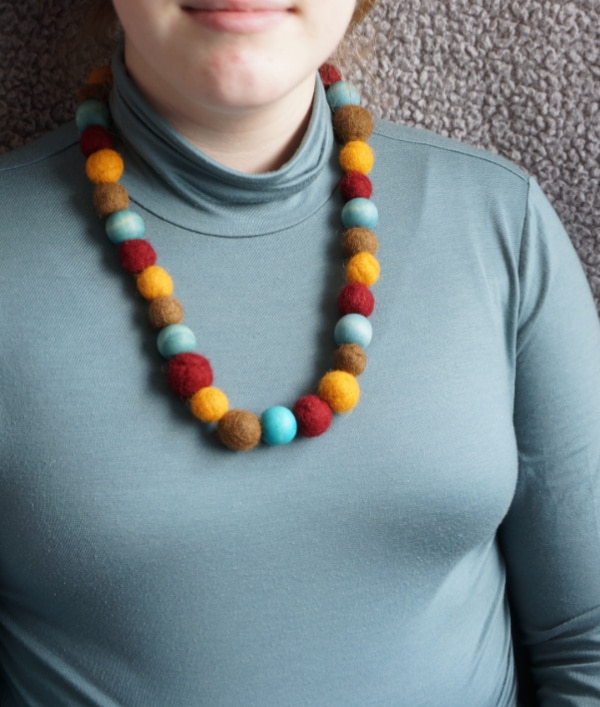
I love the feeling of felt. I love the texture and the colours of felt, especially in the cooler months. Which is why I wanted to make a felted ball necklace. I based the length of this necklace on one of my favourite chains, so I know I like the length. I'm looking forward to wearing this necklace for many years to come.
Felt Ball Necklace DIY
wool roving and our how to make felt balls post or 27 felt balls
9 wooden beads
quilting thread and needle
measuring tape
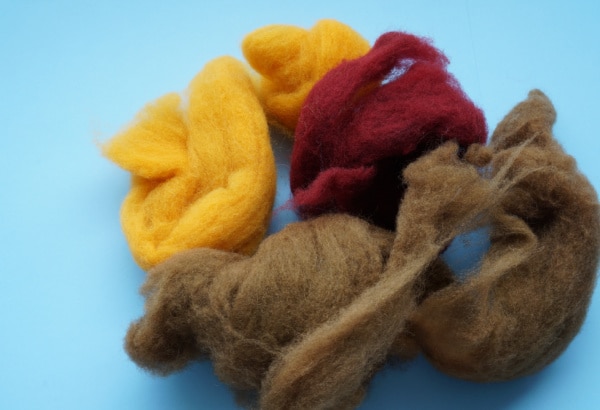
The first step in making a felt ball necklace is pretty obvious...you need to make the felt balls. I've shared how easy it is to make your own felt balls. You need some wool roving, hot water and a little dish soap...and the step-by-step instruction in my felt ball post. Alternately, you could get yourself a bag of store-bought felt balls. The main difference between the two (aside from the extra time it takes to make your own) is the uniqueness of the homemade balls. The manufactured balls are going to be perfectly round, while the homemade balls will have a little more character and charm. Trust me, the more felt balls you make the better they get.
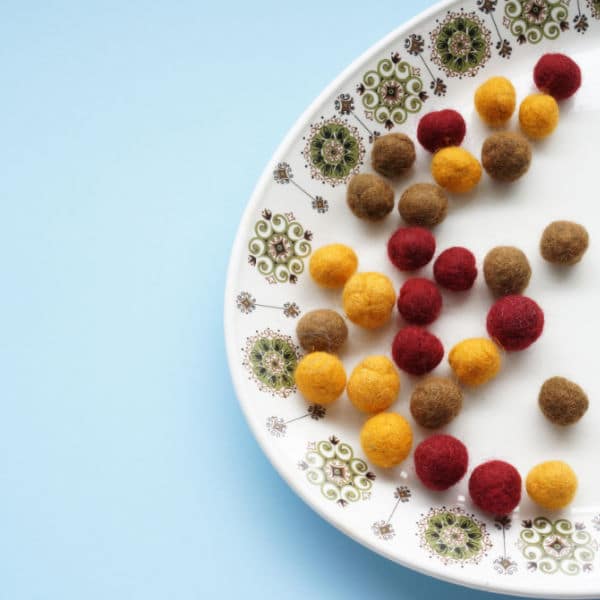
Okay, once you have your felt balls ready to go, it's time to set out your pattern and length. I wanted my necklace to slide easily over my head. I wanted the necklace to be about 30 inches long. I needed 27 felt balls and 9 wooden beads. My felt balls vary in size from about ½ inch to ¾ inch in diameter.
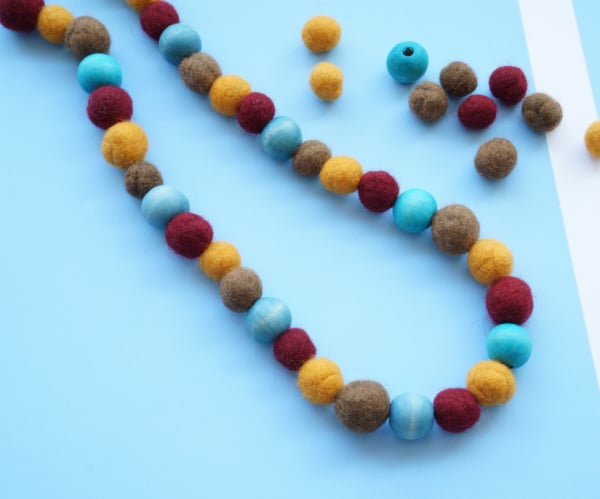
It is important to set out the pattern you want for your necklace. This will make stringing the necklace a whole lot easier. I liked the idea of adding wooden beads to the necklace. The natural beads added a nice break to the felt pattern.
When you have your pattern, it's time to prepare the string. I opted for using a quilting thread. Quilting thread is a very strong cotton thread. You need double the length, plus about 6 inches more, so you can comfortably tie the knot. I learned a long time ago that you are better to cut the string too long than too short.
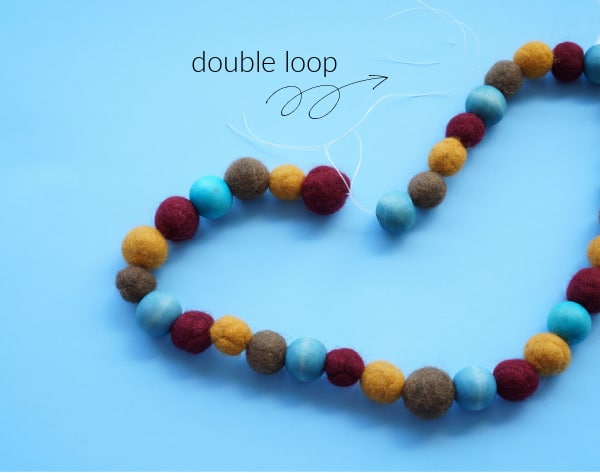
Thread the balls onto the string. When you come to the end tie a "surgeon's knot". I use this type of knot for all the bracelets and necklaces I make. Instead of looping once, a surgeon's knot has a double loop and a tight tie. Clip the ends of the thread and tuck the knot into the felt balls.
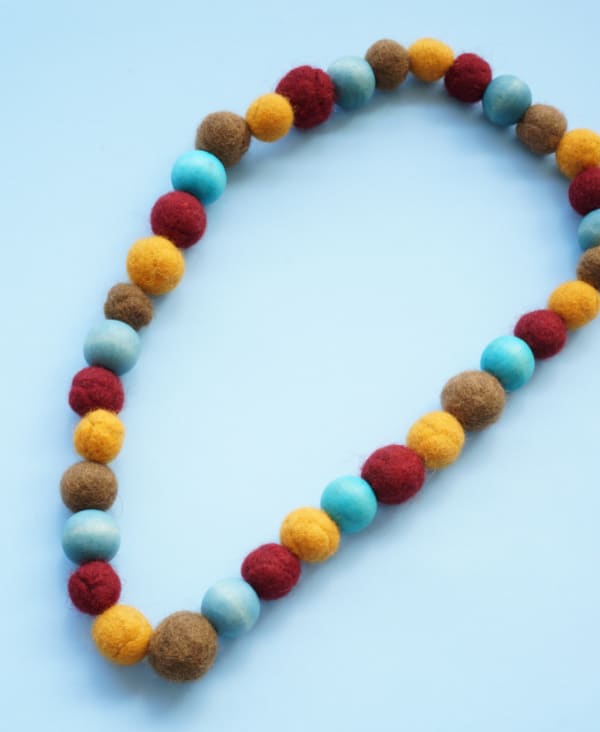
Done! Slip the necklace over your head and enjoy it. My favourite thing about my felt necklace is how it feels - it's a very tactile experience. Over time the balls will felt even more, as they rub against your clothing and in your hands. It's best to keep your necklace dry...water will change the shape of the balls.
What do you think? My next felt necklace is going to be made with festive Christmas colours! Can't wait to make one for every season.
More felt craft projects
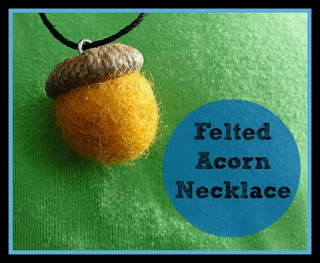
Learn how to make a felted acorn necklace
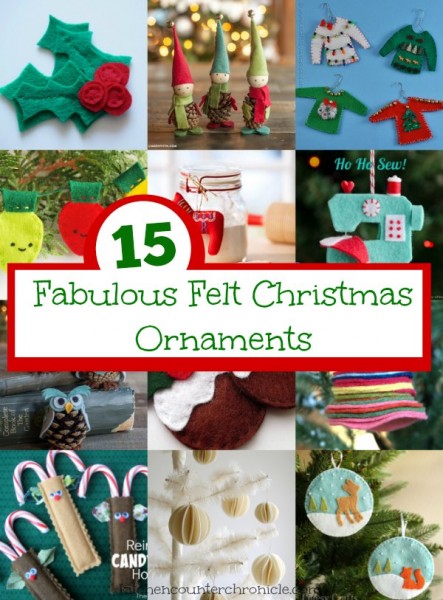
Learn how to make all of these cute felt Christmas ornaments
Make sure you are following along...
FOLLOW KITCHEN COUNTER CHRONICLES ON
SUBSCRIBE TO KITCHEN COUNTER CHRONICLES TO HAVE OUR DELICIOUS RECIPES, FUN CRAFTS & ACTIVITIES DELIVERED DIRECTLY TO YOUR INBOX.