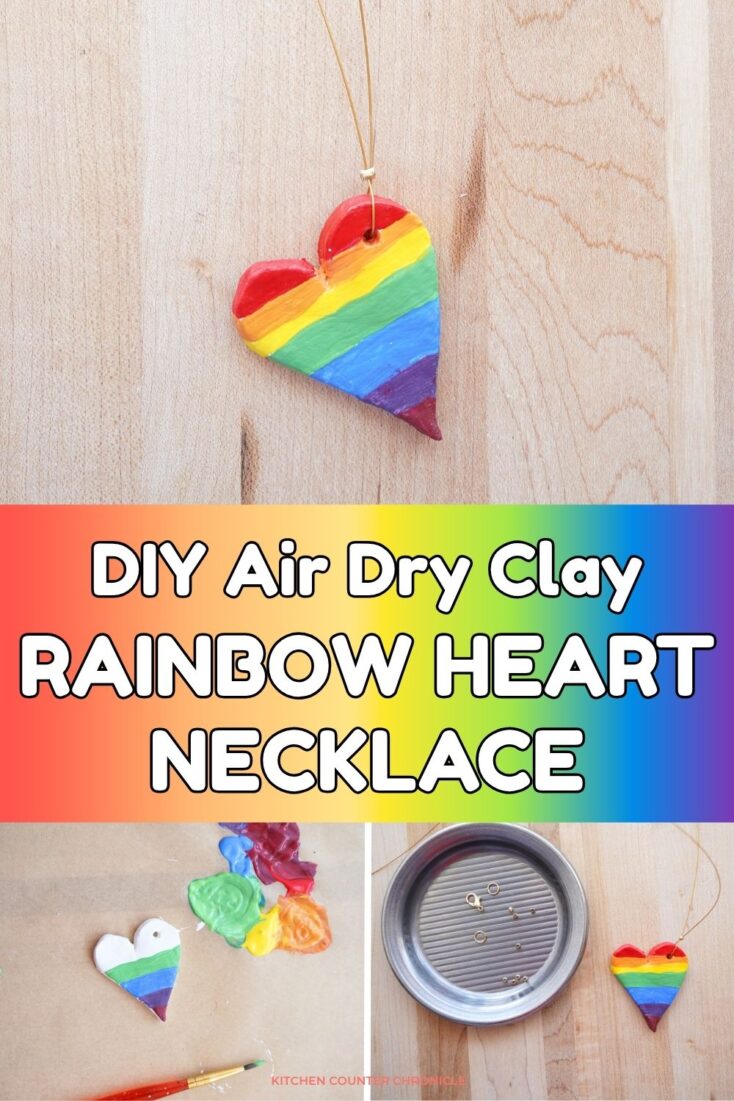
It's summertime, and it's the perfect time to try out all the coolest summer camp crafts. I think making air-dry clay crafts is a classic summer craft idea. And, making a rainbow heart necklace is a fun project for tweens and teens to make. Let me take you step-by-step through how to make this cute summer craft.

Disclosure: There are Amazon Affiliate links in this article which means, at no additional cost to you, we could receive compensation for our recommendations. You can read our full disclosure policy on our Disclosure Page for more details.
Table of contents
So, why make a rainbow heart necklace? Well, I love a heart necklace...thinking back to the lockets we used to wear when we were teens. So I knew I wanted to make a heart necklace. The rainbow seemed fitting because I love all the colors of the rainbow, and I love the diversity that it celebrates in the people who wear it. This rainbow heart necklace pendant seemed like the perfect summer craft to make and share with a friend. Exchange necklaces and hold onto the summer feeling all year round.
How to Make an Air-Dry Clay Rainbow Heart Necklace
white air-dry clay
craft utility knife or heart cookie cutter
acrylic paints - red, blue, yellow
paintbrush
Mod Podge matte
gold metal necklace wire
gold crimp beads
gold jump loops and clasp
jewelry pliers
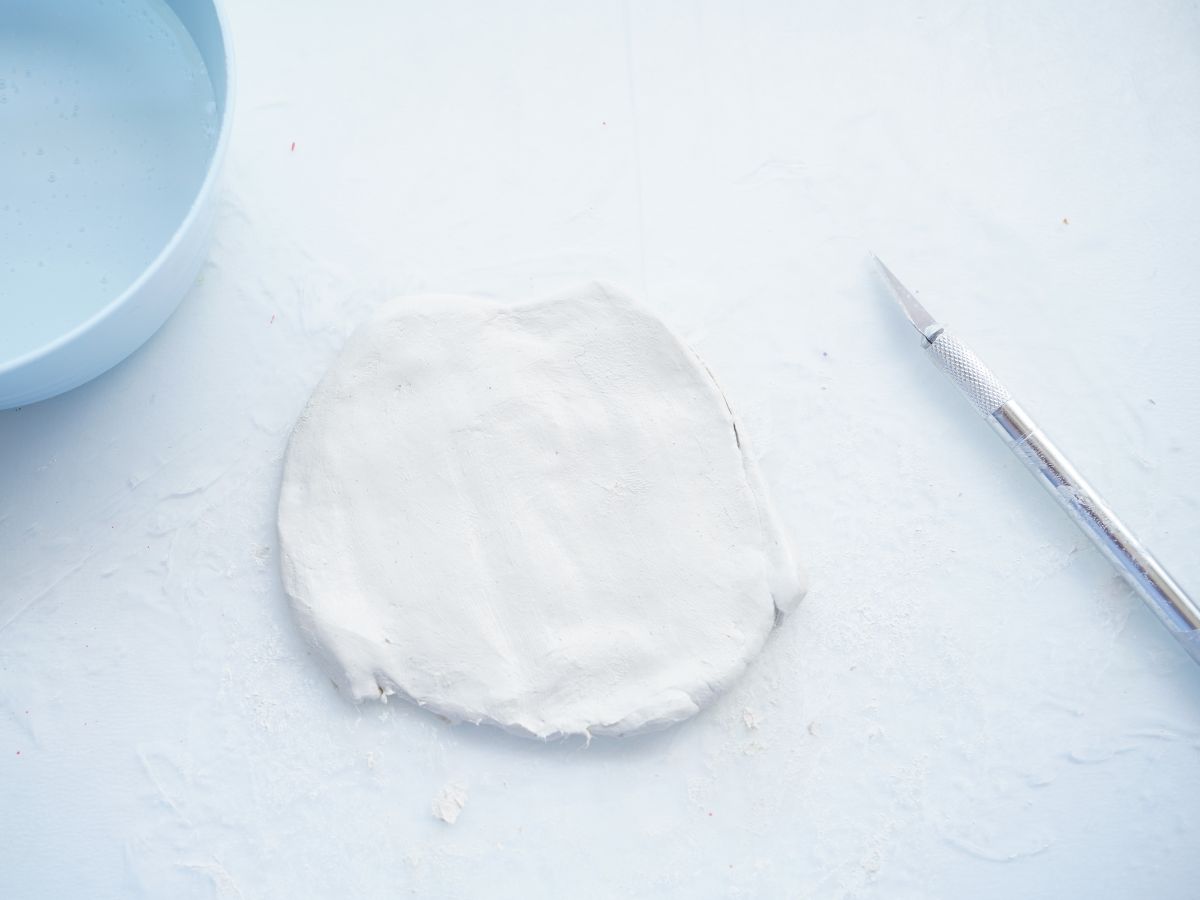
The first step in making this necklace is to break off a plum-sized ball of air-dry clay. Roll it in your hands and then flatten it into a disk, which is about ¼ inch thick. Have a small bowl of water available so you can add a little water to your hands if the clay starts to dry out, as you work with it. Once you have made your flattened disk, it's time to cut the heart shape.
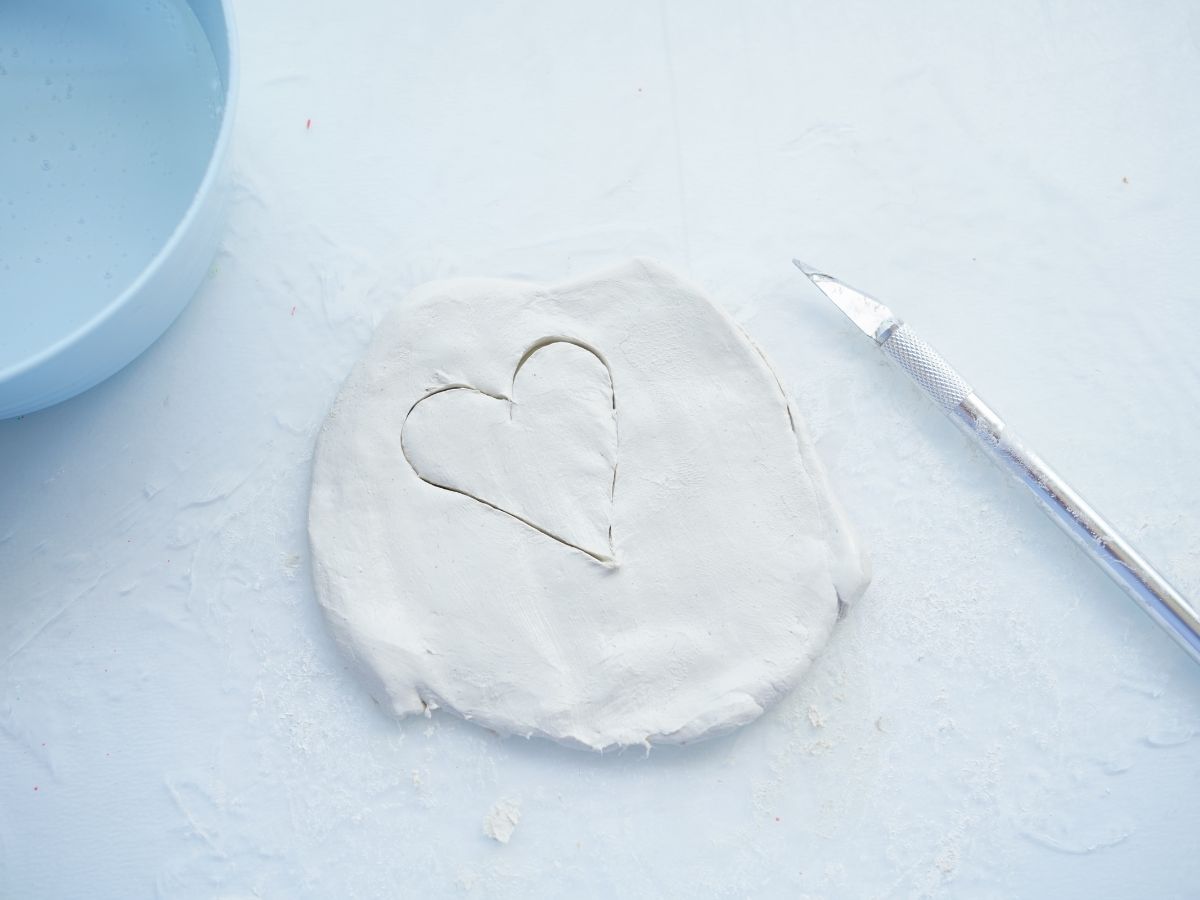
I used a utility knife to cut out the heart shape. I didn't have a heart cookie cutter small enough for the pendant size I wanted to make. If you happen to have a small heart cookie cutter, go ahead and use that. Remove the excess clay and then wet your fingers and smooth the sides of the heart. Set aside on a baking rack to dry. Oh, don't forget to poke a hole in the heart, for the thread to feed through. I used the end of my paintbrush to make the hole.
The clay may take about 24 hours to dry, depending on the conditions where you have placed it. Once the heart is dry, you can use a nail file to sand down any rough edges and then it's time to paint.
How to Paint a Rainbow Using Primary Colors
For my rainbow heart, I started with the three primary colors of acrylic paints - red, yellow, and blue. I created all the colors I needed for the rainbow from these three paints by mixing the paints together.
The 7 colors of the rainbow: red, orange, yellow, green, blue, indigo, and violet.
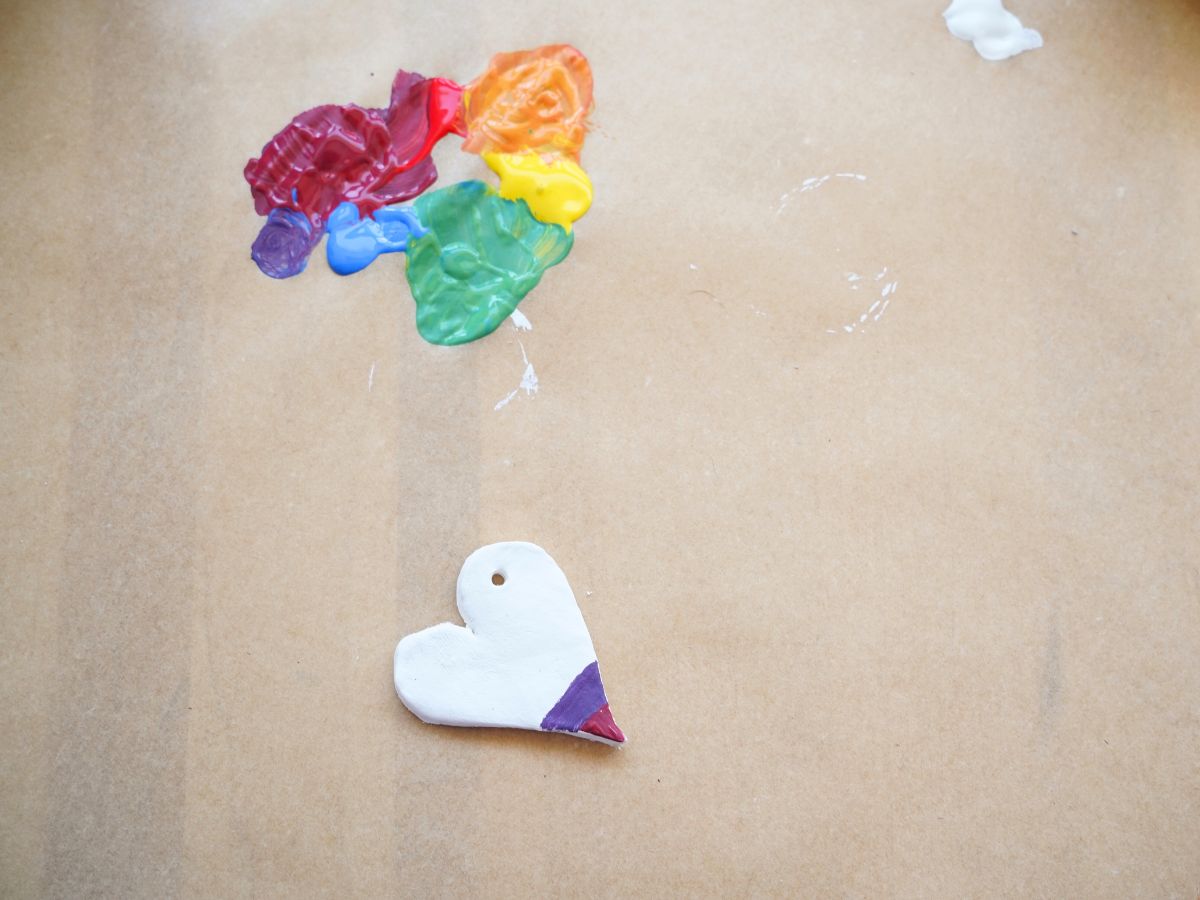
I started by mixing blue and red to make indigo and violet paints. I used more red for the violet stripe and more blue for the indigo stripe. You could measure out the size of each stripe, but I just eyeballed the stripes. Knowing I needed space for 7 stripes.
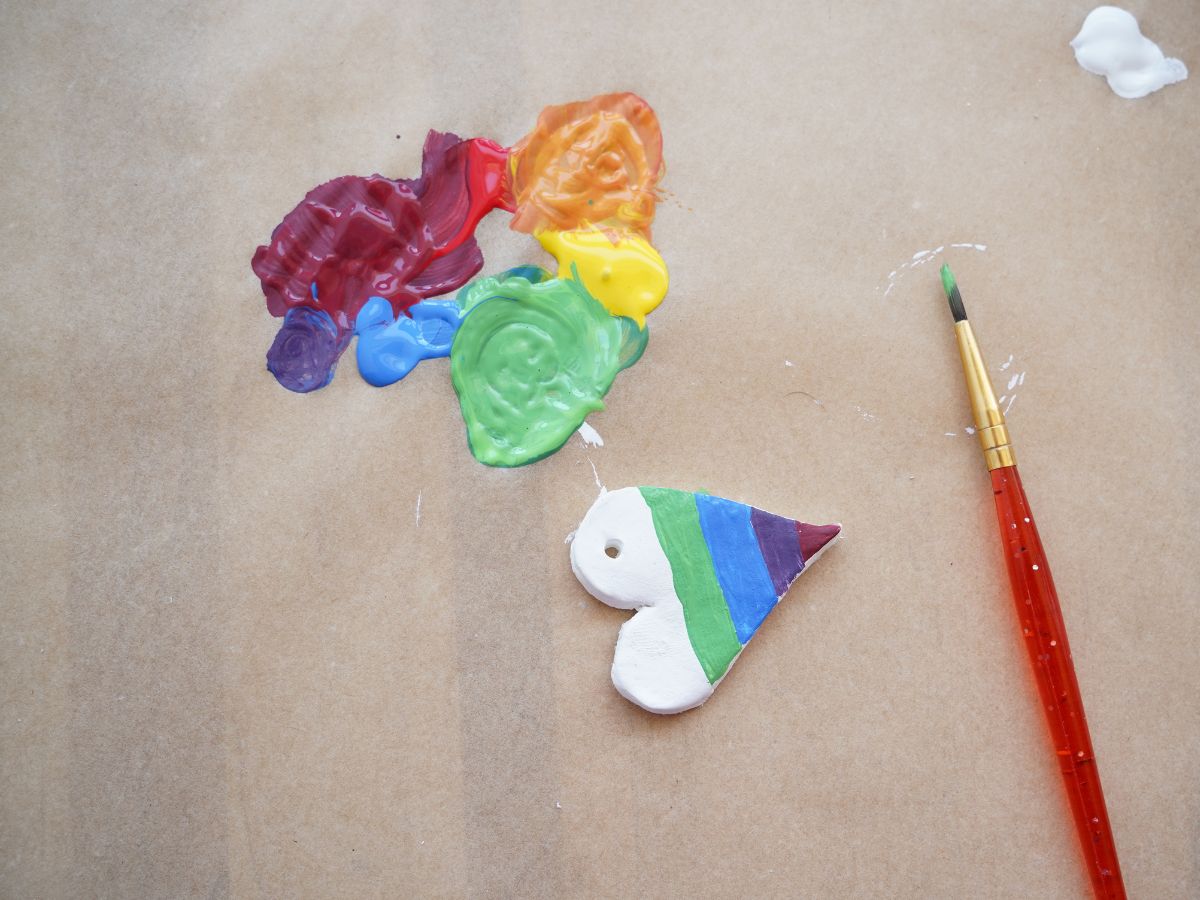
Next up was a straight blue stripe, and then mixing yellow and blue for the green stripe. I didn't carry the paint around the sides of the heart at first. I wanted to get all the stripes on the front of the heart and then I went back and added the paint to the sides.
Finally, I had a straight yellow stripe, and the orange was made from mixing yellow and red. Finishing with the red stripe at the top of the heart. Don't forget to paint inside the hole you've made for the string.
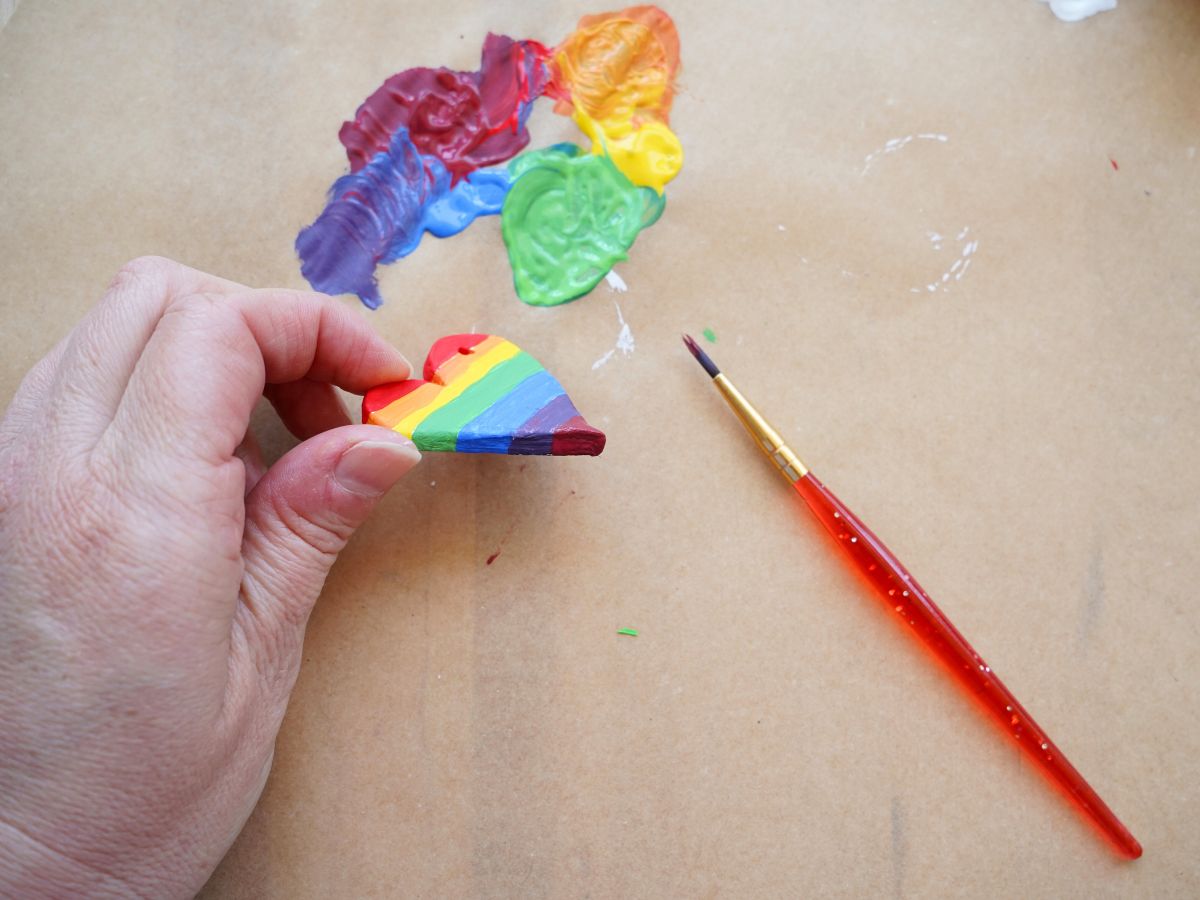
Add the paint to the sides of the heart and you can even carry the paint onto the back, but I decided to leave the back white. The back would be the perfect spot to write a message to a friend, or write the date, or simply sign your initials. You could use a permanent marker for the writing.
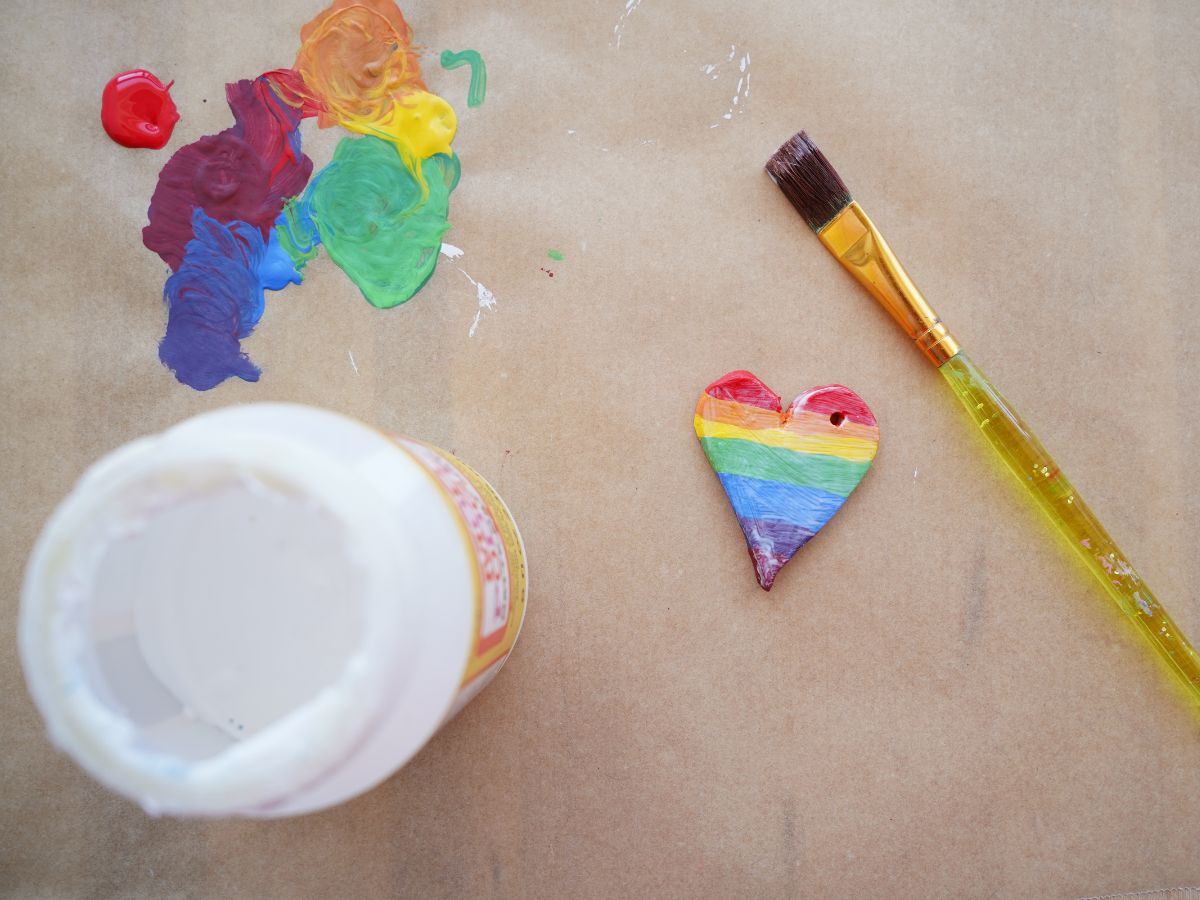
When the paint is dry, it is time to add a coat of Mod Podge to seal the pendant. I like using the matte Mod Podge, but you could use the glossy if that's what you like. Set it aside to dry. Don't forget to seal the back of the pendant too.
How to Use Crimp Beads to Add a Clasp to a Necklace
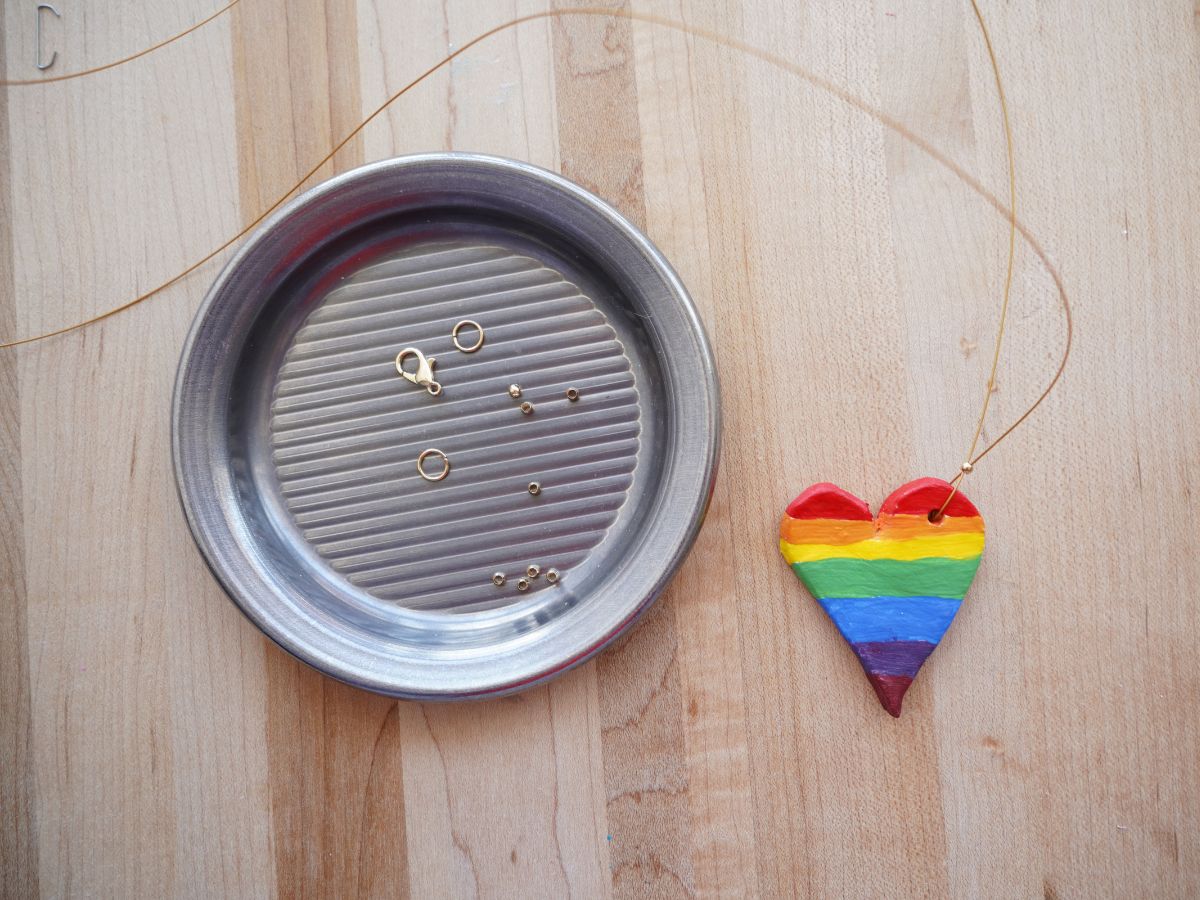
When the pendant is dry, we can add the necklace chain. Now, you could simply add a loop of waxed linen to the heart and tie the ends together in a knot to create the "chain". That's the easiest option. But, I wanted to finish this necklace with a clasp, so I used a fine metal thread in a gold color. I used a necklace that I already own to determine the length of the necklace I wanted. I laid the thread out and cut it a few inches longer the the already made necklace, so I have room for the clasp.
Start by feeding the thread through the hole in the pendant. Place the pendant in the centre of the thread. I wanted to secure the pendant in the center, but you could leave it unsecured and able to slide on the thread. To secure it in place, feed a crimp bead over both ends of the thread until it is close to the heart. Leave space so the pendant isn't too tightly in place. Then use the pliers to crimp the bead. Now the pendant will stay in place.
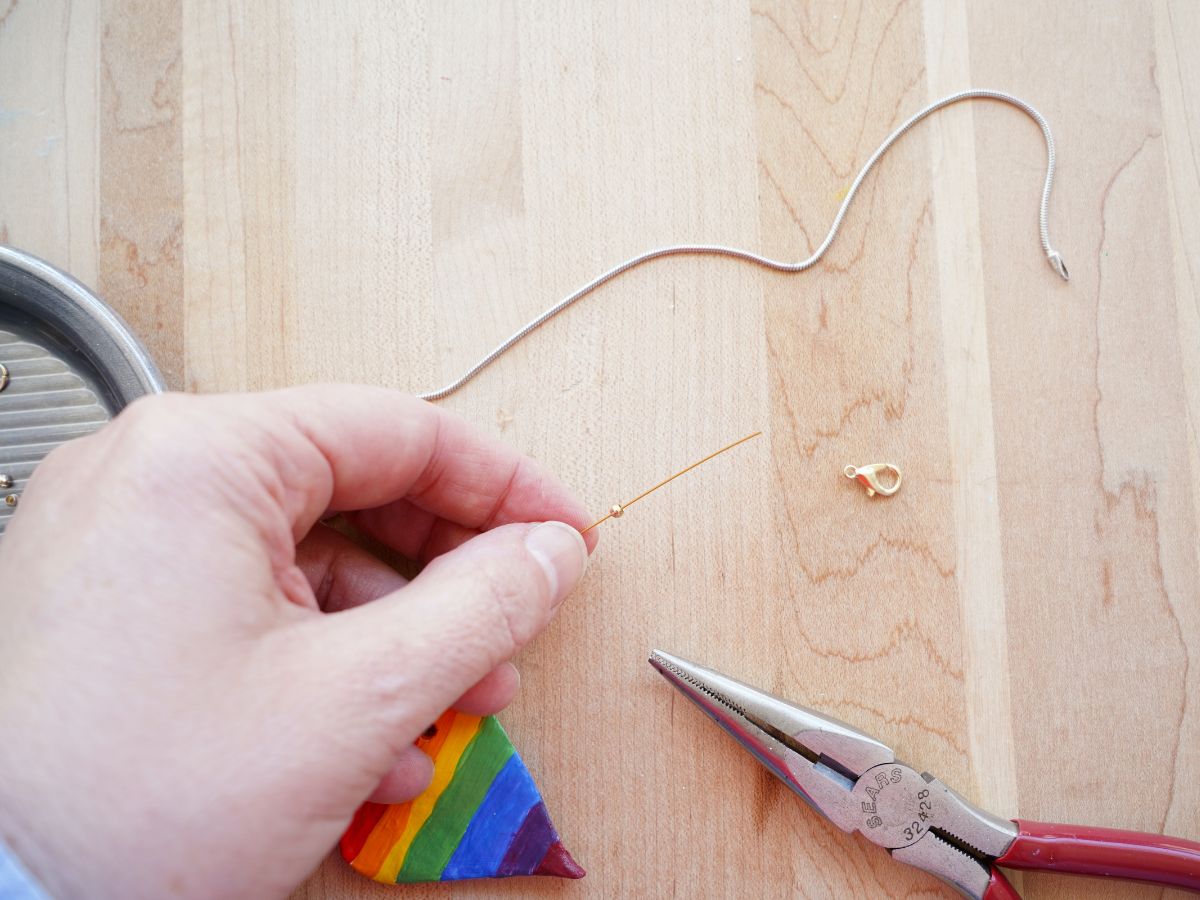
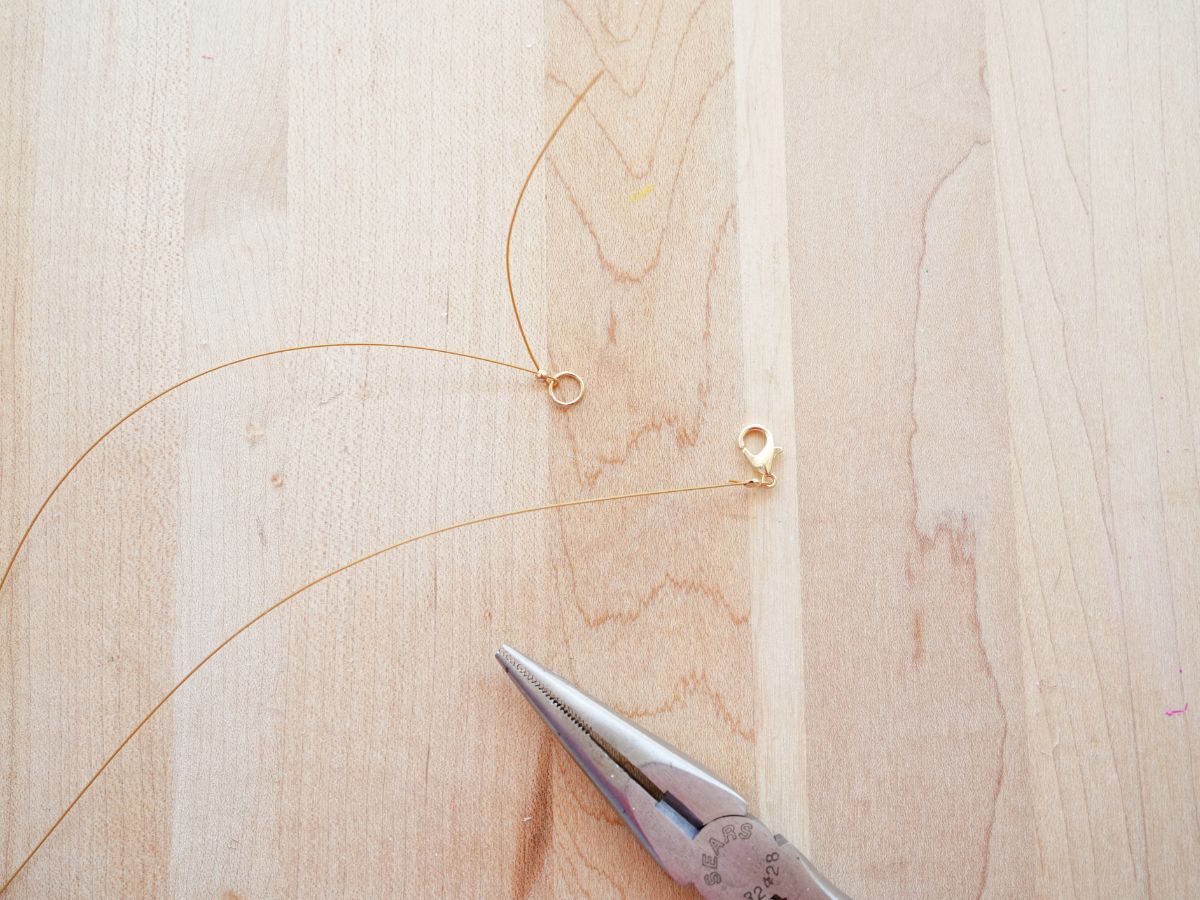
Adding the clasp will require you to have two crimp beads, a jump loop, and a clasp. The same procedure is used for both ends of the necklace. Feed a crimp bead over one end of the thread. Then feed the clasp onto the thread.
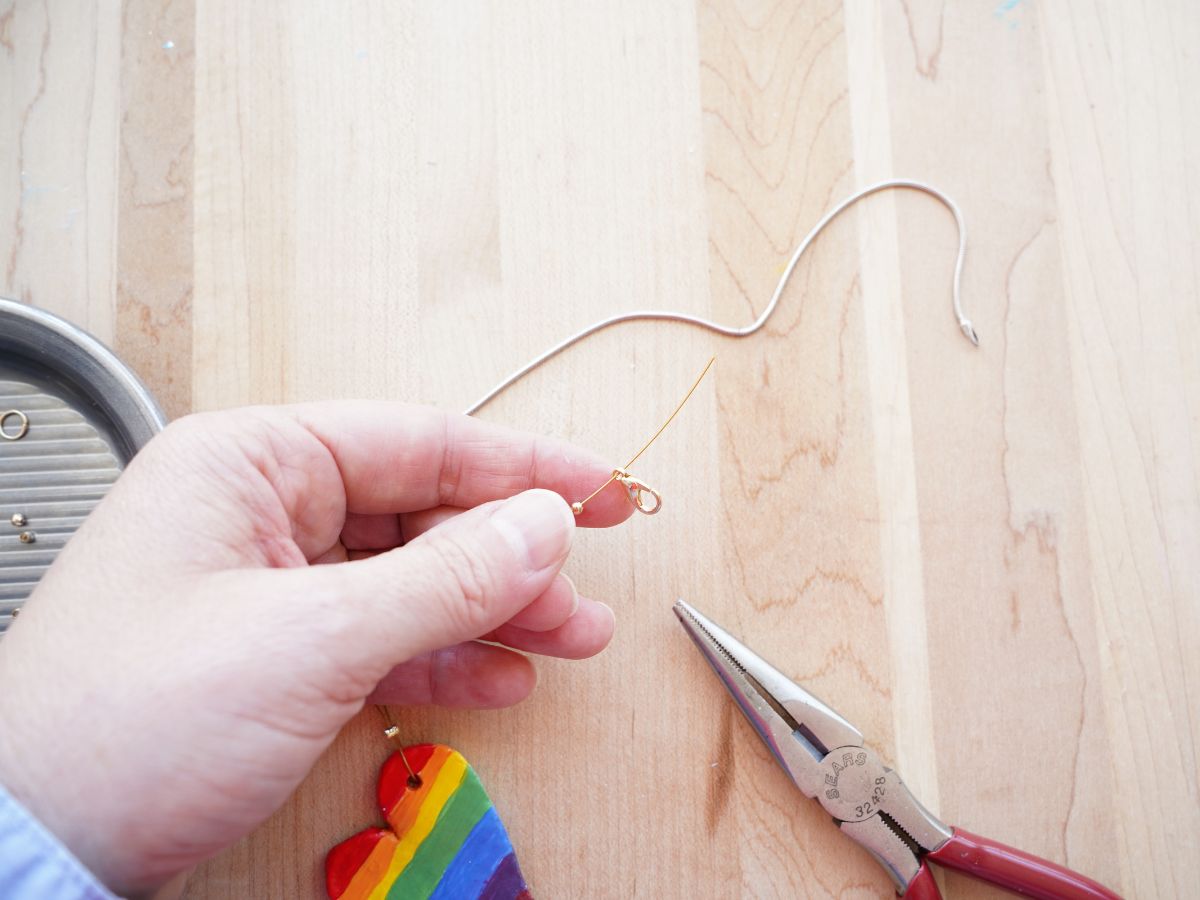
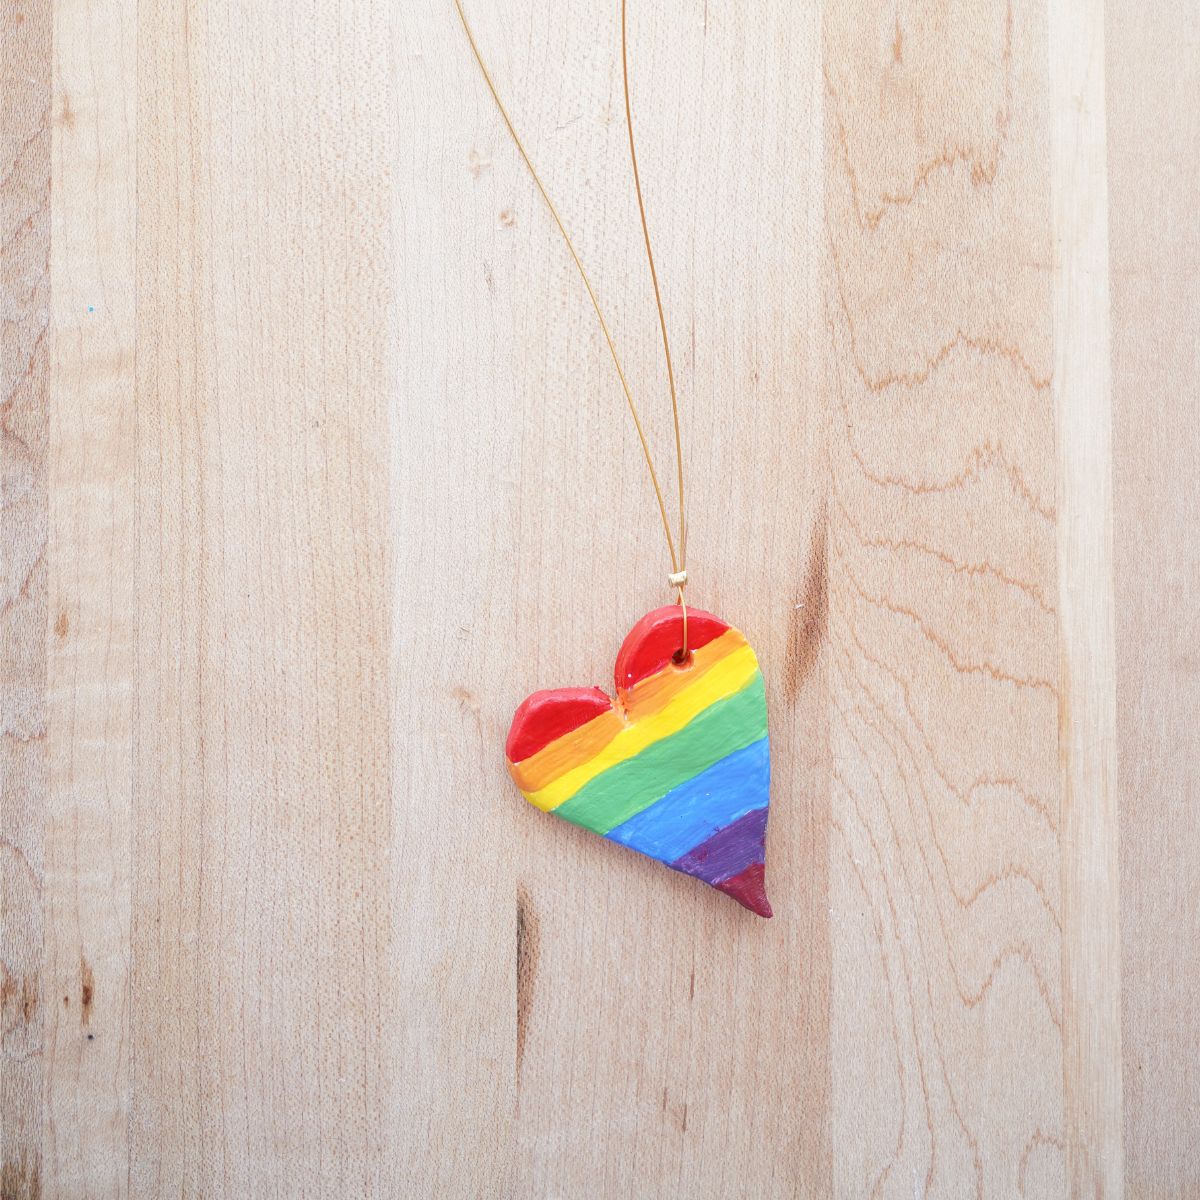
Turn the thread and feed it back through the crimp bead. Leave enough space for the clasp to move freely. Before crimping the crimp bead, make sure the necklace is the length you want it to be. Then use the pliers to crimp the crimp bead and secure the clasp in place. Use the cutting tool part of the pliers to cut any extra thread.
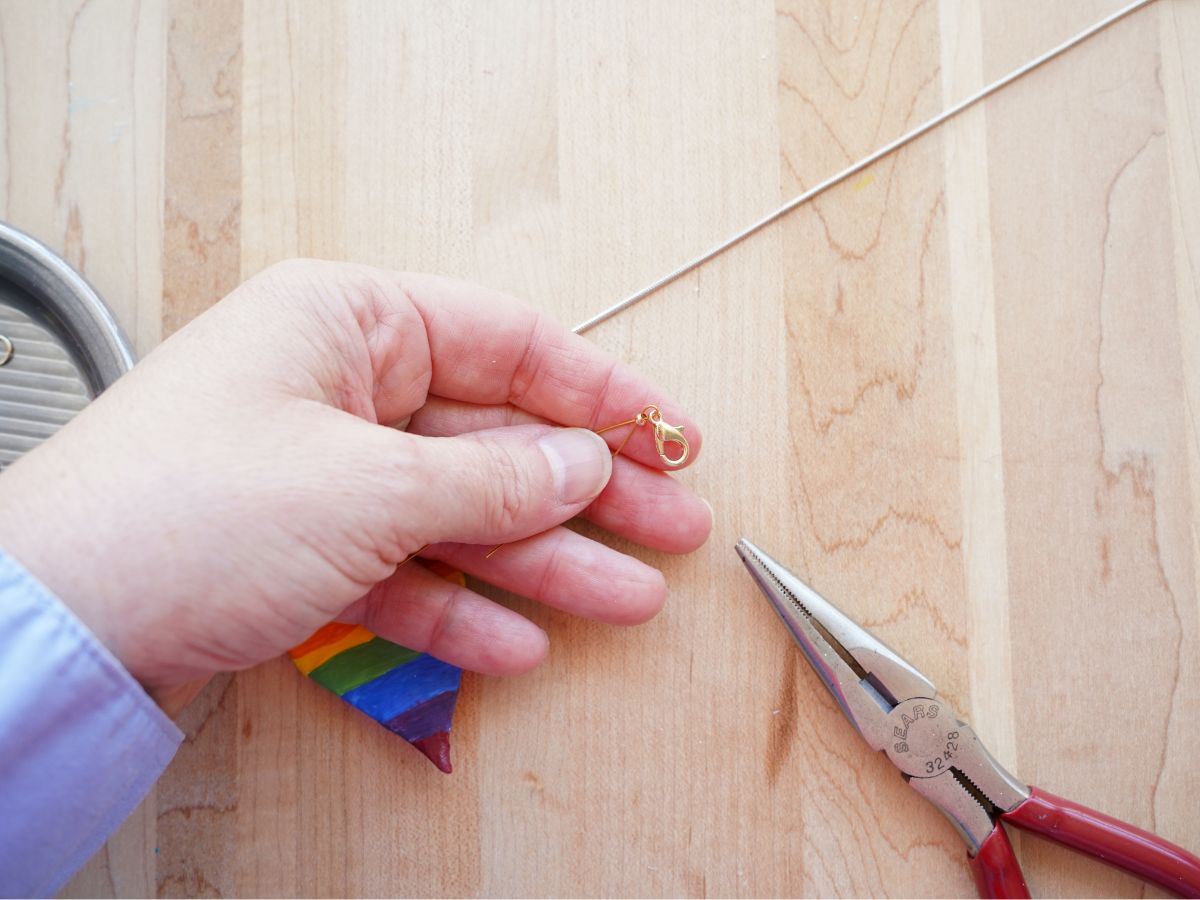
Then it's time to do the same with the jump loop end of the thread. Again, use a crimp bead and jump loop. Turn the thread to feed back through the crimp bead, measure and secure in place by crimping the bead with the pliers. Cut off the excess thread and you're done!
I find that using crimp beads is the quickest and easiest way to add a clasp to a necklace. It is secure and simple. What do you think?
As I said, this necklace would be a fun friendship craft to make and share or to gift to someone. I think this would also be a great art project for the classroom. The process of learning about color mixing is always fun.
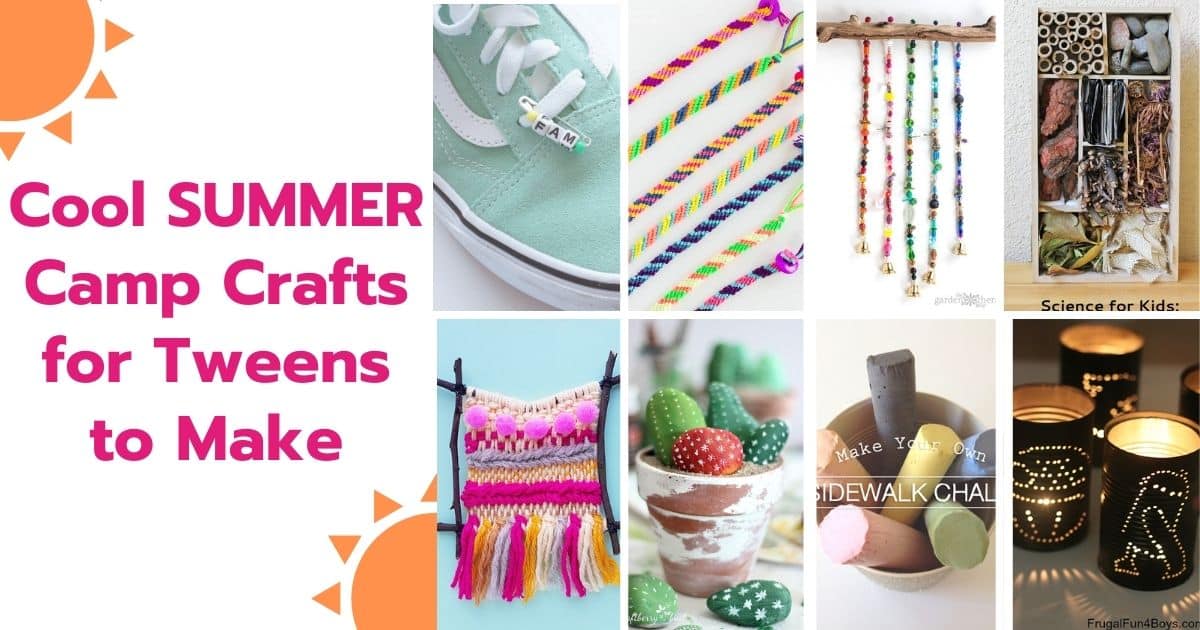
Check out all of these creative summer camp crafts for older kids to make.
Make sure you are following along...
FOLLOW KITCHEN COUNTER CHRONICLES ON
SUBSCRIBE TO KITCHEN COUNTER CHRONICLES TO HAVE OUR DELICIOUS RECIPES, FUN CRAFTS & ACTIVITIES DELIVERED DIRECTLY TO YOUR INBOX.