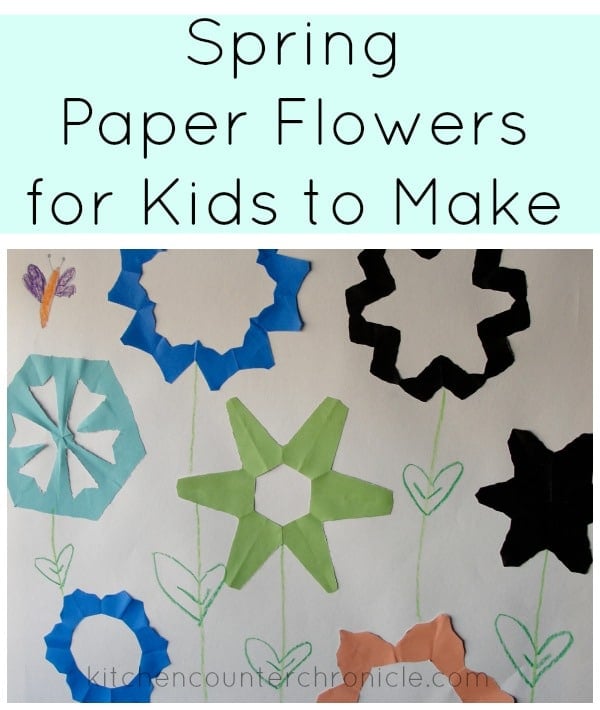
• Skip to primary navigation
  • Skip to main content
  • Skip to primary sidebar
  • Skip to footer
kitchen counter chronicles header new
  • Home
  • Activities
    • Fun Would You Rather Questions for Kids
    • Stem Activities for Kids
    • Top Books for Kids
    • Book Activities
    • Outdoor Play
    • Travel
  • Recipes
    • Meatless Monday Recipes for Families
    • breakfast
    • lunch
    • dinner
    • dessert
    • snack
  • Tween
    • Parenting A Tween
    • Tween Gift Guides
  • Arts & Crafts
    • Fun Tween Crafts
    • Fun Art Projects for Tweens
  • Holidays
    • Valentine’s Day Crafts for Kids
    • Earth Day Activities for Kids
    • Easter
    • Mother’s Day
    • All The Best Father’s Day Ideas for Kids
    • Halloween Crafts for Kids
    • Thanksgiving
    • Christmas Crafts for Kids
      • Christmas
  • Green Living Ideas
    • Garden
  • About
    • Contact Me
    • Work With Me
    • Featured On
    • Disclosure Policy
    • Privacy Policy
    • Instagram
You are here: Home / craft / Spring Paper Flowers for Kids to Make

Spring Paper Flowers for Kids to Make

By Jen

484 shares
  • Facebook
  • Twitter
  • Yummly
 We love to decorate our front door. There is something welcoming about a festive front door (in our opinions). So, when we were thinking about springtime we knew it was time for a change

spring paper flowers for kids

You might remember last year’s spring door, egg carton flowers. This year we were inspired by our continuing love of making snowflakes. Over Christmas my daughters went a little paper snowflake crazy! Of course it was my youngest daughter who suggested we turn our paper snowflakes into spring paper flowers…brilliant.

Spring Paper Flowers

assorted origami papers – spring colours
scissors
glue stick
large piece of firm paper – bristol board
crayons
pom-poms
pipe cleaner
hole punch
1. Fold your origami paper as you would for making a paper snowflake…find the instructions here.
2. Cut the paper in any way your child chooses.

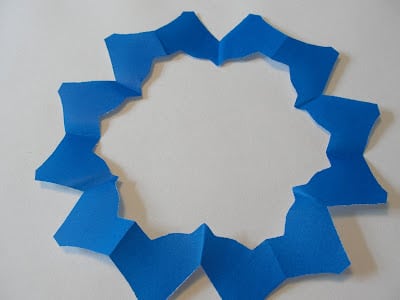
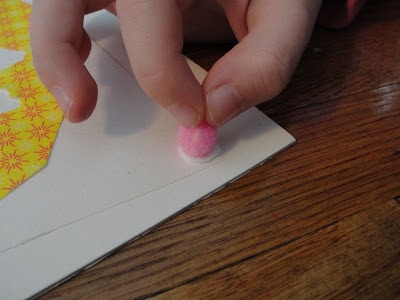
3. Unfold the paper to see the flower.

4. Using the glue stick, adhere the flowers to the large piece of paper to create a garden.

5. Use the crayons to draw on the stems, butterflies, etc.

6. Punch two holes in the top-centre of the board…this is where you will hang the piece.

7. Feed the pipe cleaner through the holes and wrap each end tightly, creating a hanging loop.

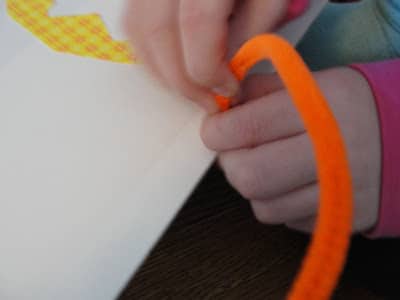
8. Embellish the picture however your child likes.

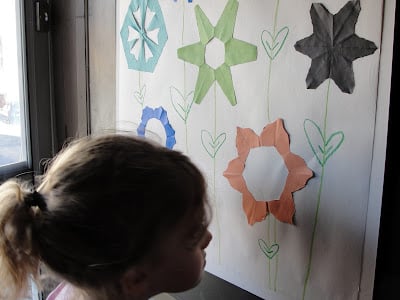
9. Hang on the front door with pride!

This piece of art makes me smile every time I open the door. My daughter beams with pride when she sees her creation. This activity is great for kids of all ages. The flowers can be as simple or complex as they like. The embellishments could include glitter, stickers, stamps, etc, etc. 
 
Do you hang artwork on your front door? What is on your door these days?
 

Be sure to subscribe to Kitchen Counter Chronicles to have our delicious recipes, fun crafts & activities delivered directly to your inbox. You may also follow along Facebook and Twitter.

Looking for more springtime recipes and craft ideas, check out our Spring Crafts, Activities & Recipes Pinterest board.

Follow Jen at KitchenCounterChronicle’s board Spring Crafts, Activities & Recipes on Pinterest.

Filed Under: craft, kids, spring

Previous Post: « Green Life – my great grey hair debate
Next Post: Birth, death and the stuff in between »

Reader Interactions

Comments

  1. jmommymom says

    March 22, 2012 at 3:52 pm

    I had to click on you linked-up post because I was drawn the the geometry of your flowers. Now I see you made them like snowflakes. What a neat spring craft.

    • KitchenCounterChronicles says

      March 22, 2012 at 5:20 pm

      Thanks, yes they are very geometric and fun to make! Thanks for stopping by.

  2. Rebekah says

    March 22, 2012 at 10:04 pm

    So prettty! My daughter enjoyed cutting snowflakes, so I am glad to know there is a craft we can do just like it for Spring.

    • KitchenCounterChronicles says

      March 22, 2012 at 10:18 pm

      thanks rebekah!

  3. Cerys @ Rainy Day Mum says

    March 23, 2012 at 6:03 pm

    What a great idea. They would be so much fun to do. We have a glass front door but hadn’t thought of decorating our enterance hall.

    Thank you for coming to play with the Kid’s co-op this week

  4. KitchenCounterChronicles says

    March 23, 2012 at 7:08 pm

    Great! Have fun and thanks for stopping by…I’ll come by and check out your site. Cheers!

  5. JDaniel4's Mom says

    March 24, 2012 at 7:24 am

    What a lovely way to bring spring inside!

  6. Kim @ The Educators Spin On It says

    March 25, 2012 at 10:20 am

    Thanks for sharing on the Afterschool Party. I love this idea and I know my daugther will love making it for our front door too. Afterschool fun here we come!

  7. MiaB says

    March 25, 2012 at 5:48 pm

    Lovely!!! Great idea. Thanks so much for sharing your creativity with us here at Sharing Saturday. Hope to see you again next week.

  8. Raising a Happy Child says

    March 29, 2012 at 12:48 am

    So pretty! I love looking at different flower art all over the web. Thanks for sharing with Afterschool!

Primary Sidebar


welcome sidebar 2019

Search for More Ideas

Follow Along…

Popular Post

how to grow harvest and dry chamomile title with chamomile flowers

Footer


  Feel free to use information and pictures from this site, but please credit their source and include a direct link to Kitchen Counter Chronicles. Thank you


Kitchen Counter Chronicles is a participant in the Amazon Services LLC Associates Program, an affiliate advertising program designed to provide a means for us to earn fees by linking to Amazon.com and affiliated sites.

Copyright © 2022 · Foodie Pro Theme On Genesis Framework · WordPress · Log in

  • 10
484 shares
484 shares
  • 10