
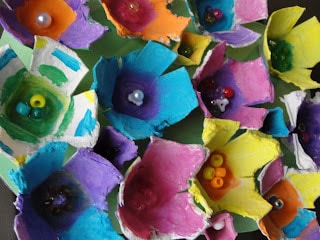
As the rain starts to fall down, we cannot help but think about the inevitable, beautiful spring flowers. Until those flowers arrive in our garden, we decided to take matters into our own hands. Before you toss that empty egg carton into the recycling bin, wait! Who knew that egg cartons could look so beautiful? Find out how to make egg carton flowers. Here's what we did...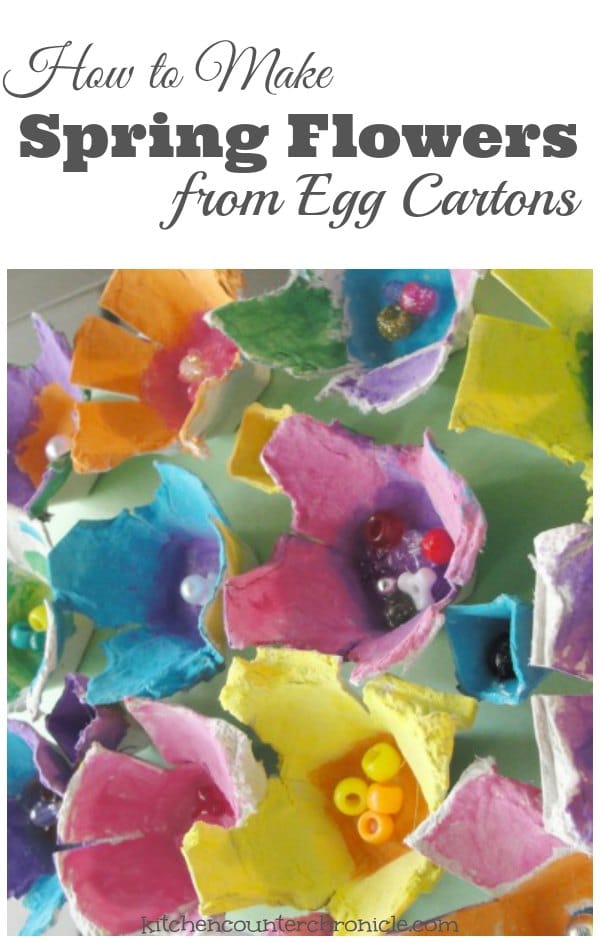
How to Make Egg Carton Flowers
egg carton (paper egg carton)
paint (we used acrylic craft paints)
paint brush
assorted beads
glue gun
cereal box (empty)
green construction paper
scissors
glue stick
string
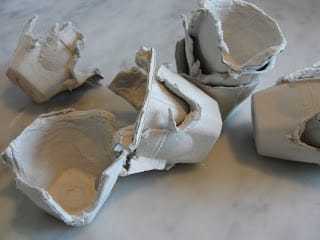
1. Dismantle the egg carton; cut the lid off, cut the egg holder side into individual sections
2. With each individual section, cut ⅔ of the way down the sides in four spots.
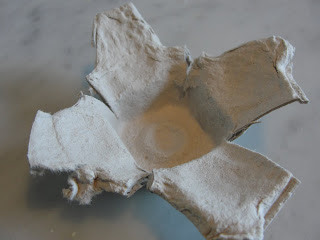
3. Fold the "petals" down, creating 4 petals
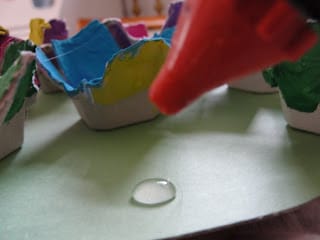
4. Load up a plate as your artist palette
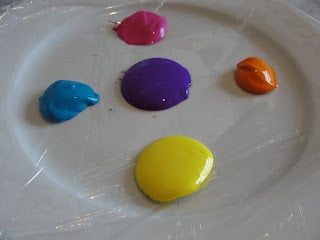
Hot tip: for easy clean up, cover your plate with plastic wrap
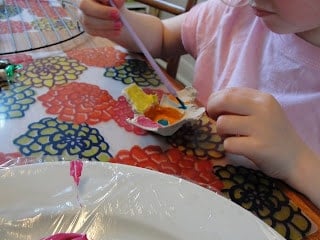
5. Paint the flower as you like, set aside to dry.
6. Heat up glue gun and gather up the beads.
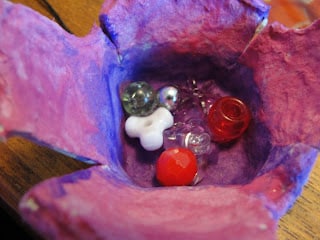
7. Put a drop of glue inside the flower, place selected beads into the glue.
8. To make the flower base, where you will adhere your flowers, take the cereal box and cut out the shape of base you would like, we made an oval.
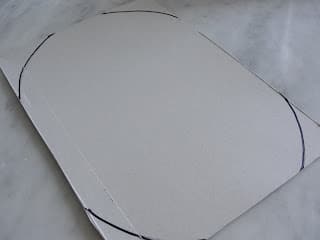
9. Trace this shape onto the green construction paper, cut out the construction paper and adhere the construction paper to the cereal box cut out...base is done. Alternately, paint the cereal box green...but this might warp the box if the paint is too wet.
10. When all flowers are dry and the base is complete, using the glue gun adhere flowers to the base

11. Poke a hole into the top of your base and feed string (or ribbon, or pipe cleaner) through the hole
12. Hang your beautiful egg carton flowers on your front door for all to see. 
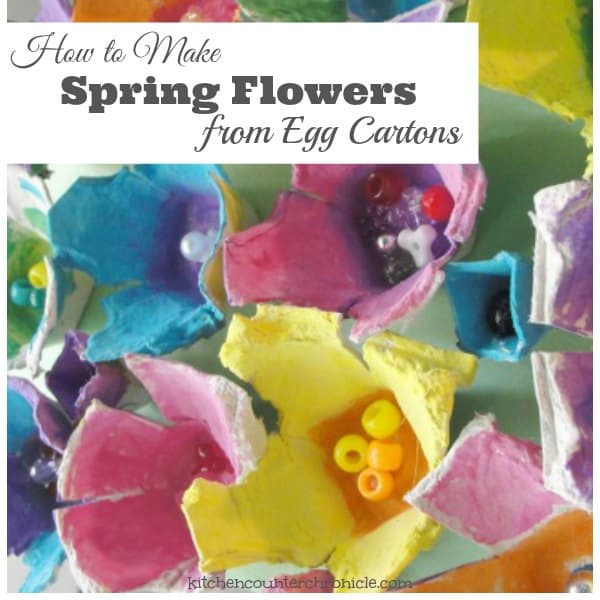
This is a great project to complete over the course of a day or two. Because the flowers need to dry between stages, you can walk away from the project and pick it up at another time. I love these types of projects, since they allow the kids to really think about what they want to do. Our door is now adorned with a beautiful arrangement of flowers! Enjoy!
Be sure to subscribe to Kitchen Counter Chronicles to have our delicious recipes, fun crafts & activities delivered directly to your inbox.
You may also follow along Facebook and Twitter.
Head to our Pinterest board, where we are sharing all of our creative crafts, recipes and activities...
Follow Jen at KitchenCounterChronicle's board Kitchen Counter Chronicles Posts on Pinterest.

ಪುಟ್ಟಿಯ ಅಮ್ಮ/Putti Amma says
These are beautiful!!
KitchenCounterChronicles says
Thanks!
Sarah @ Sarahndipities says
This is so great! Thanks for sharing at Make Something Monday!!
~ Sarah
Rebekah says
Just lovely!! I pinned this to my Spring Board on Pinterest.
maggy, red ted art says
Soooo pretty! Love all the colours! We will be making some soon too, can't wait!
Thank you for sharing on Kids Get Crafty!
Maggy & Alissa
KitchenCounterChronicles says
Have fun! Thanks!
Aleacia says
These are so lovely! I really like the mixture of beads in the center of each flower 🙂
Jo says
I love these flowers. I'm also planning another one making spring flower arrangement using fresh materials and egg box flowers if I could include it here as well. Thanks. Let me know.