Do you call them chicken fingers or chicken strips? I guess we use both names interchangeably...I mean what is the difference? When we are short on time and need a quick dinner, that everyone loves, we turn to the chicken strip. Here is my recipe for easy peasy lemony chicken strips. Make a quick salad for a side dish and dinner is ready in under 30 minutes. Be sure to check out all of our easy chicken recipes.
Easy Lemon Chicken Strips
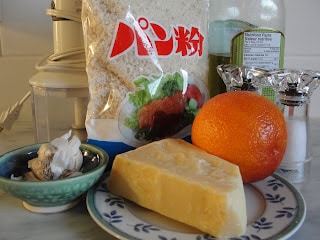
2 boneless, skinless chicken breasts
1 cup of panko breadcrumbs
2 cloves of garlic
¼ cup of shredded parmesan cheese
salt and pepper
olive oil
zest of one orange (or whatever seasoning you like - thyme, oregano, cumin, etc)
1. preheat oven to 350F
2. line a baking sheet with parchment paper, for easy clean-up
3. slice the chicken breast into strips, approximately 1" wide
4. place the chicken strips in a bowl and set aside
5. pour 1 cup of panko breadcrumbs into mini food processor
6. drop 2 garlic cloves into processor and whiz until garlic is well minced
7. add ¼ cup of parm cheese, orange zest, salt and pepper; whiz until incorporated
8. drizzle in olive oil and mix, until the breadcrumb mixture is moistened
9. transfer the breadcrumb mixture to a bowl
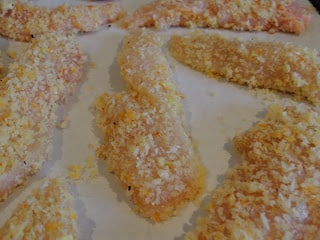
10. drop each chicken strip into the breadcrumb mixture and coat, then place coated chicken on parchment lined baking sheet
11. bake chicken strips for 20 minutes, turning halfway through
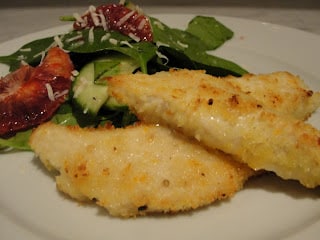
12. I like a crispy strips, so I put the chicken under the broiler for a few minutes at the very end
13. use your favourite dipping sauce, make a simple salad
14. call the family to the table and enjoy!!
Hot tip 1: you can substitute regular breadcrumbs for panko breadcrumbs
Hot tip 2: keep ends of loaves of bread in the freezer for when you want to make breadcrumbs...just pull them out and pulse them in the processor
Hot tip 3: if your recipe involves using the breadcrumbs for "binding" the ingredients, then after processing the frozen crumbs, bake them on a parchment-lined baking sheet at 350F until they are toasted...approximately 10 minutes.
Make sure you are following along...
FOLLOW KITCHEN COUNTER CHRONICLES ON
SUBSCRIBE TO KITCHEN COUNTER CHRONICLES TO HAVE OUR DELICIOUS RECIPES, FUN CRAFTS & ACTIVITIES DELIVERED DIRECTLY TO YOUR INBOX.


angelswingsforlisa says
Thanks for the recipe Jen...it looks scrumptous...and easy....love your blog....
Peggy-Sue says
I love chicken fingers made with panko, but oddly, my kids don't ... My recipe is a little different - no garlic or orange zest and the panko isn't put through a food processor - I dip the chicken in the panko, then into an egg mixture, then back in the panko - so they are SUPER panko chicken fingers! When I make these we have a "eat with your fingers!" meal and I put out cut up veggies and dip.
Oh - and we made the cheesey crackers this weekend and they were a big hit! I had to squirrel some away for Gracie's school snack before they were all eaten.
Jen says
Great tip - the processor is really just used to mince the garlic, and combine all the ingredients...doesn't really impact the breadcrumbs...like the SUPER panko version!
lifewithlizzi says
MMMmmmmm! making me hungry and it's not yet lunchtime....... filed for the future -> many thx