We love Eric Carle. Over the years we have collected many of Eric Carle's books...they always feel magical and look so beautiful. We recently came across Eric Carle's lovely book "Dream Snow" - it was inspiring. Last week, I shared how this winter we are planning on embracing our new found love of snowflakes and this book seemed like yet another way to explore snow. Many, many years ago I made a snow globe and this year I wanted to take my daughters through a simple snow globe diy. We had so much fun connecting our love of snowflakes, our love of Eric Carle and our love of snow globes.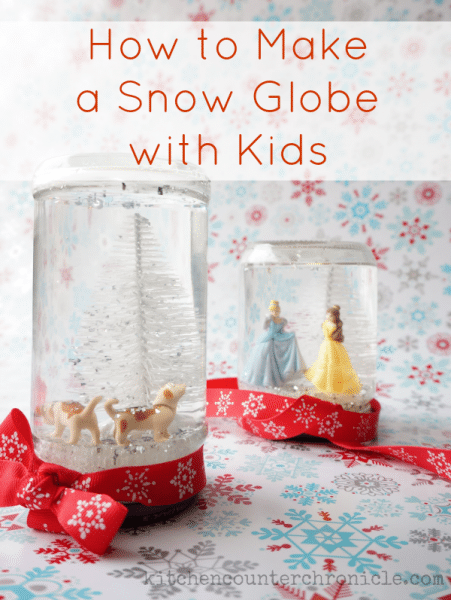
Dream Snow: A Snow Globe DIY
jar with tight fitting lid
clear epoxy
glycerin
silver glitter
styrofoam sheets (1" thick)
items you want to use inside the jar
distilled water
ribbon
The first step in making a snow globe is choosing a jar. We used one jar that had previously held salsa and one that held a butter chicken sauce. To say the least we had to thoroughly clean the jars.
Once the jars are clean, the next task is deciding what to put inside the jar. Look for plastic or metal items, as wooden or cloth items will degrade quickly in the water. Lay out your items on the lid of the jar, to be sure they will fit inside. We used a dollar store bottle brush Christmas tree, Playmobil dogs and plastic princesses. Make certain the toys are clean before using them.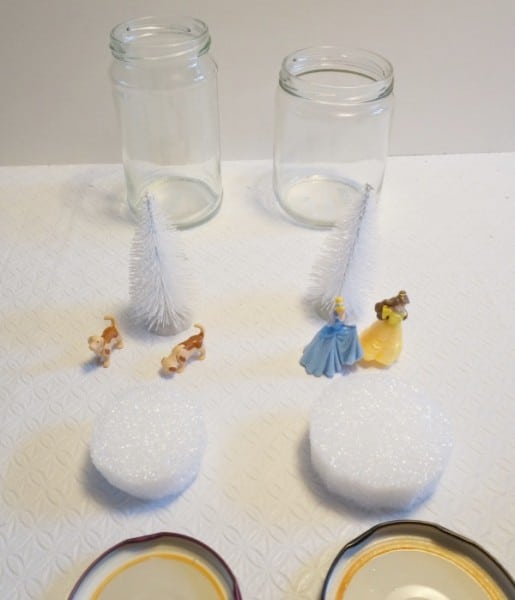
The next step was something we decided to do after a little trial and error. When you place the toys directly on the lid and close the lid you can't properly see the toys...they are positioned too low in the jar. So, cut out a piece of styrofoam (1" thick) to fit inside the jar lid. The foam will raise the items inside the jar, so that they can be fully seen. Once you have the foam cut and it fits inside the jar with ease...position the toys on top of the foam. We had to carve out a bit of the foam so that the tree would fit properly inside the jar. At every step, check to make certain your little scene fits inside the jar.
Following the instructions on the epoxy container, adhere the styrofoam to the inside of the jar lid. Then adhere the toys to the styrofoam. Be sure to leave everything to dry thoroughly before moving on to the next step...we left ours to dry overnight.

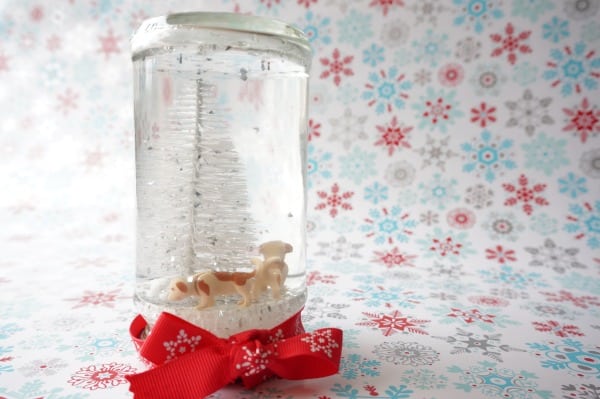
Apply epoxy to the threads of the jar and screw the lid onto the jar...screw it on tightly. Now, have some patience...follow the package directions for drying time before flipping the snow globe. Once the epoxy has completely dried..flip the jar and enjoy the snow floating through the globe.
These little snow globes take a little time...patience is a virture, expecially in children...but in the end you will have a magical treat. Just like in Eric Carle's book "Dream Snow", children can watch the snow gently blanket the scene they have created inside their snow globes. A kid made snow globe would make a lovely gift for family and friends. What will you put inside your snow globe?
Related Posts

LOOKING FOR MORE WAYS TO CONNECT WITH YOUR KIDS THIS HOLIDAY SEASON?
COME JOIN KITCHEN COUNTER CHRONICLES ON FACEBOOK AND PINTEREST.
BE SURE TO SUBSCRIBE TO RECEIVE OUR IDEAS DELIVERED TO YOUR INBOX.


