

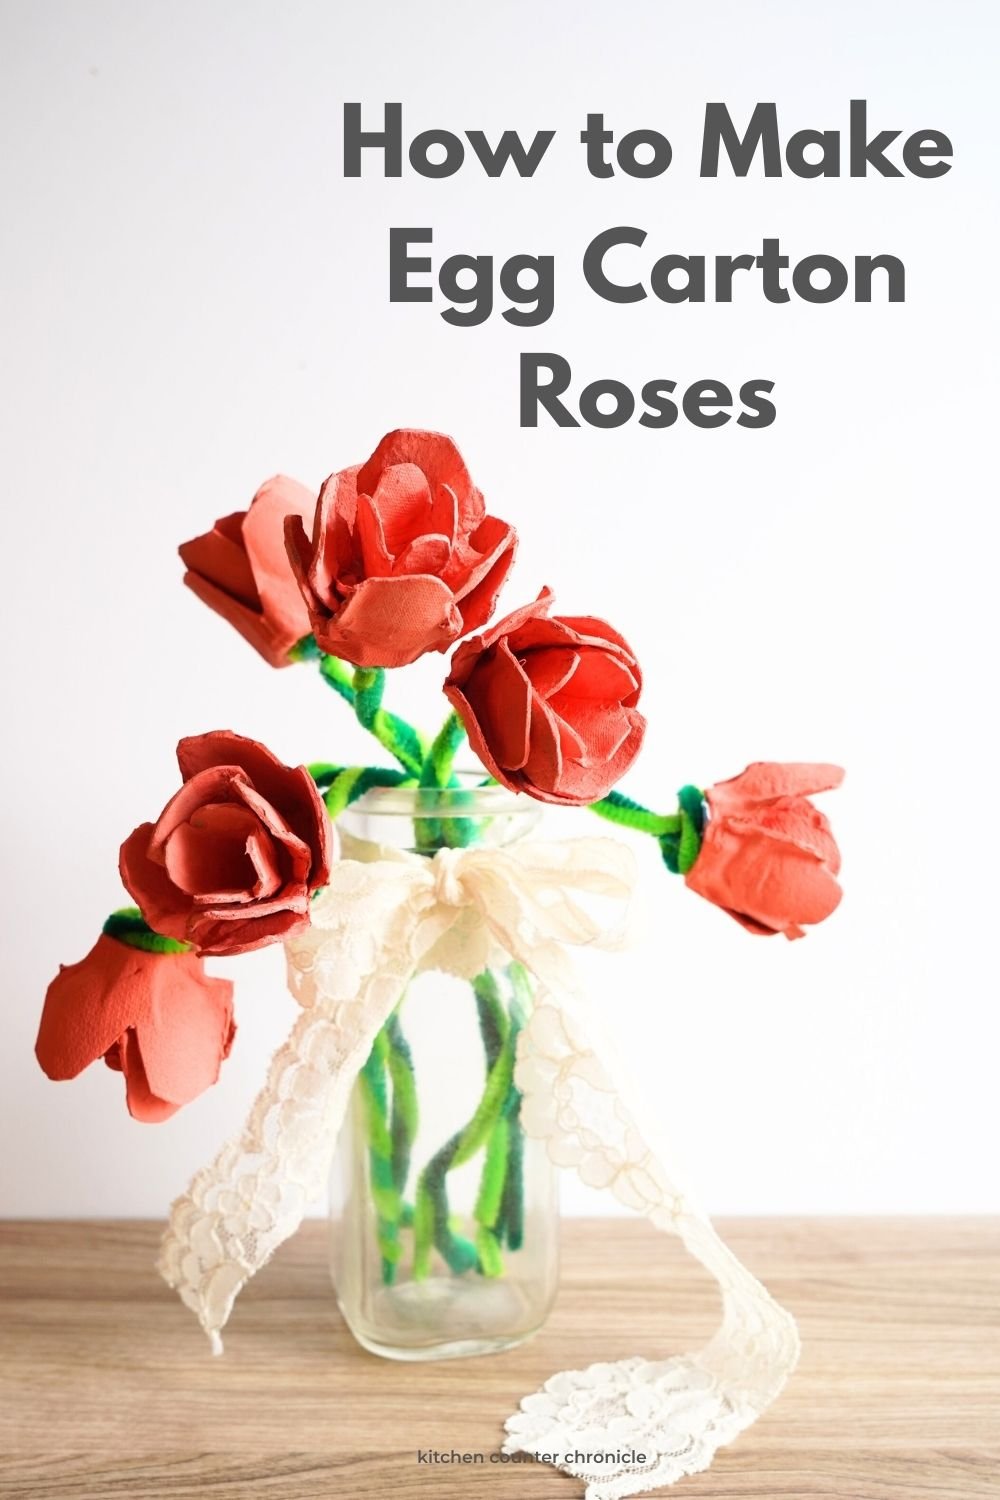
I love making egg carton crafts. I've shared so many amazing egg carton craft ideas over the years, but my favorite are all the beautiful flowers I've created. So, for Valentine's Day, I decided to make myself a bouquet of egg carton roses.
Disclosure: There are Amazon Affiliate links in this article which means, at no additional cost to you, we could receive compensation for our recommendations. You can read our full disclosure policy on our Disclosure Page for more details.
Don't you just love it when you discover an inexpensive and easy craft project? I mean, working with egg cartons is so simple. These flowers are fun for kids of all ages to make, and of course, I love making them too. Fun for a classroom craft or a creative project for older kids to enjoy. And, while I am making a bouquet this time around, I have another fun idea for these egg carton roses that I will share shortly.
DIY Egg Carton Rose
cardboard egg carton
scissors and a craft knife
glue gun
red and pink acrylic paints
paintbrush
green pipe cleaners
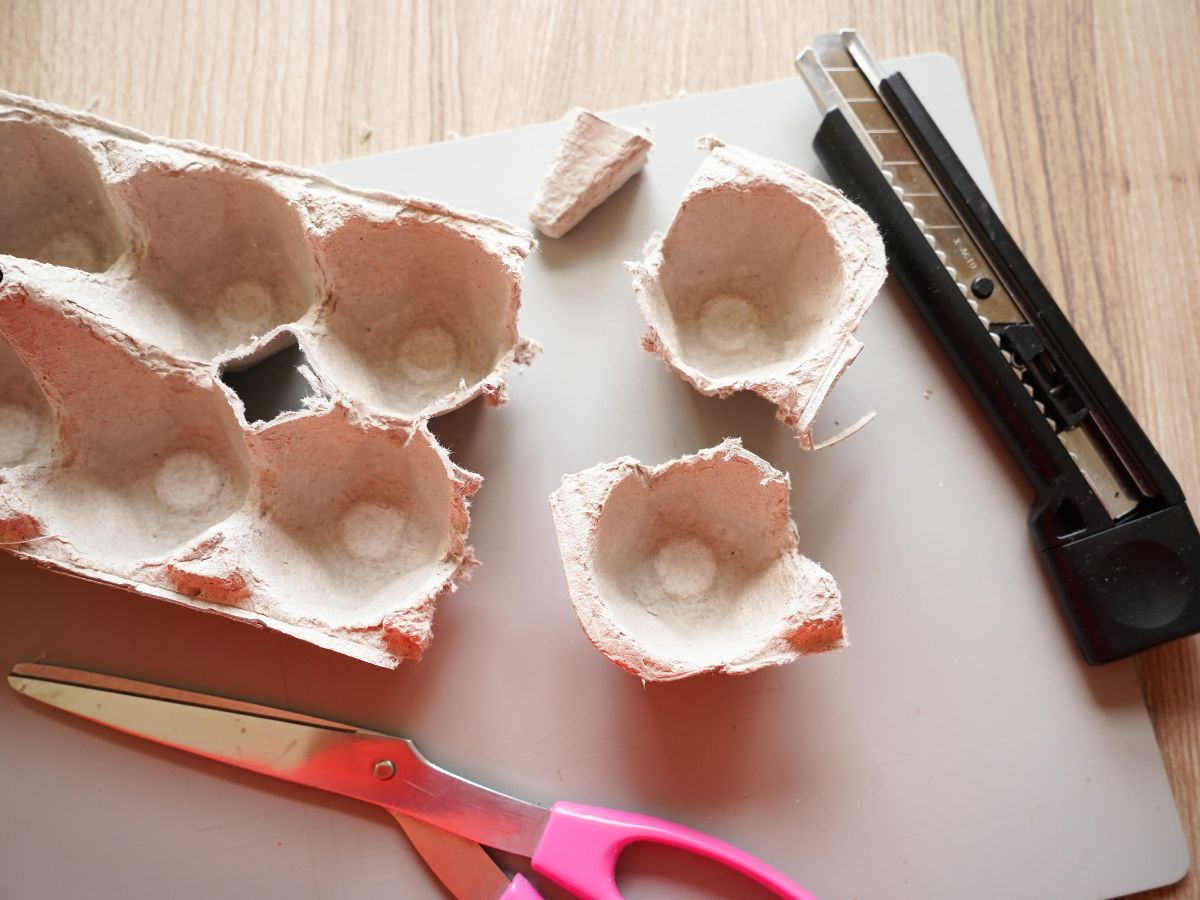
The first step is breaking down your egg carton into individual cells. Roses are a flower that has many layers of petals. You will need two full cells and one of the tall centre pieces of the egg carton for each rose. I started by cutting off the tall centre pieces, using a craft knife. Once I removed all of the tall pieces, I used my scissors to cut the cells of the egg carton.

Now, it's time to cut the layers of the rose. Start with the largest, outer layer of the rose. I decided to cut my egg carton cell into 4 simple flower petals for the outer layer of the rose.
Next, cut the inner layer of petals. For this layer, I cut another 4-petal flower. However, to make this layer smaller than the outer layer, I cut out a small strip from one petal and cut into the middle of the base of the egg carton cell. Then I tucked one end into the other, overlapping the petals. I added a small dollop of glue to hold this overlap in place.

Finally, it's time to cut the tall centre piece. For this piece, you will need to cut 4 slits in the egg carton piece. Curve the corners to make them more petal-like.
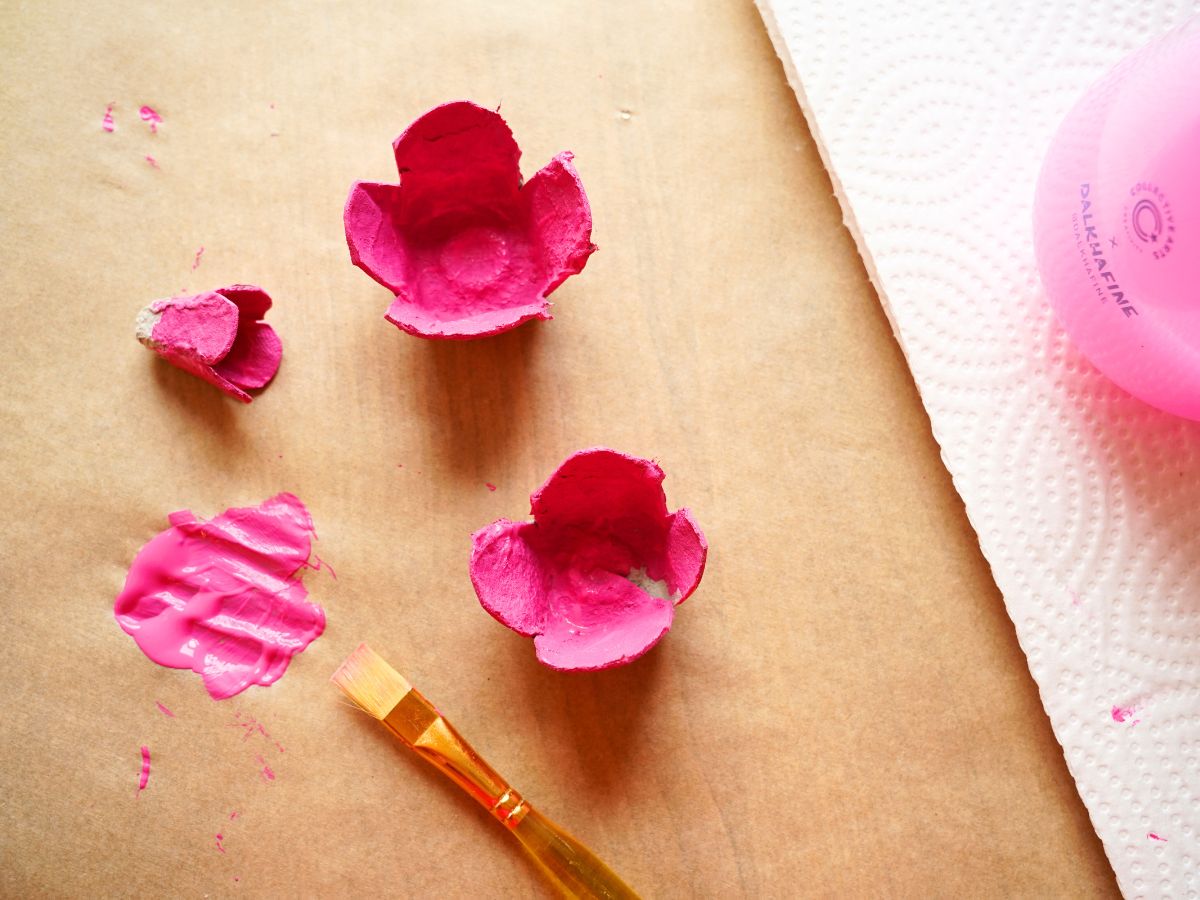
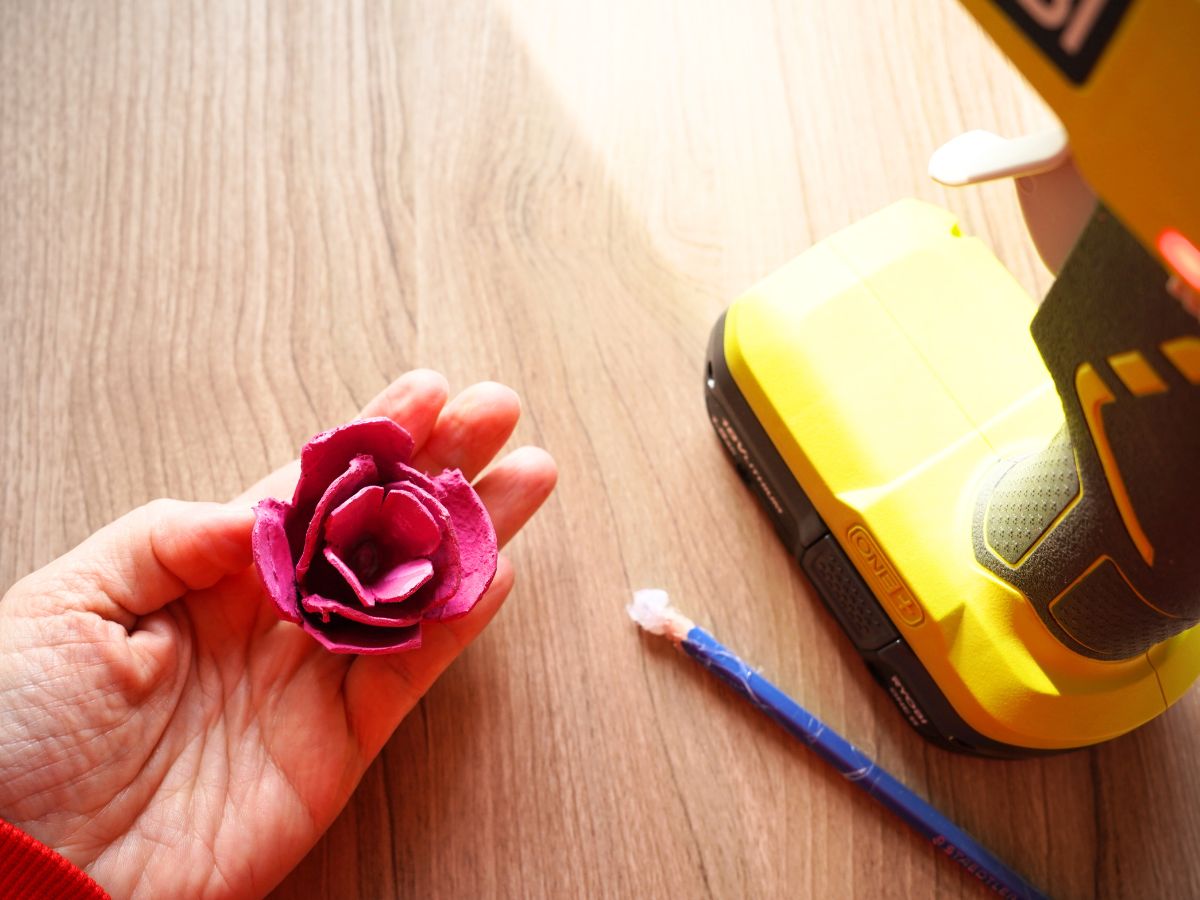
Now, paint all the pieces inside and out. Don't forget to paint the outside bottom of the largest piece, because this will be visible when the flower is done.
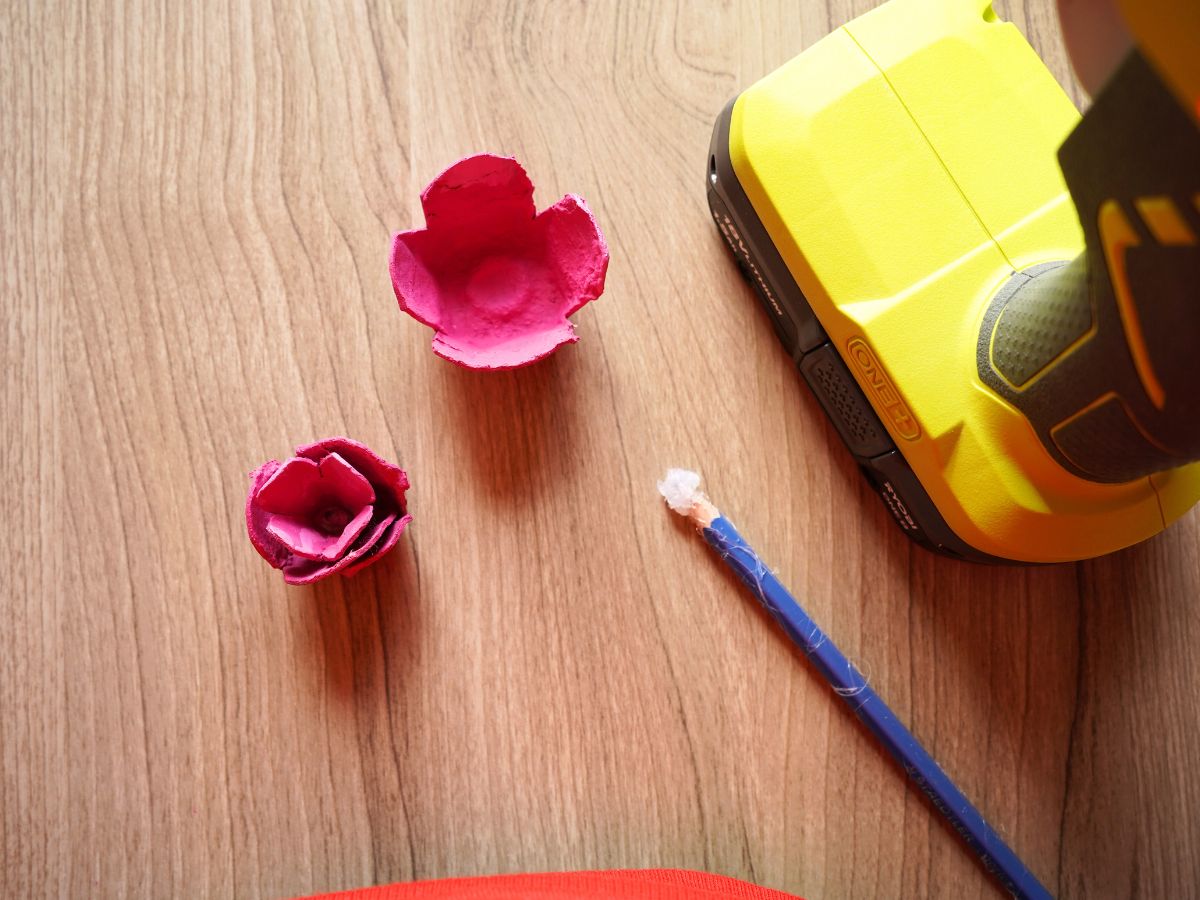
To assemble the rose, I added a dollop of hot glue into the inside of the middle layer egg carton cell, then pressed the smallest egg carton flower piece inside. Finally, add a dollop of glue inside the largest flower piece and press in the centre pieces. As you glue the petal pieces to each other, try to position them so the petals layer nicely. You don't want all the petals to line up; you want a more overlapping look, like a real rose.
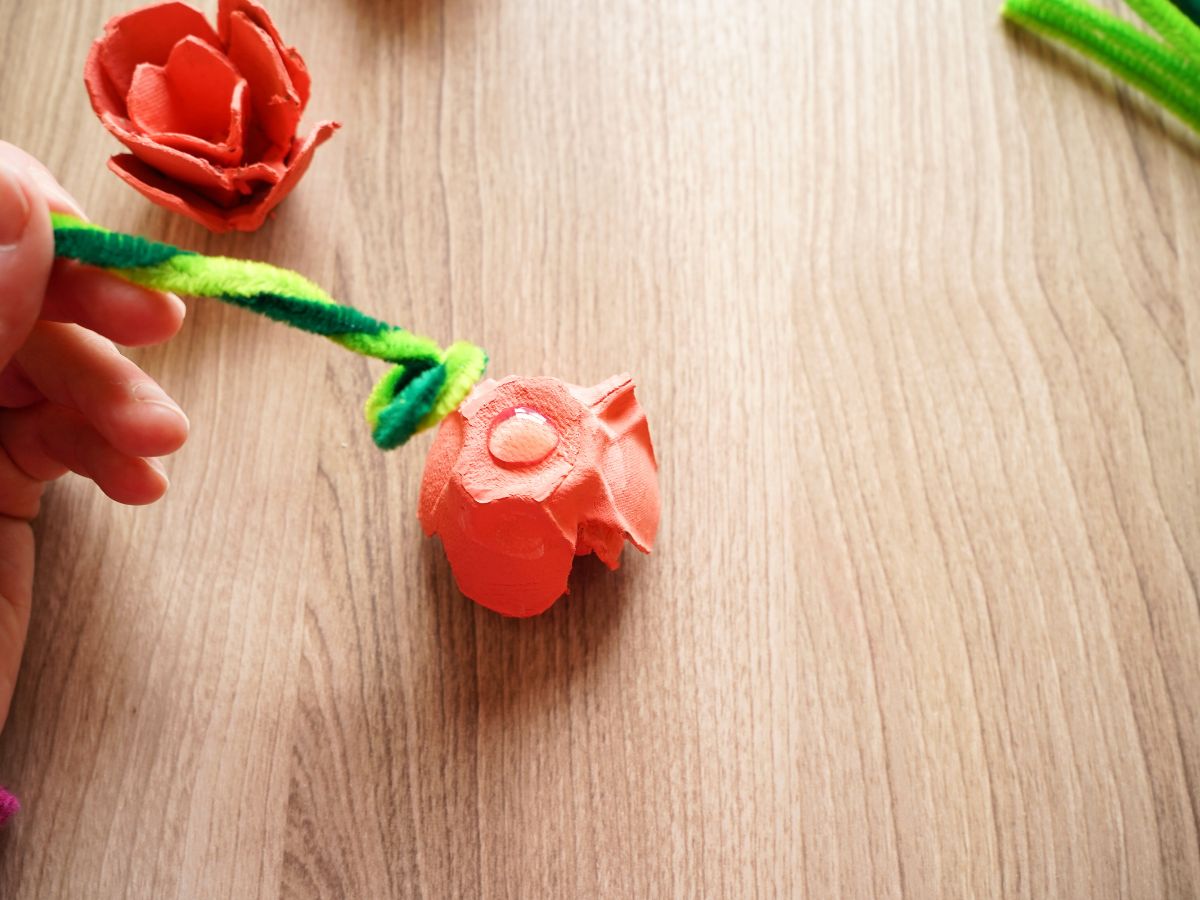
Now, it's time to decide if you want to glue these roses to something or turn them into long-stem roses. In this case, we are going to make long-stem roses. I used two shades of green pipe cleaners for my rose stems. Start by twisting the two pipe cleaners together. This makes a stronger stem for the roses.
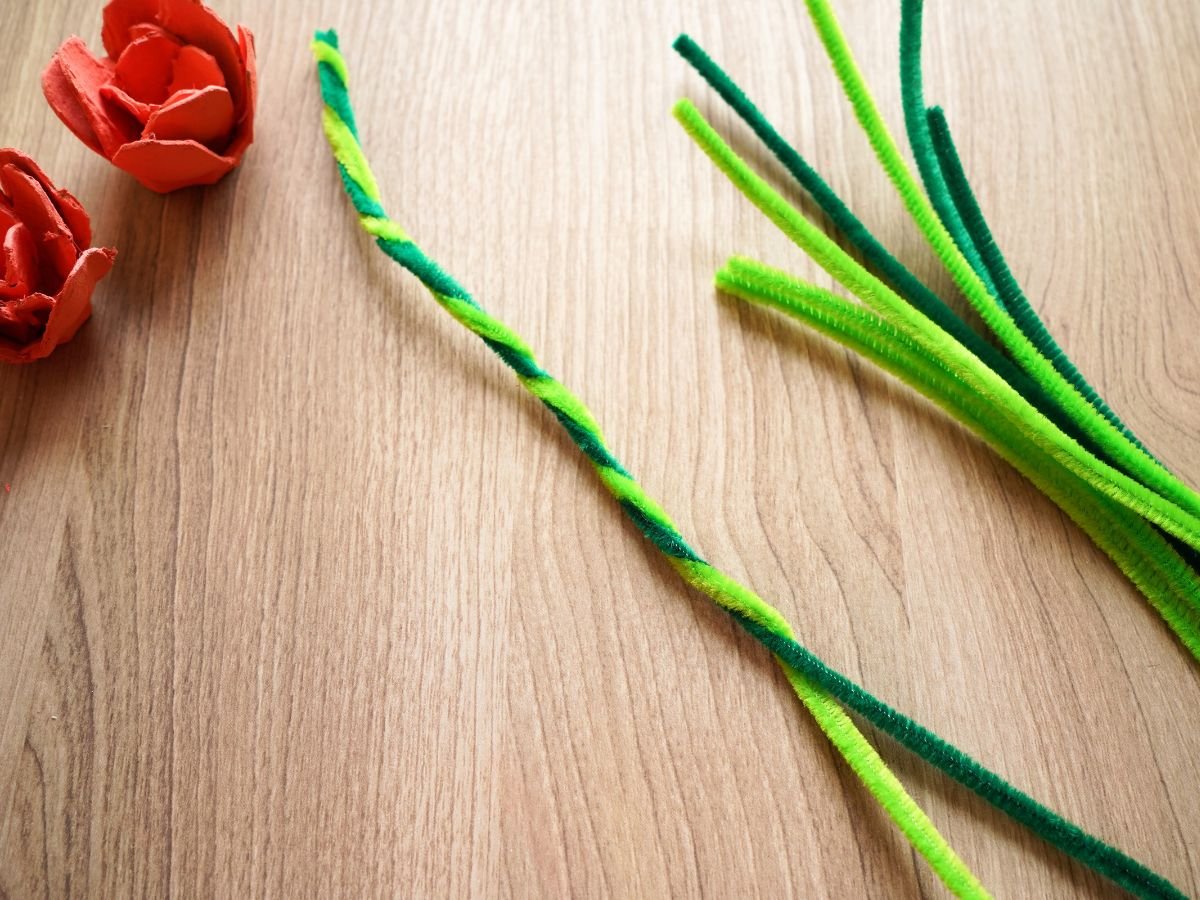
Once twisted together, spiral one end of the pipe cleaners to create a wide, flat (coin-sized) section. Add a large dollop of glue to the underside of the rose head and press the flat end of the stem into the glue. Hold until it has cooled and dried in place.
You can make a full bouquet of 6 long-stem roses from one egg carton. I popped my egg carton roses into a vase and added a lacy bow to the vase.
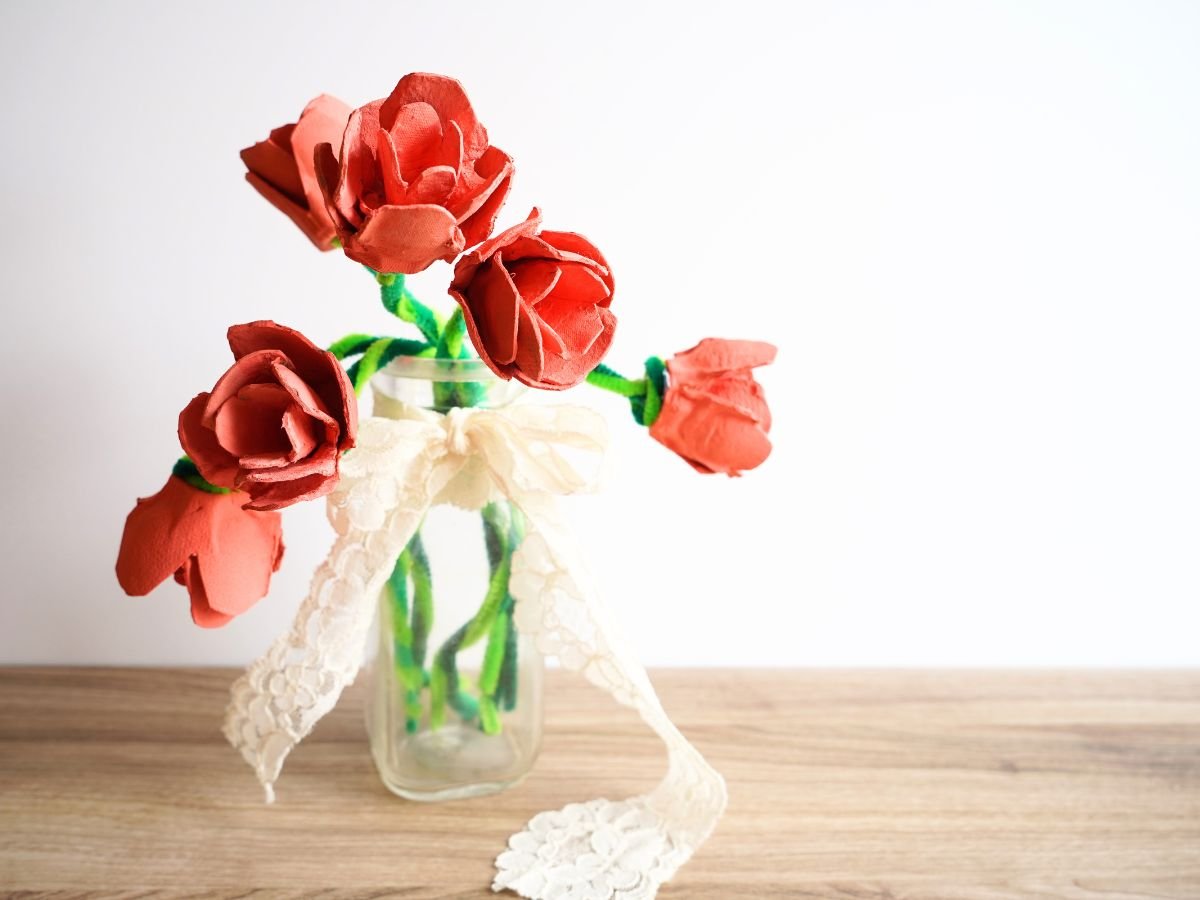
I think this is going to make a lovely Valentine's Day craft project to enjoy for years to come. I love how these roses turned out. Don't you?
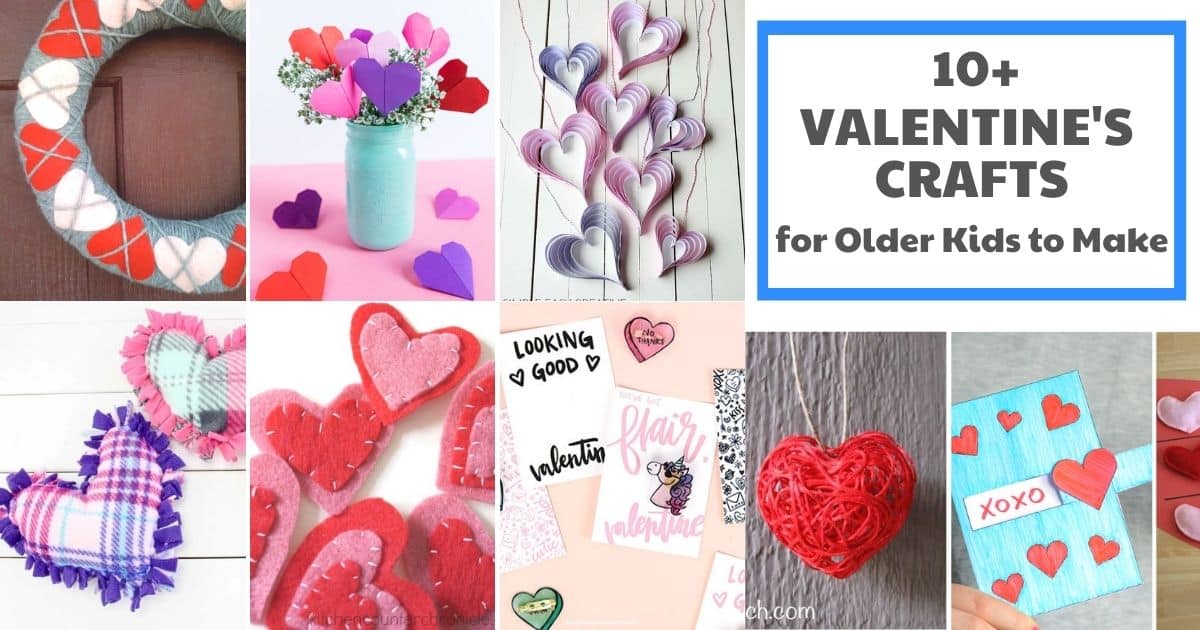
Check out all of the cool Valentine's Day crafts I've shared for older kids and adults to make.
Make sure you are following along...
FOLLOW KITCHEN COUNTER CHRONICLES ON
SUBSCRIBE TO KITCHEN COUNTER CHRONICLES TO HAVE OUR DELICIOUS RECIPES, FUN CRAFTS & ACTIVITIES DELIVERED DIRECTLY TO YOUR INBOX.

