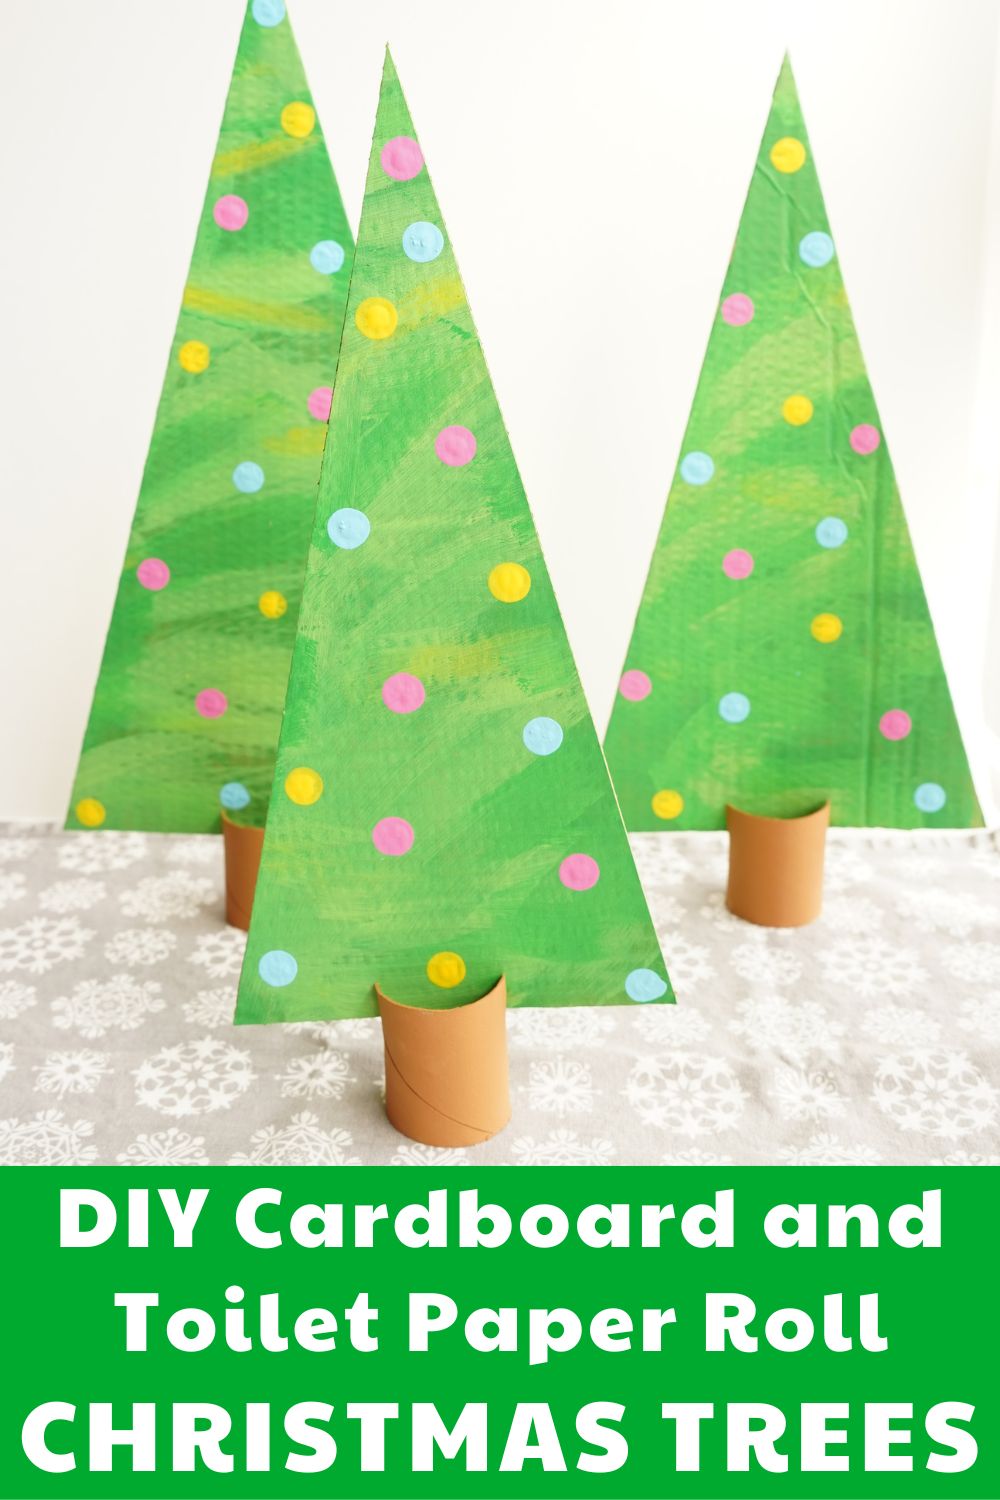
I love making crafts with items you can find in your recycling bin. And, I especially love finding ways to reduce our waste during the holidays. So, when I set about making these awesome DIY cardboard and toilet paper roll Christmas trees I knew I was making something amazing!
Disclosure: There are Amazon Affiliate links in this article which means, at no additional cost to you, we could receive compensation for our recommendations. You can read our full disclosure policy on our Disclosure Page for more details.
I have a real affinity for Christmas trees. My family has a history of growing Christmas trees. When I was a kid we used to head to these HUGE Christmas tree farm lots (my family are Christmas tree wholesalers) and 30-50 of our family members would gather at the tree farm and cut down our tree. It was an experience that left a mark on my heart. I love a live tree.
So, when I reach for Christmas decorations I tend to reach for Christmas trees. And, this year I wanted to make a field of bright and cheerful Christmas trees. I really love how these turned out.
Cardboard and Tiolet Paper Roll Christmas Trees
toilet paper rolls (half per tree)
scrap cardboard
acrylic paint (it covers over cardboard the best) - honey brown, festive green, sour apple green, bright yellow, carousel pink, and island blue
paintbrushes and foam paint brush
utility knife
self-healing mat
long ruler
scissors
rock

First up, let's start with the toilet paper rolls. Since we make so many toilet paper rolls everyone in our house knows that when a toilet paper roll is emptied, it is immediately dropped in my craft room. But, if you don't happen to have any toilet paper rolls (or paper towel rolls or wrapping paper tubes) you can always purchase craft paper rolls. Each tree will use half a roll. Slice the roll in half and paint the outside with the brown paint. This will be the trunk of your tree. Set aside to dry.
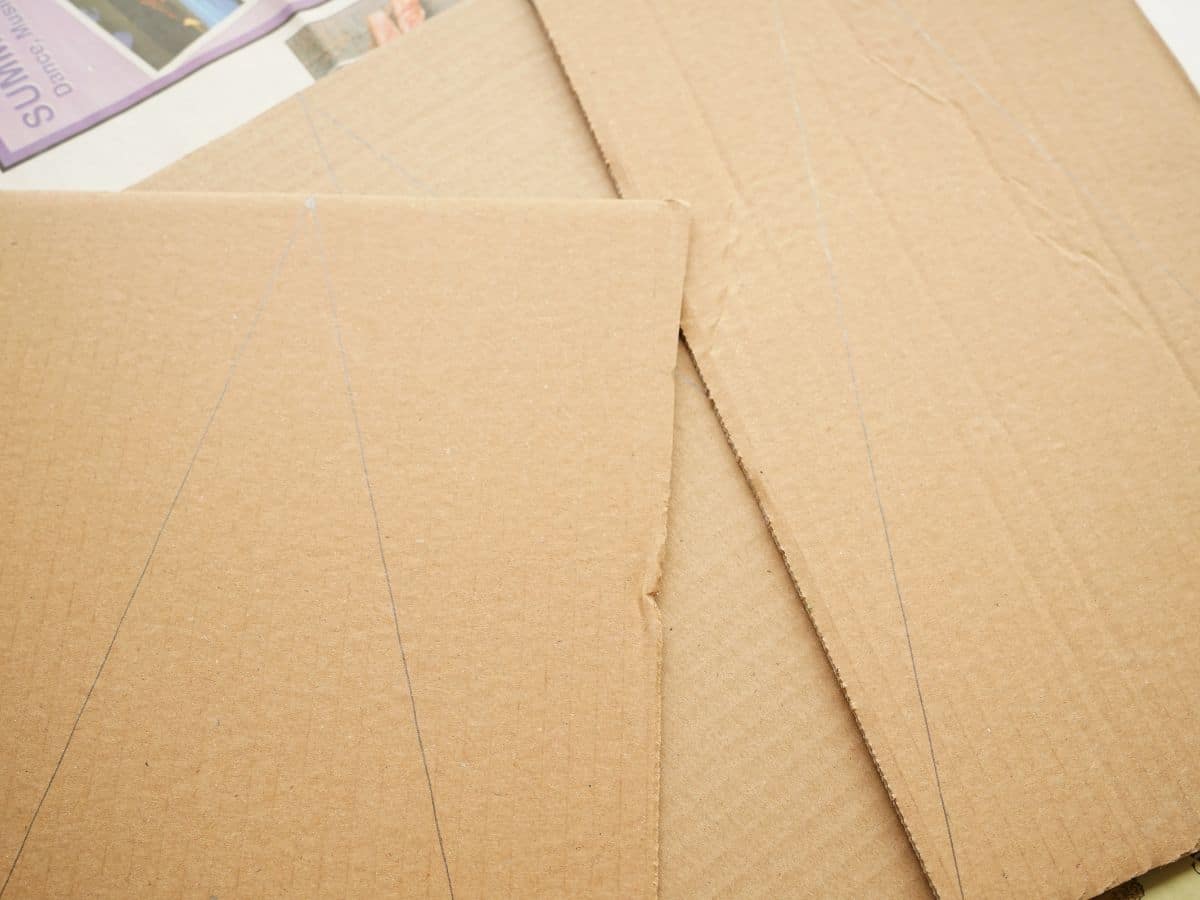
Now, it's time to move on to the making of the trees. I really love the simplicity of a tall, straight-sided tree. Use whatever scrap cardboard you have lying about. I even used some pieces that were a little crinkled. The crinkles just added a little dimension to the trees, right? You will want to find the middle of your piece of cardboard and draw a dot, at the top of the cardboard. This will be the top point of the tree. Then place a ruler from the point you just drew down to the corner, at the bottom edge of the cardboard sheet. Making a giant triangle. Our largest tree is about 35 cm tall and 22 cm across at the bottom.
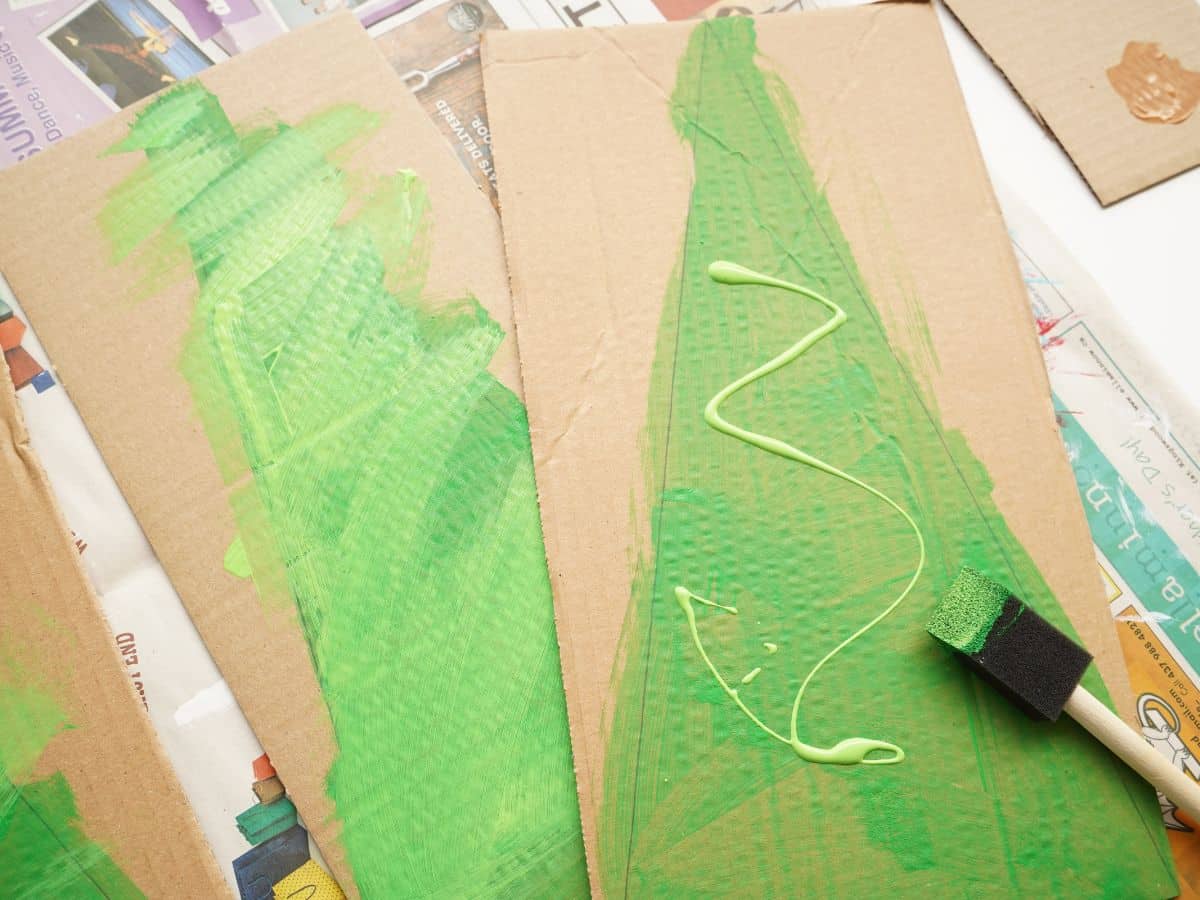
Okay, now it is time to paint the greenery onto the trees. I love layering the color onto the tree, this will give your tree some dimension. Start with the darkest green you have. While the paint is still wet add some brush strokes of the lighter green and finish with a few highlights of yellow. The best part of making this tree is that anyone can be an artist. From toddlers to teens. Have fun.
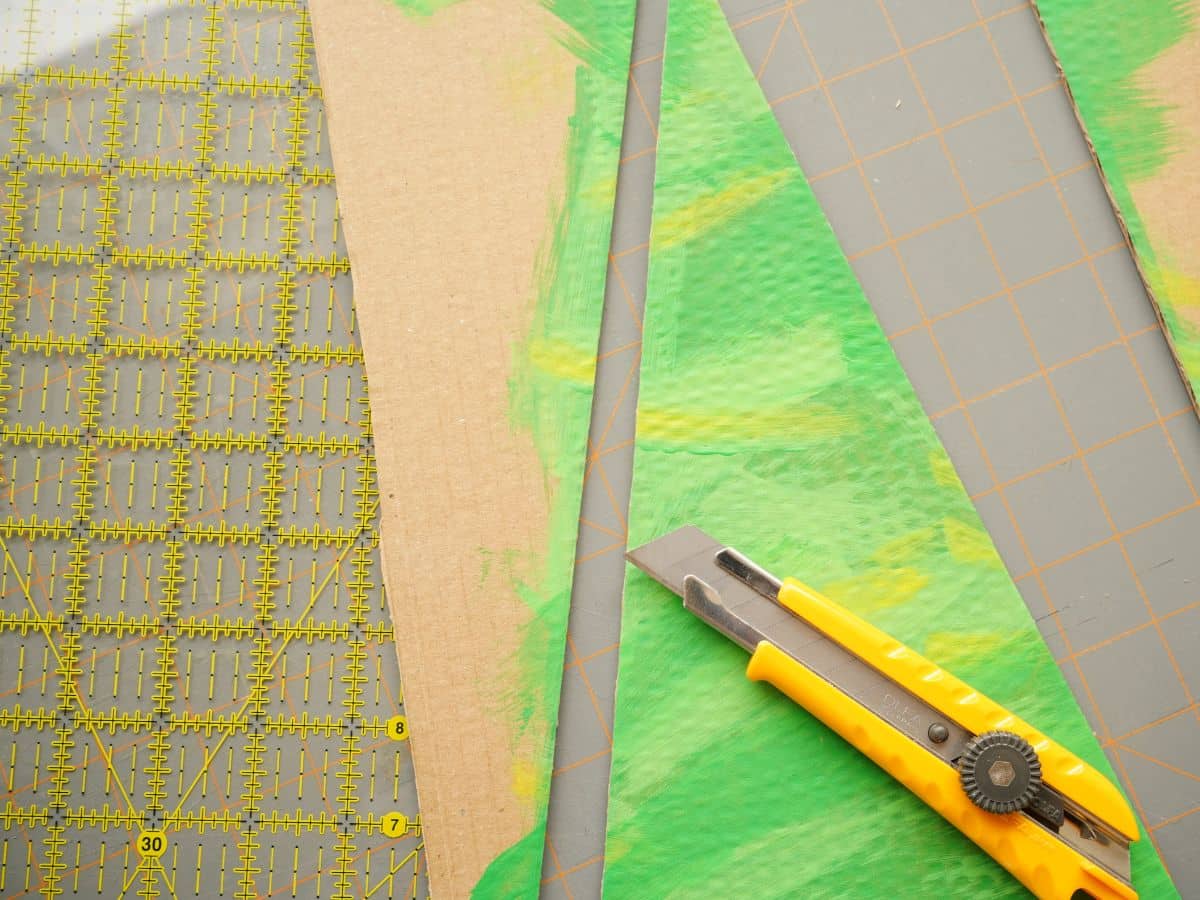
When the tree is painted and dried it's time to cut out the shape. The best way to do with is with a utility knife. I found that scissors didn't give the straight edge I wanted. But if you only have scissors then go for it. If using a utility knife be sure to protect your tabletop from the knife. Run the knife along the edge of a ruler and draw along the pencil line you drew earlier. Your tree is ready for your decorations.
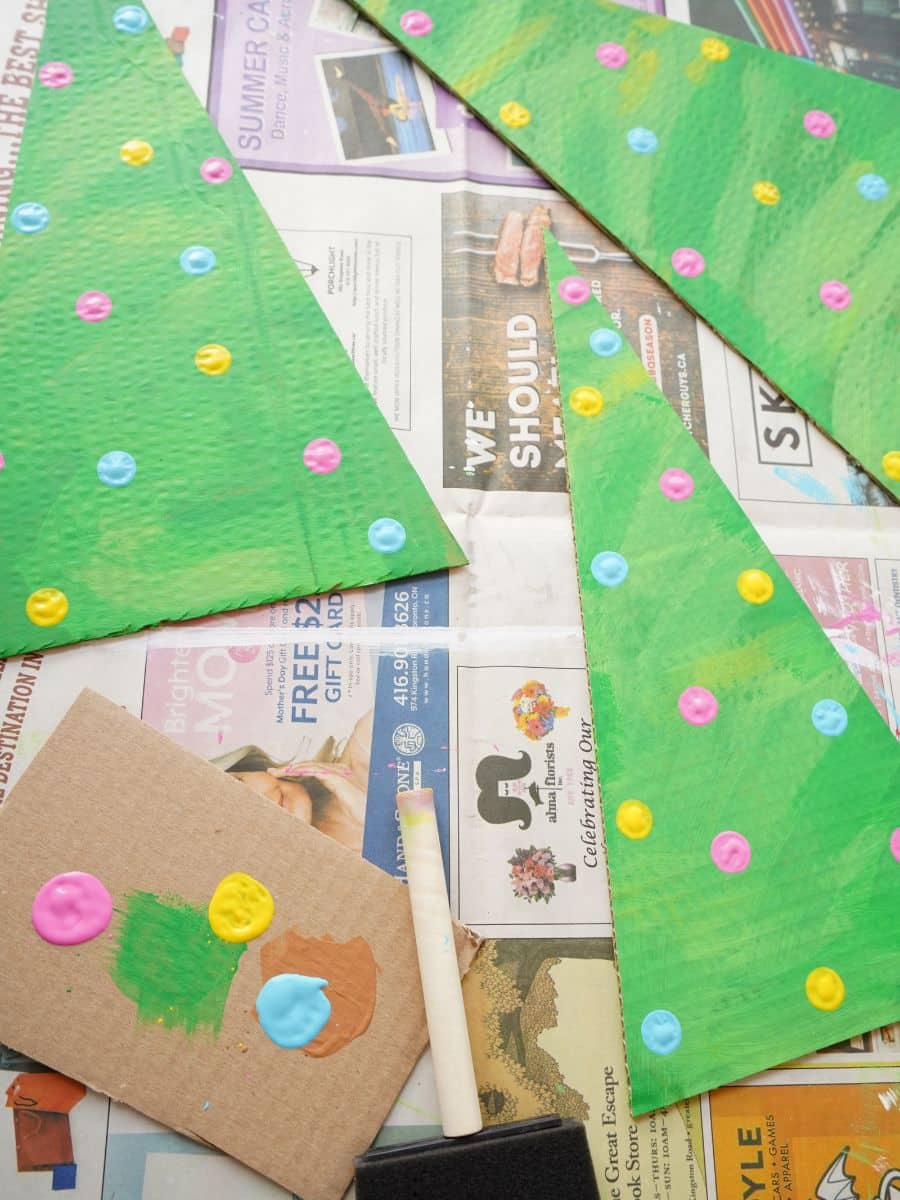
Again, it's time to have some fun. I dipped the end of a foam paint brush into dollops of paint to get the circles of the Christmas ornaments. I opted for pink, blue, and yellow. You could use whichever colors you like. The technique of using the end of a paintbrush dipped in paint will give you cute polka dots. Practice a few times on a scrap of cardboard, so you can decide what amount of paint you need on the brush end.
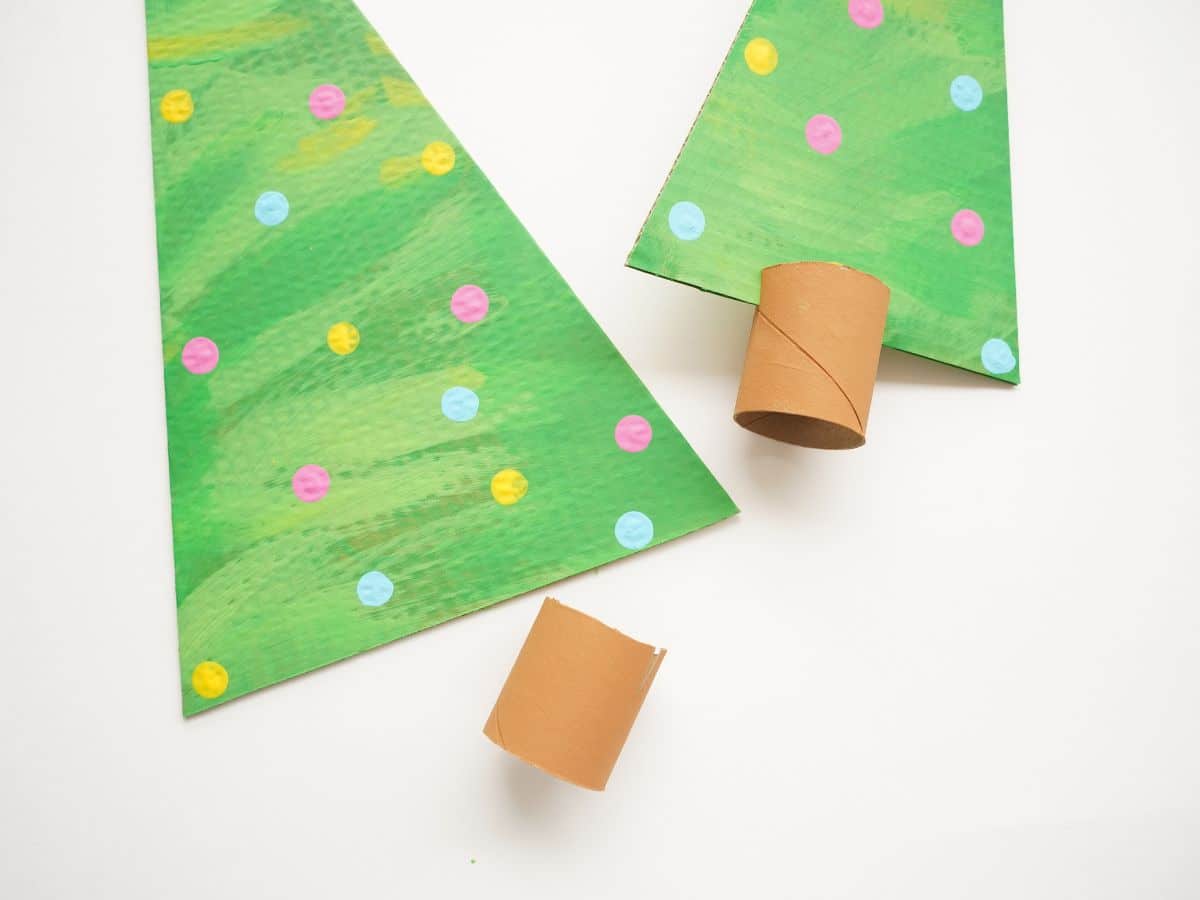
Finally, cut two narrow "v's" into the side of the toilet paper roll. The cut should be about halfway down the side of the painted tube. Then slide the tree into the slats you have cut. It should sit snuggly. You may want to test the size of the slats on a scrap toilet paper roll. The size of the slat will depend on the thickness of your cardboard tree. The main thing is you want it to fit snuggly.
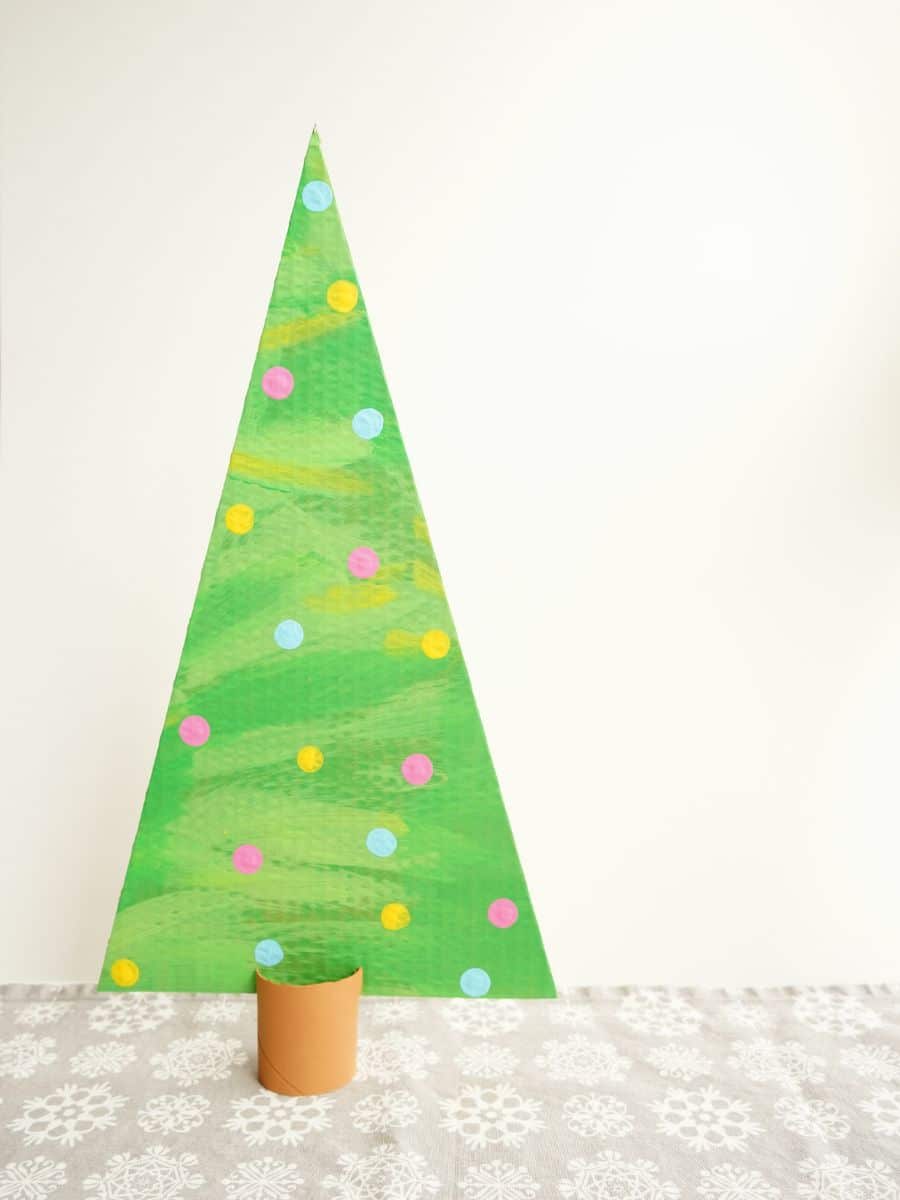
Stand up your trees! My trees stood perfectly on their own. However, if you need more stability just tuck a rock inside the toilet paper roll. This will hold the tree in one spot.

I love the forest of trees that this creates. They are cheery and bright, my favorite style of Christmas decorations. This Christmas craft would be fun to do in a classroom or at home on a snowy day. Again, it is great for kids of all ages and adults too! Have fun with the entire process.
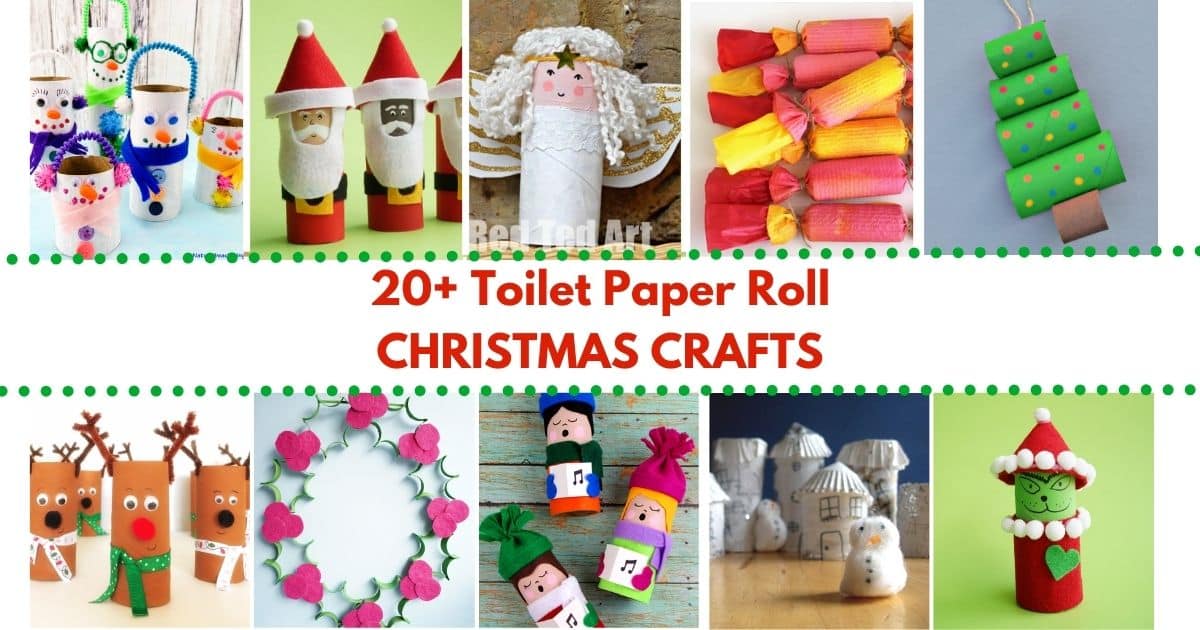
Check out all of our creative toilet paper roll Christmas decorations
Make sure you are following along...
FOLLOW KITCHEN COUNTER CHRONICLES ON
SUBSCRIBE TO KITCHEN COUNTER CHRONICLES TO HAVE OUR DELICIOUS RECIPES, FUN CRAFTS & ACTIVITIES DELIVERED DIRECTLY TO YOUR INBOX.