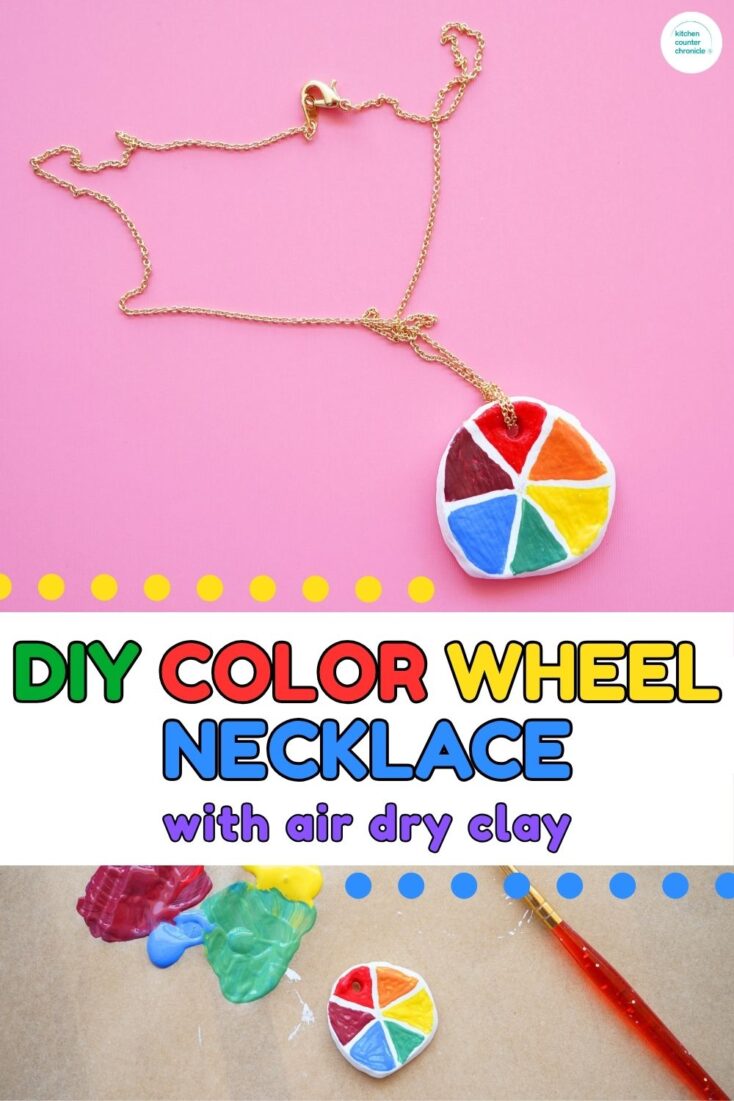
This is a super colorful craft project for tweens, teens, and adults to make. It is super easy to make an air-dry clay color wheel necklace. We have made all kinds of crafty jewelry over the years, but this color wheel necklace is one of my faves. I think it is the perfect summer craft project.

Disclosure: There are Amazon Affiliate links in this article which means, at no additional cost to you, we could receive compensation for our recommendations. You can read our full disclosure policy on our Disclosure Page for more details.
What is the color wheel?
Okay, what is a color wheel? If you've never taken an art class, you might not be familiar with a color wheel. Basically, a color wheel is an illustration of colors and the creation of colors. All colors stem from the three primary colors - red, yellow, and blue. By mixing these 3 colors, you can create secondary colors and all possible colors. A color wheel typically includes the primary colors and the mixtures of colors from there. Our color wheel necklace is very basic. Color wheels can be used to help understand color theory, complementary colors (two colors that are directly across from one another on the color wheel), and analogous colors (neighboring colors on the color wheel).
I had seen a color wheel necklace in a shop and decided I wanted to make my own. I thought air-dry clay would be the perfect material to use.
DIY Air Dry Clay Color Wheel Necklace
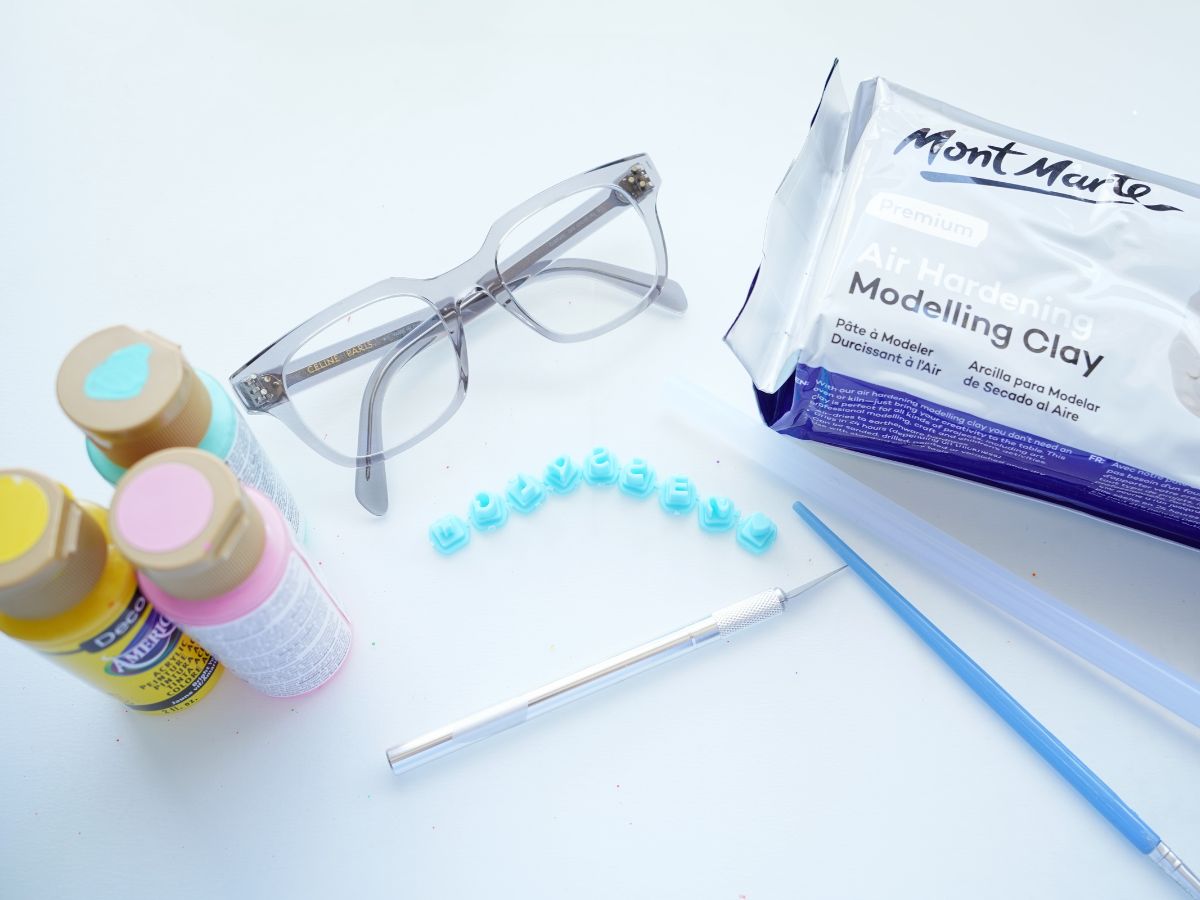
Craft Supplies Needed
white air-dry clay
white, red, blue, and yellow acrylic paints
paint brush
large glue stick or rolling pin
bowl with water
utility knife
Mod Podge (matte)
thin gold chain necklace
or, black waxed linen
The first step in making this air-dry clay necklace is to pull a plum-sized piece of clay off the block of clay. Roll it in your hands to make a smooth ball and then flatten it with your palm and fingers. You could use a large glue stick or a small rolling pin to flatten the clay, but I simply used my hand. Add a splash of water to your hands if the clay starts to dry out. You want to create a disk of clay that is about ¼ inch thick.
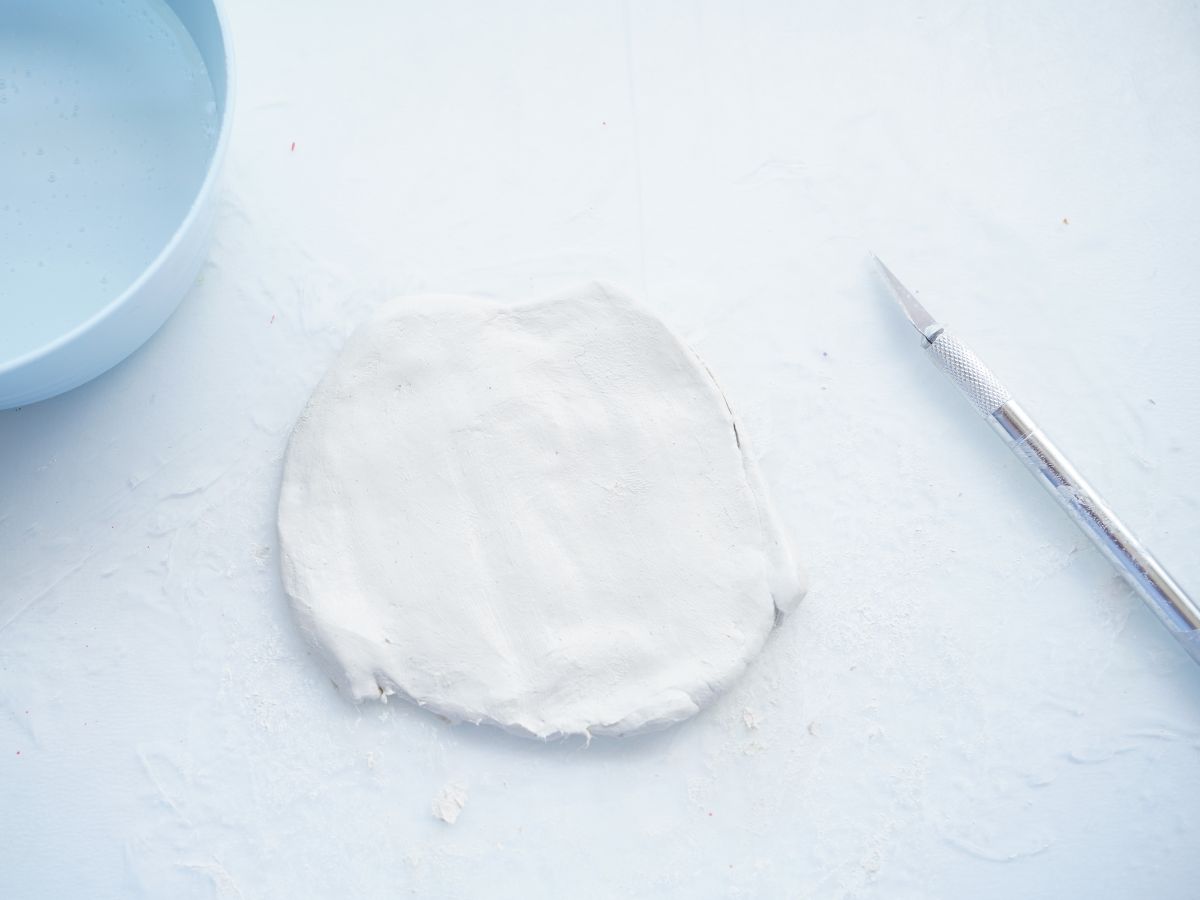
Now, it's time to make the circular pendant. Use a round cookie cutter or use a sharp utility knife to cut a circle for your pendant. I didn't have a small enough cookie cutter, so I freehand cut the circle. And, don't forget to make a small hole for the chain to feed through. I used the end of my paintbrush to create the hole. Set the clay aside to dry on a baking rack. It might take about 24 hours to dry completely, it just depends on the sun/wind conditions where you place it.
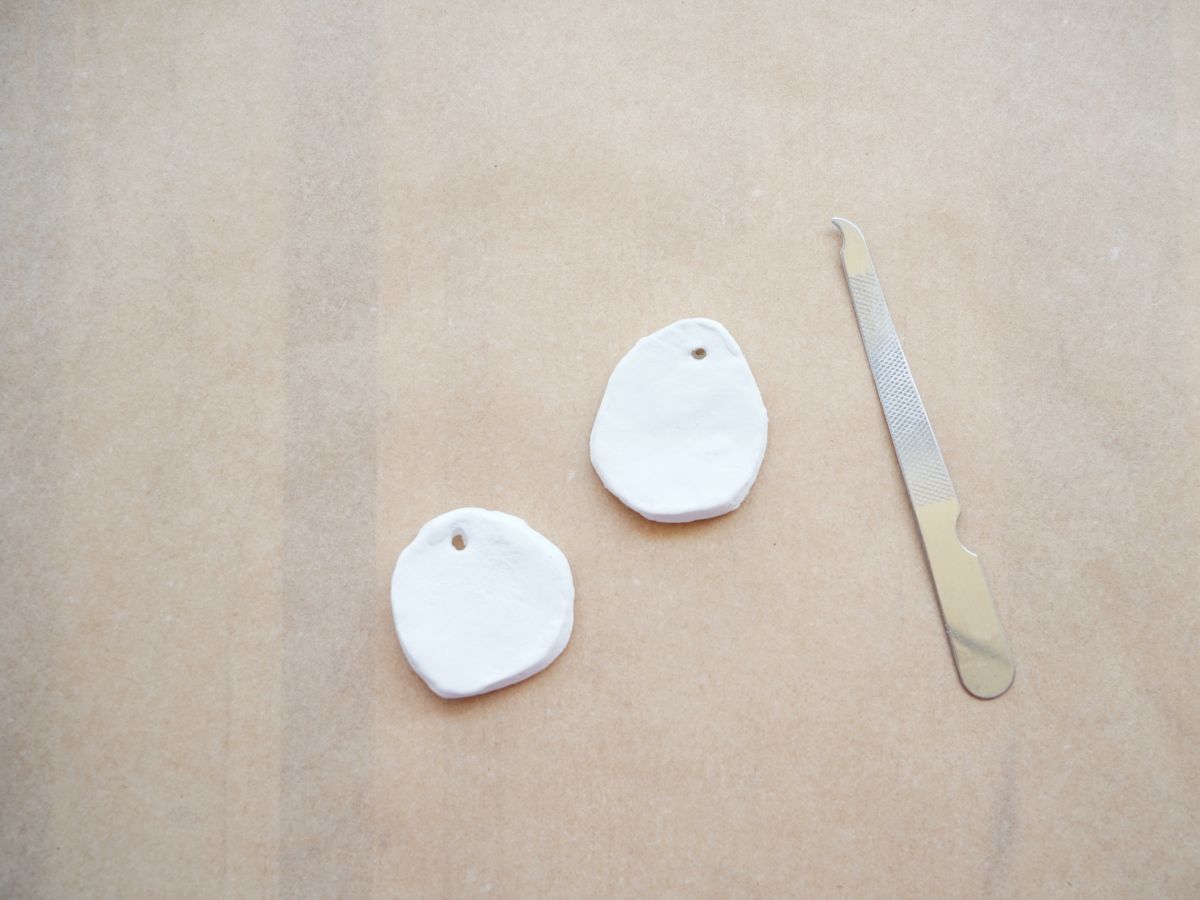
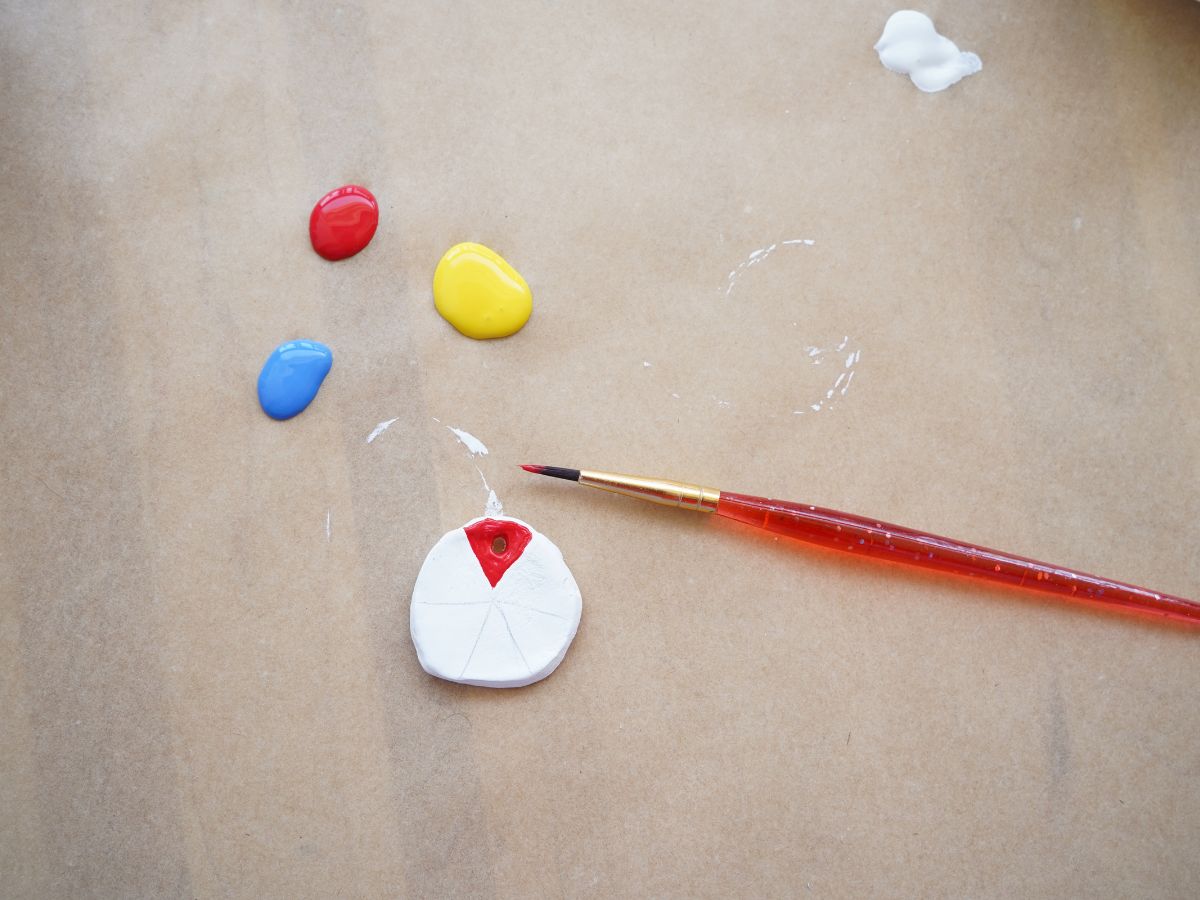
Once the pendant is dry, it is time to sand the rough edges. I used a small metal nail file to smooth any little rough spots. When the sanding is complete, paint the entire pendant white. The white will be the base for the necklace, and it will be the dividing lines between the colorful sections.
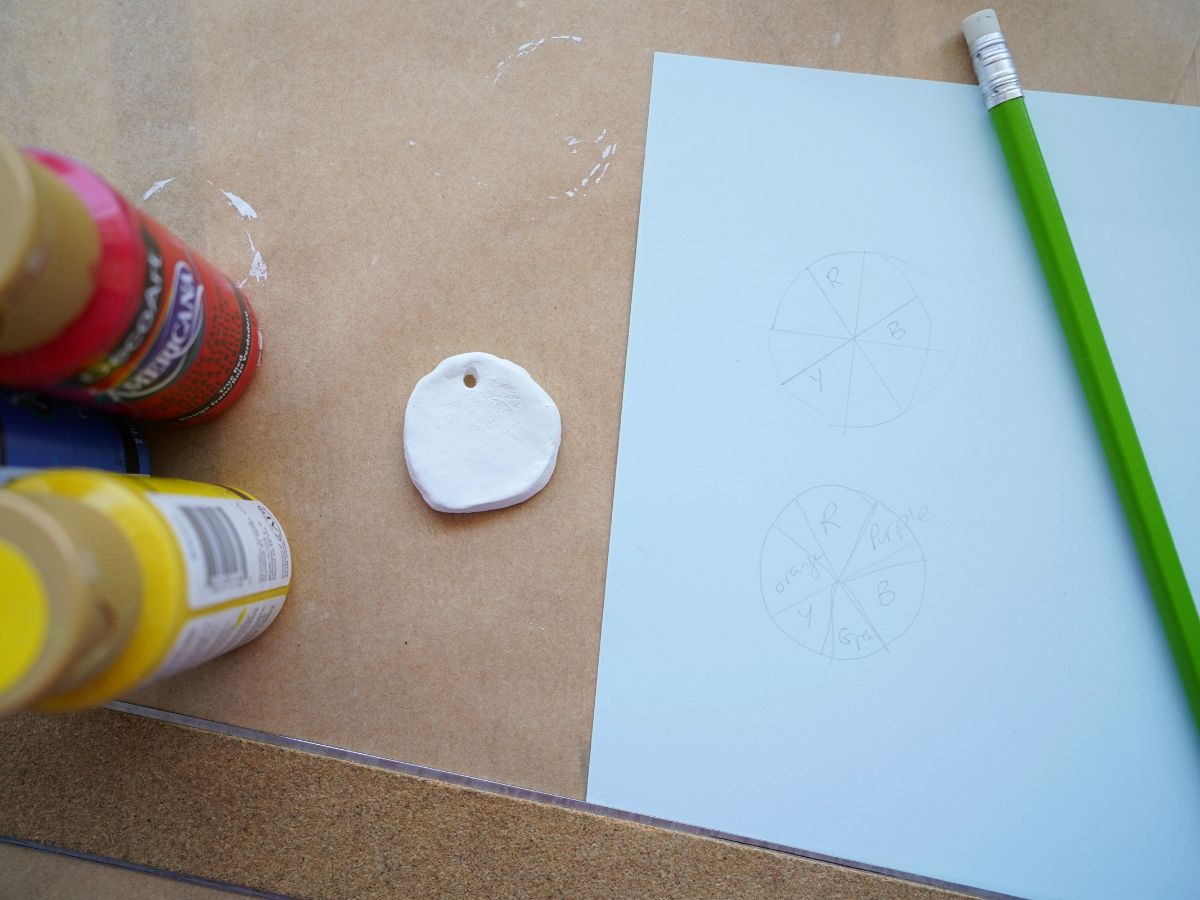
Now, it is time to plan your color wheel design. Trace the pendant on a piece of paper. You will want at least 6 segments on your color wheel. That gives you the chance to have the 3 primary colors and 3 mixed colors. If your pendant is larger, you could totally have more segments and more opportunities for mixing colors. The colors are endless.
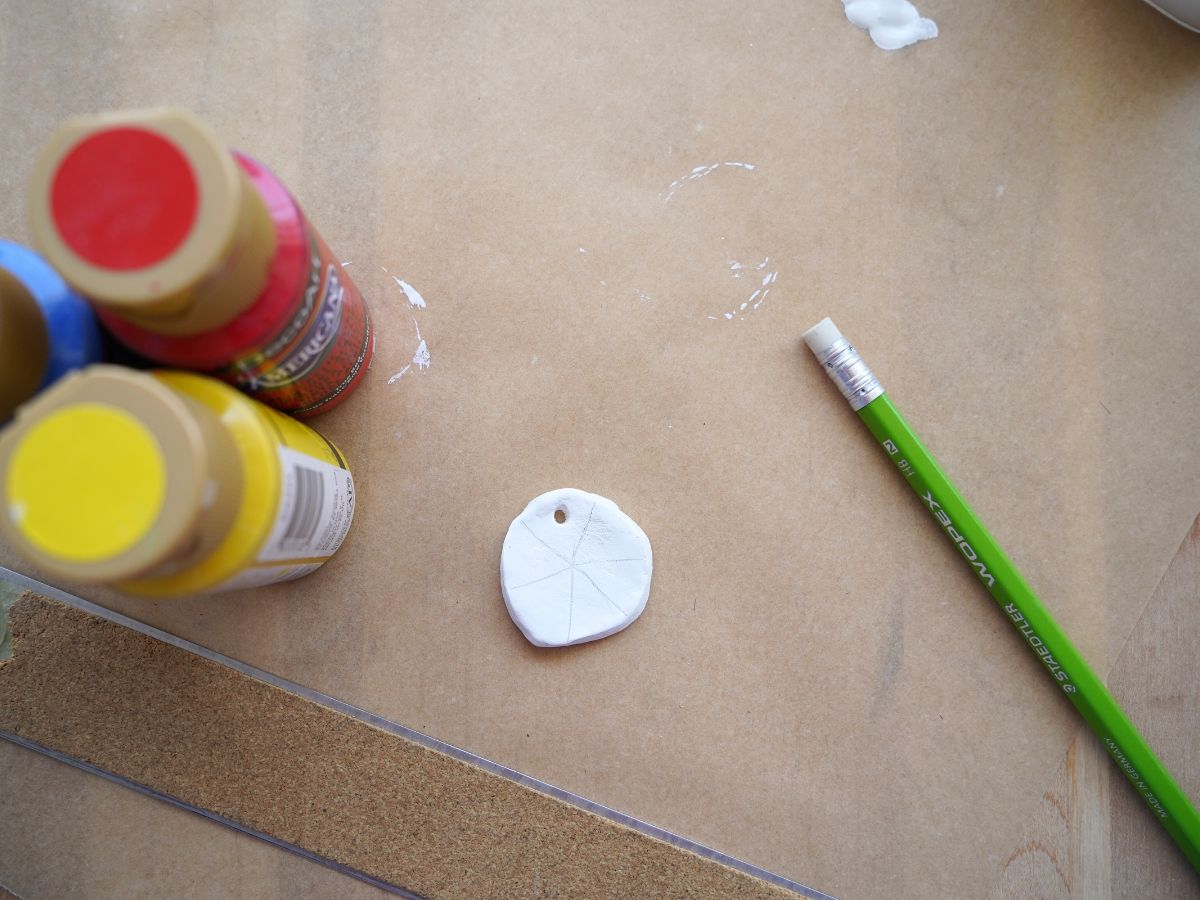
When you have your design, use a pencil to lightly draw on the segment lines. These lines will be erased as you add the color, and they will leave the white dividing lines. Add your red, yellow, and blue paints to your palette. I like working on a parchment paper-covered surface. Start painting the first segment, I started with red.
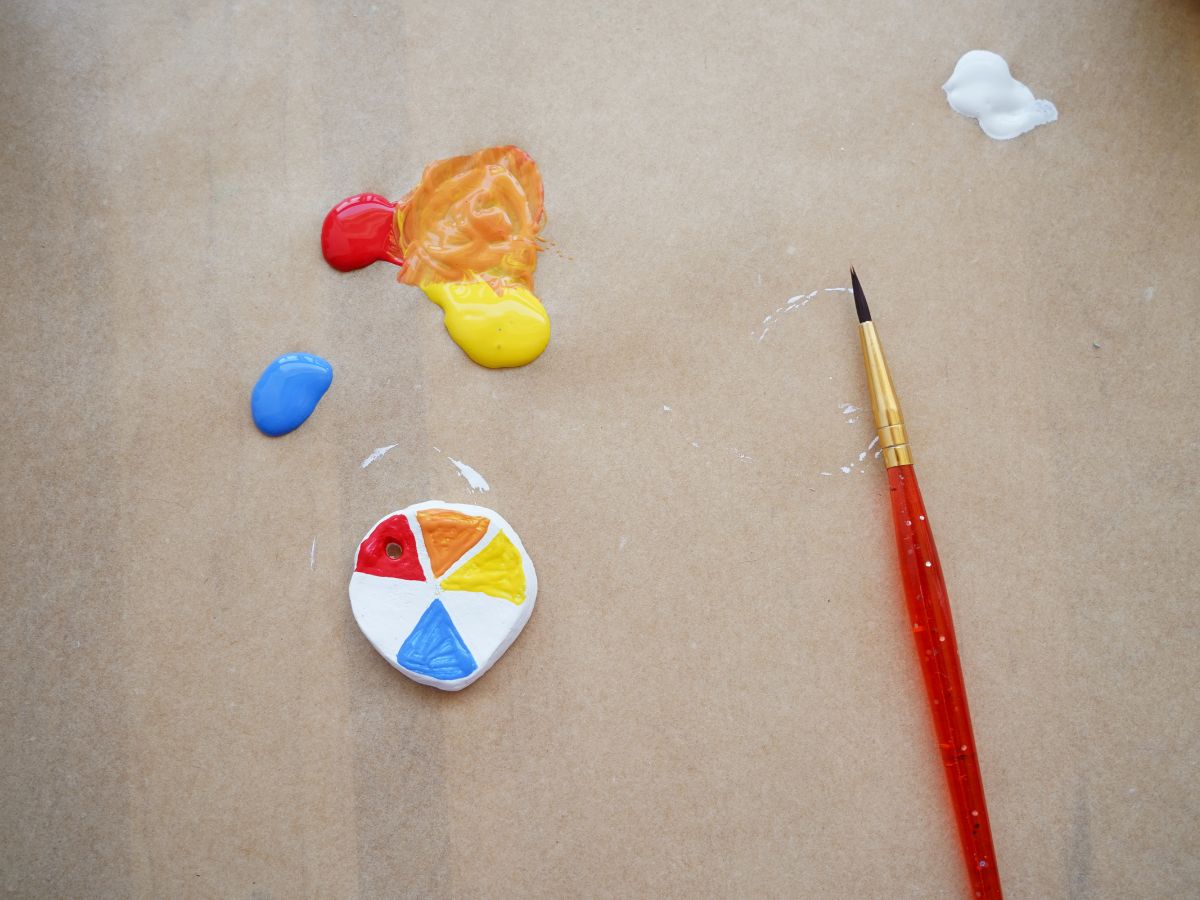
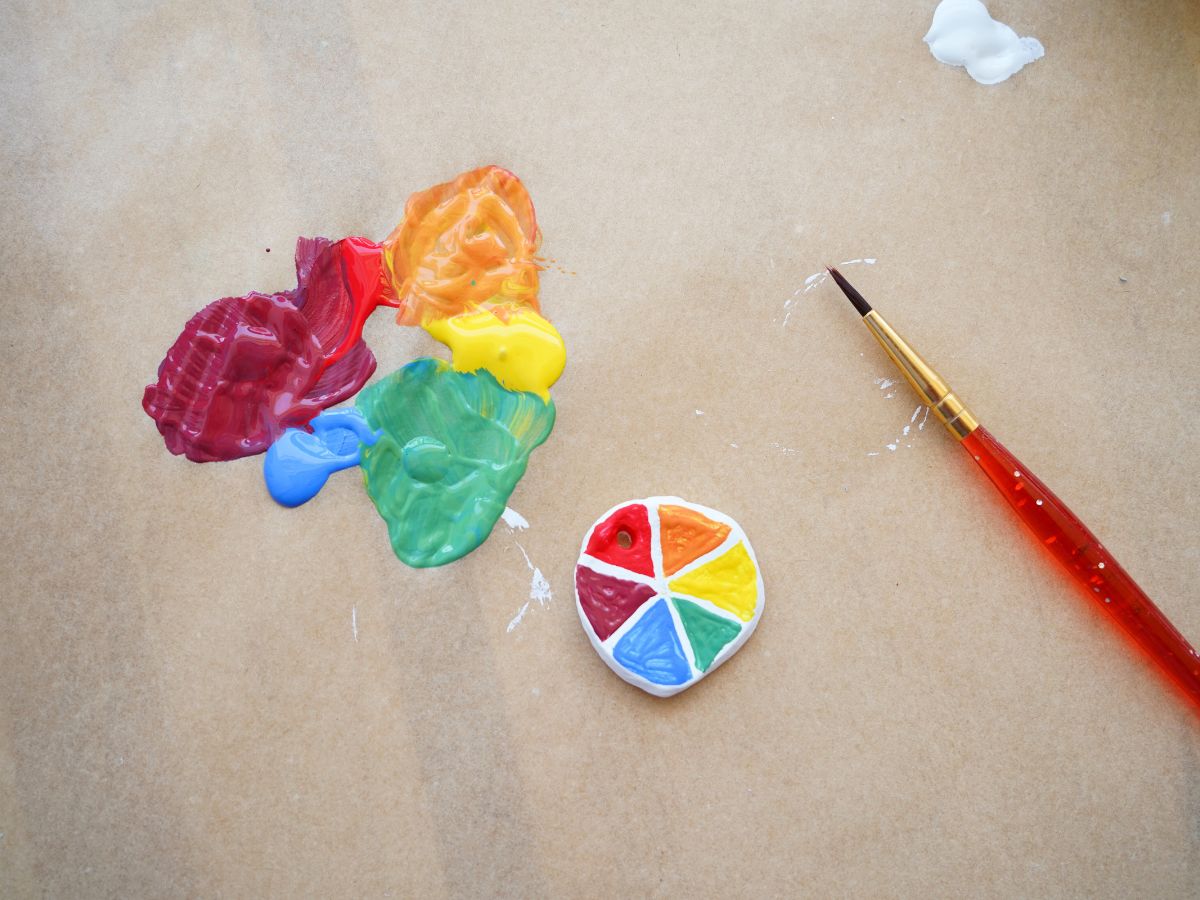
As each segment is completed, you can mix the paints and work your way around the wheel. Creating new colors and painting them on the wheel. With 6 segments, you will have red, orange, yellow, green, blue, and purple. Set the necklace aside to dry.
When the paint has dried, you can apply a coat of Mod Podge protectant. I like to use the matte kind. Let the Mod Podge dry completely.
Now it is time to add the chain to your necklace. I happened to have a thin chain that fit through the hole of the pendant. I love how it looks. If you don't have a chain, you have a couple of other options for making your own chain.
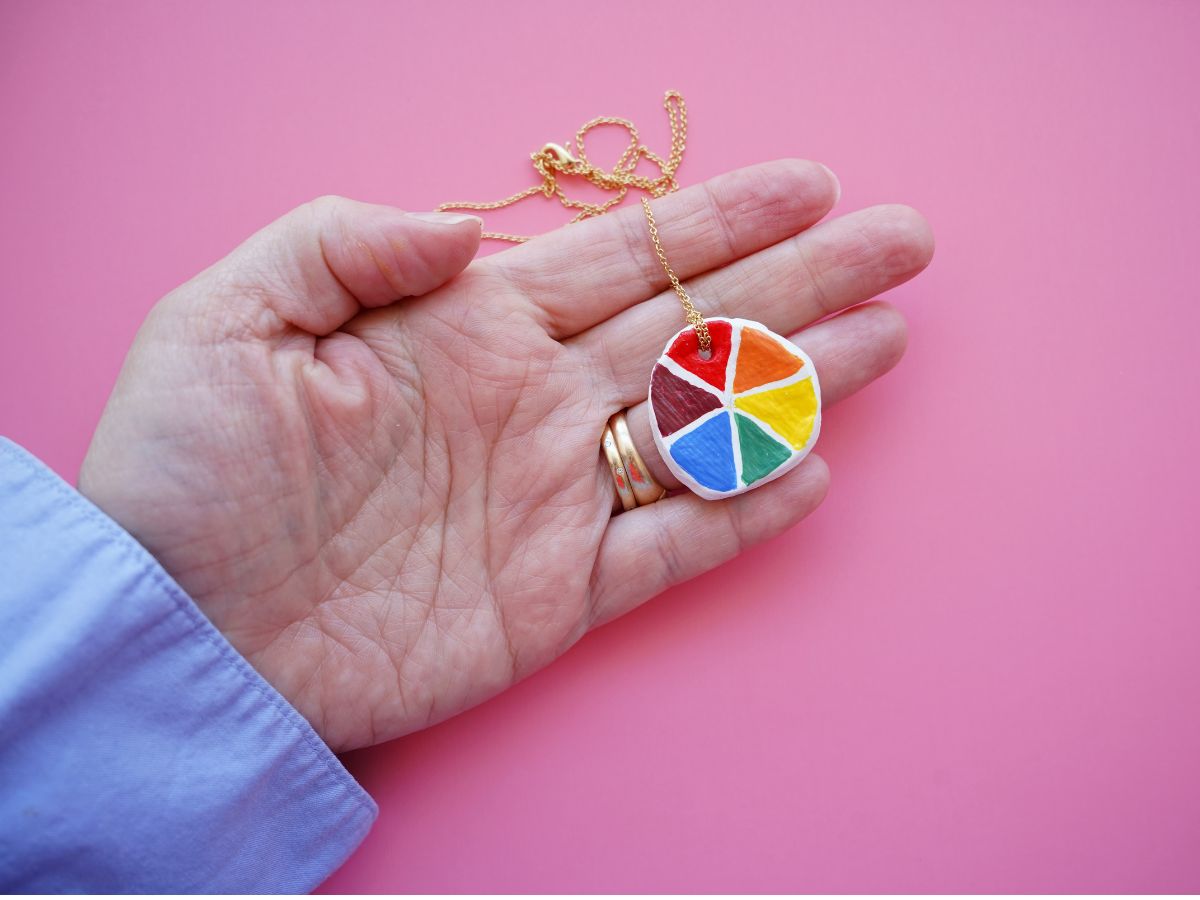
First, you could feel a long loop of waxed linen through the hole and simply knot the ends together. Creating a necklace you can slip over your head. Or, you could add a clasp to the ends of the waxed linen (as I detail in this other necklace craft post). It is actually quite easy to add a clasp to a necklace.
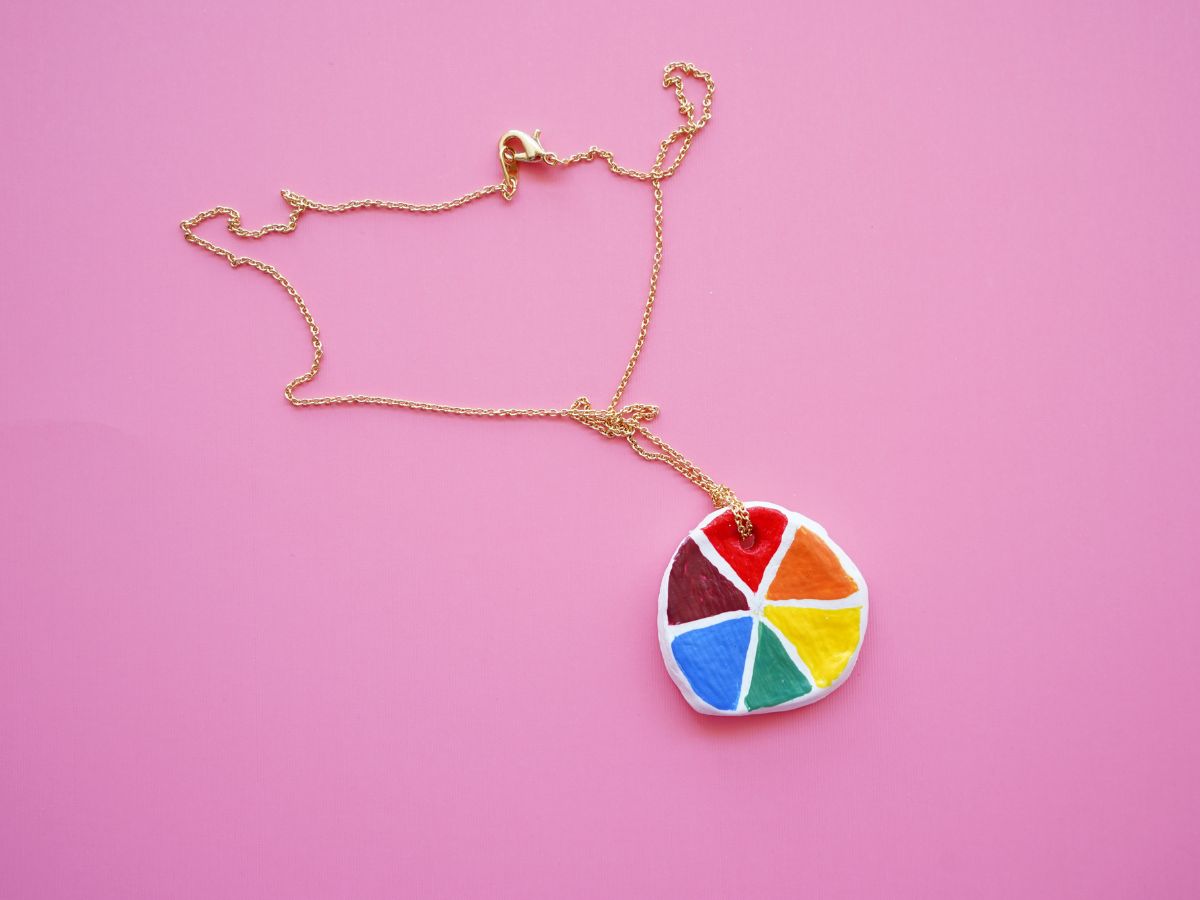
I really love how this necklace turned out. I've made salt dough necklaces before, but I wanted to try making an air-dry necklace with tweens. This is such a fun summer craft project, or for any time of the year. It really celebrates my love of being an artist. In fact, I think I will make another one for my friend who likes to paint. I think she'd really love wearing this piece.
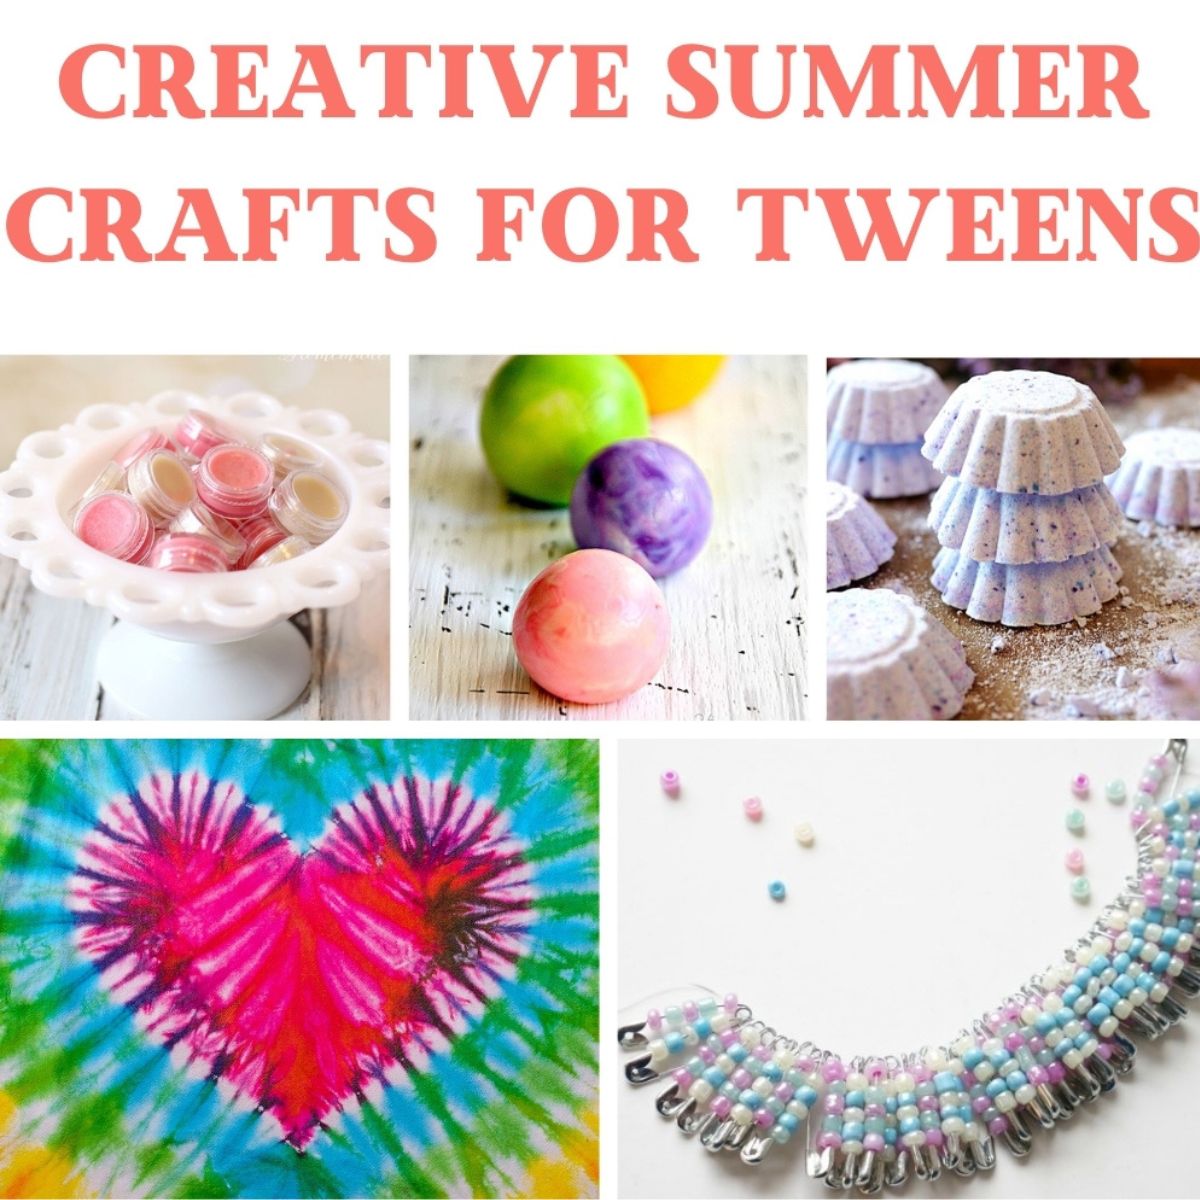
Check out our collection of summer craft project for tweens and teens to make
Make sure you are following along...
FOLLOW KITCHEN COUNTER CHRONICLES ON
SUBSCRIBE TO KITCHEN COUNTER CHRONICLES TO HAVE OUR DELICIOUS RECIPES, FUN CRAFTS & ACTIVITIES DELIVERED DIRECTLY TO YOUR INBOX.