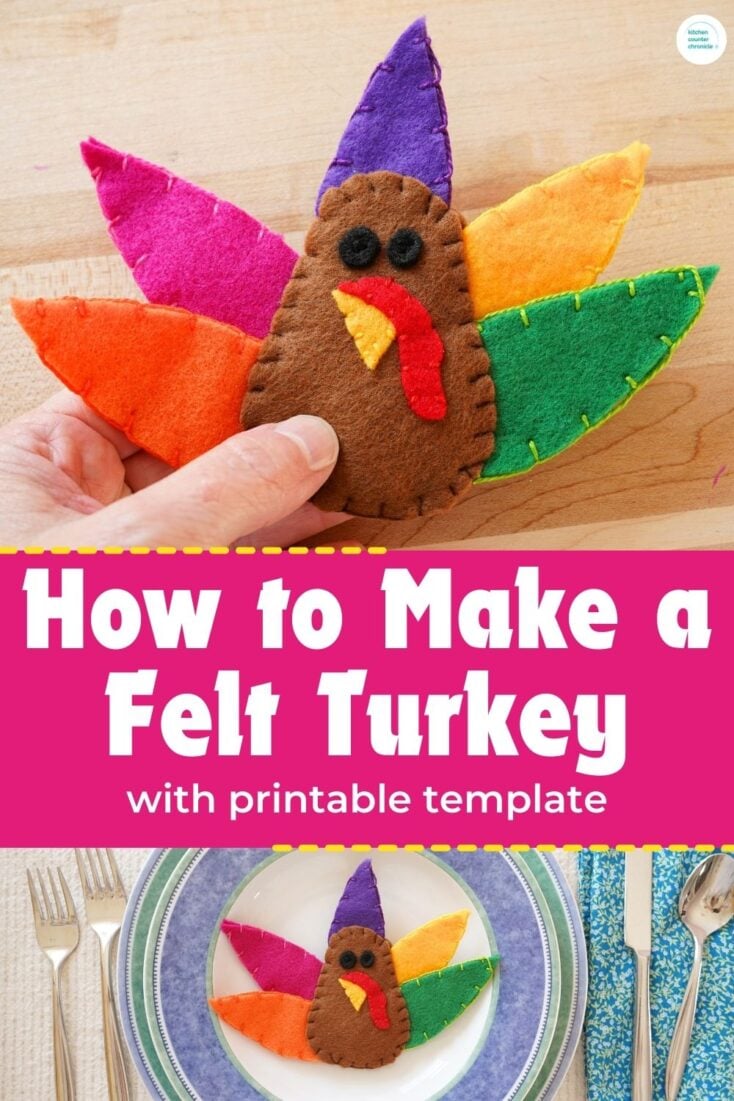
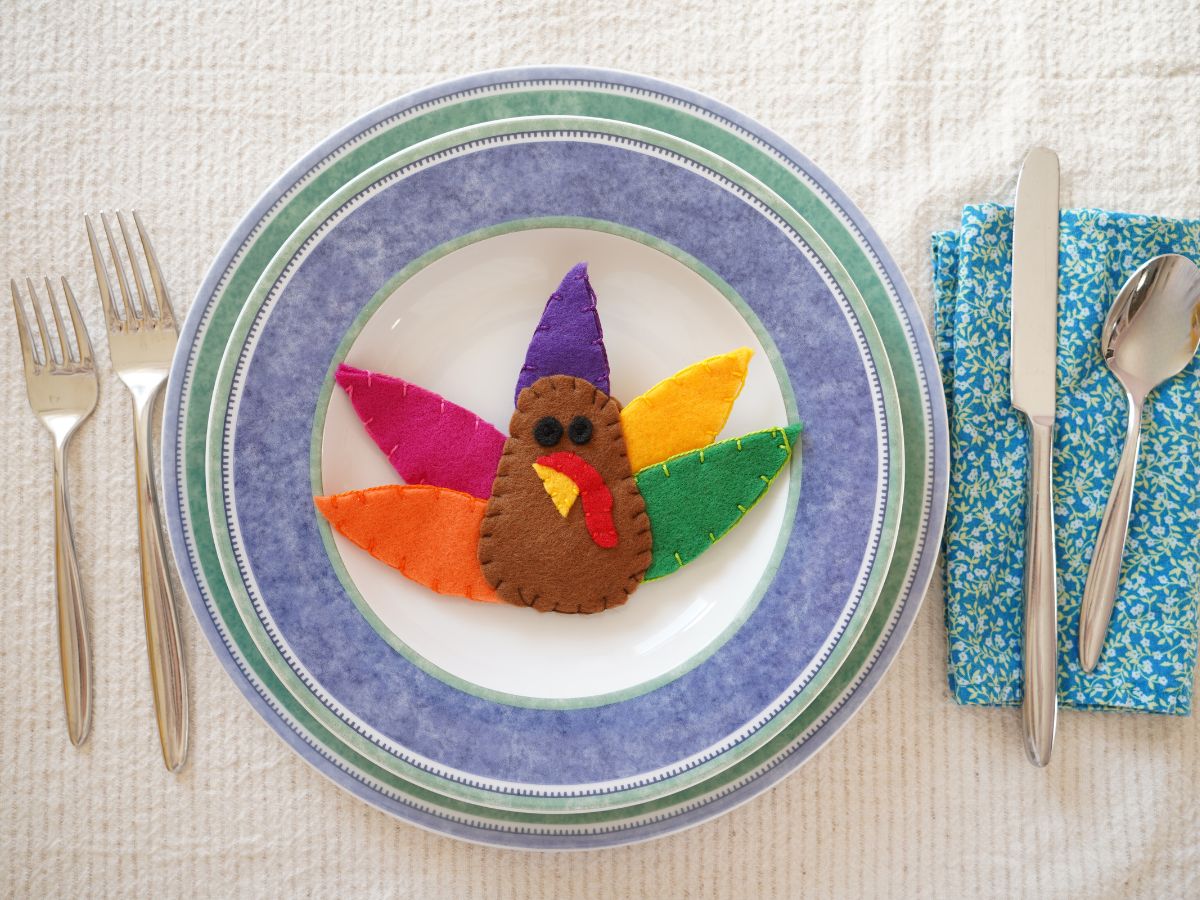
Thanksgiving is a wonderful time to make keepsake crafts. I've pulled together a fabulous collection of our favorite Thanksgiving table crafts and these felt turkeys are perfect for the Thanksgiving table. In a few steps and with a little sewing, older kids can make a whole gaggle of cute felt turkeys.

Disclosure: There are Amazon Affiliate links in this article which means, at no additional cost to you, we could receive compensation for our recommendations. You can read our full disclosure policy on our Disclosure Page for more details.
I am always looking for fun crafts for tweens and teens to make. I love finding ways to keep the crafty spark lit as kids get older. These turkeys are a great fall craft for older kids to make because they require a little more skill and concentration than crafts for younger kids. And, these felt turkeys will make a fun addition to your Thanksgiivng table and your fall decor.
How to Make a Thanksgiving Felt Turkey Craft
sheets of felt - orange, brown, yellow, purple, green, black, red
scissors
embroidery floss
embroidery needle
our printable felt turkey template
straight pins
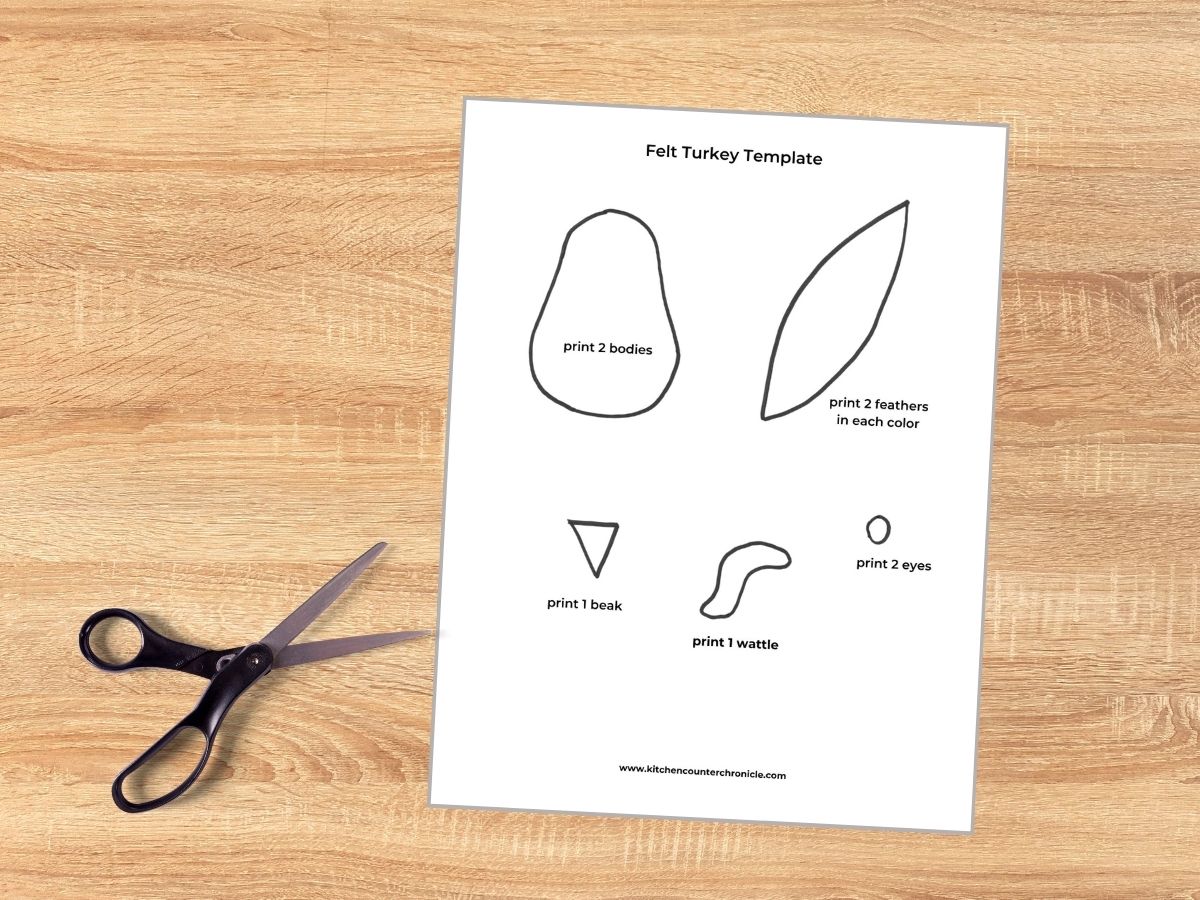
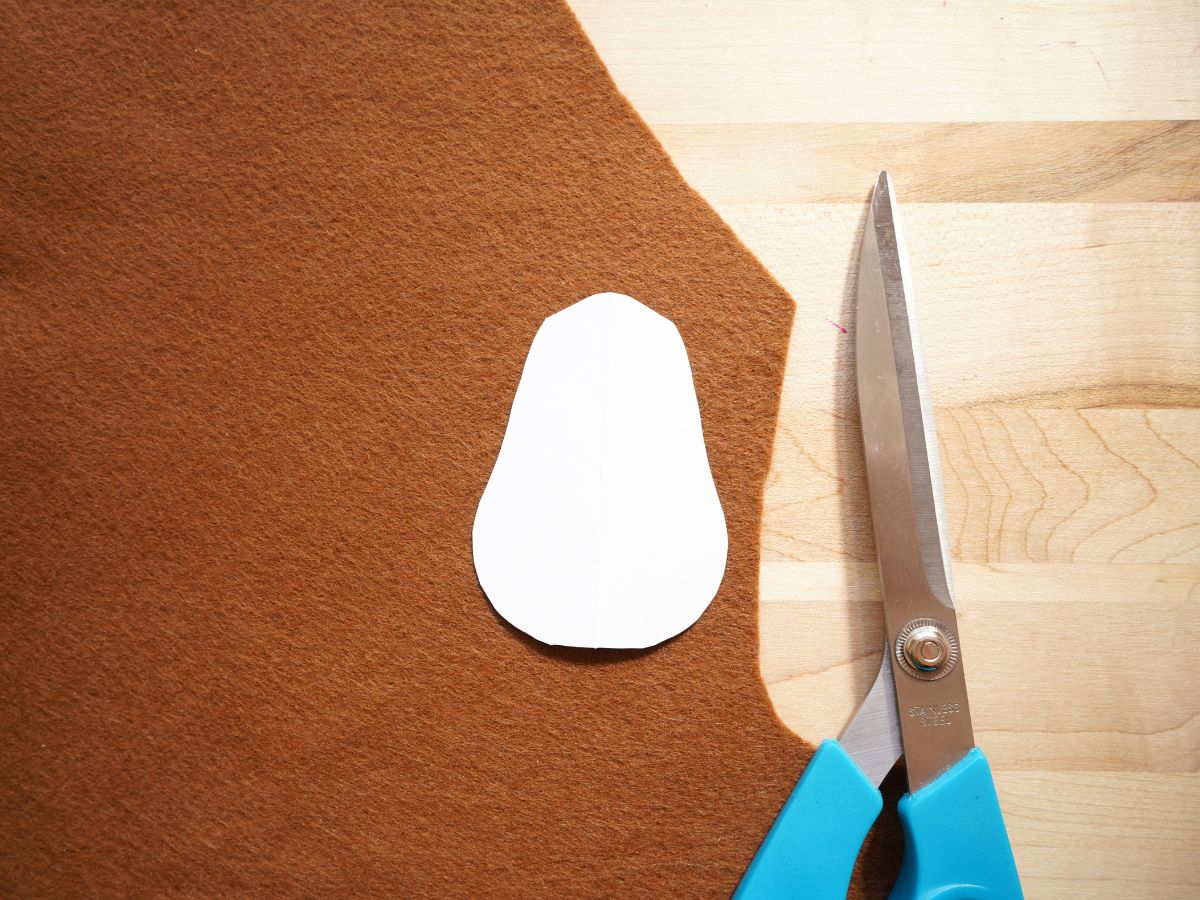
The first step in making this craft is printing our felt turkey template. Once printed you will want to cut out all the individual pieces and pin them to the appropriate pieces of felt.
You will need
2 turkey bodies - we used a brown felt
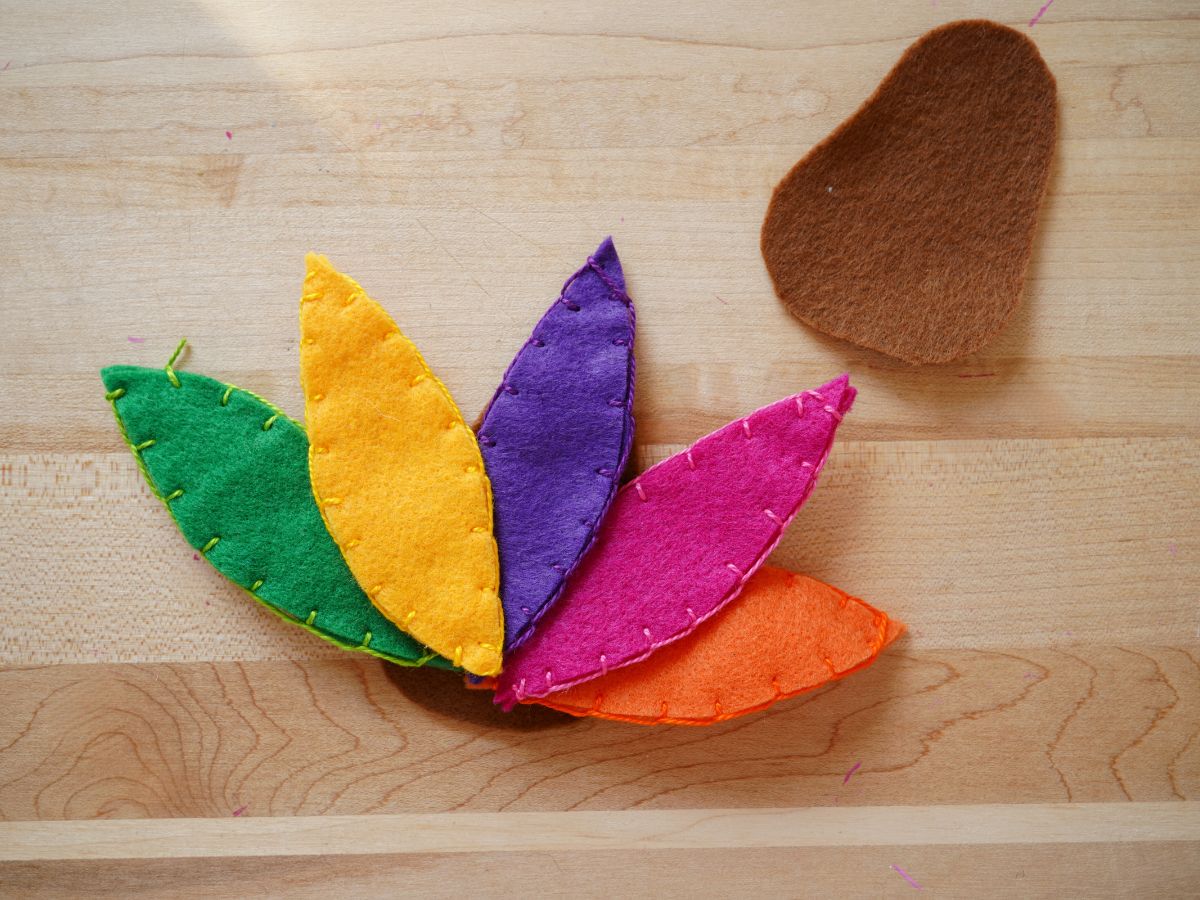
2 feathers in each color of felt - we used orange, purple, green, yellow, and dark pink
1 beak - yellow felt
1 wattle - red felt
2 eyes - black felt
Once you have everything cut out it is time to start sewing your turkey together. Begin by creating your turkey's face. For this, you will use the coordinating embroidery thread to sew the beak to the center of the turkey's "head". Then sew the wattle over the beak, in the same way that a real turkey's wattle droops over and around a turkey beak. Be sure to start and end all of your stitches on the backside of the brown felt body, as this will be hidden when you sew the turkey closed at the end.
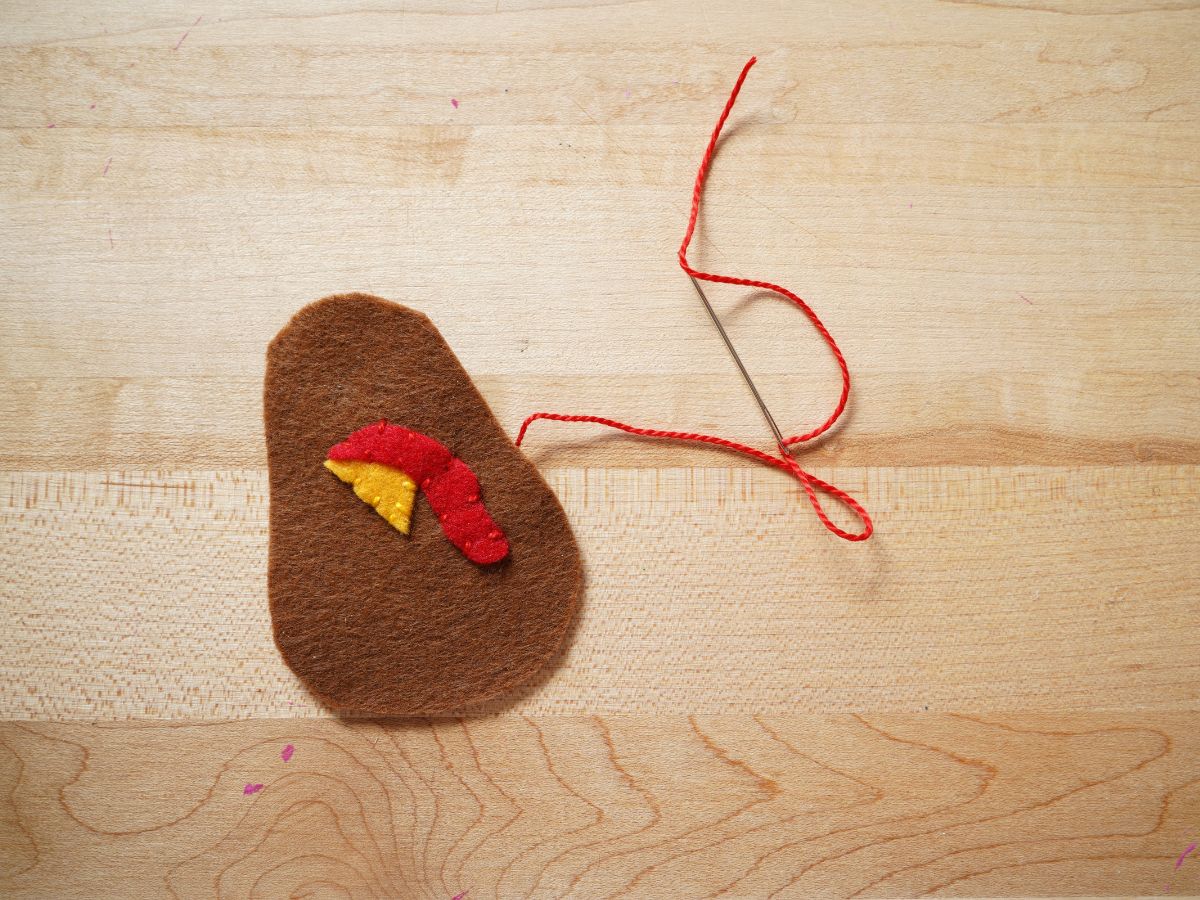
Finally, complete the turkey face by sewing on the eyes. I chose to make the turkey eyes totally black because if you look at a real turkey they have dark eyes. They don't have the same eyes as cats, or dogs. They don't have the white part of the eye (the conjunctiva), they only have the pupil-colored portion of the eye. Not that this felt turkey is in any way anatomically correct, but I thought the black eyes looked best. You could add a white portion if you'd like. It's totally up to you. You also could sew a little eyebrow or any other details you'd like. I like the simplicity of this turkey.

Set aside the turkey's body and let's focus on the colorful turkey tail. For the turkey tail you will want to sew the two felt feathers together with a blanket stitch. This stitch is a simple stitch and gives the feather a more feathery appearance. Keep the starting and finishing knots at the "bottom" of the feathers, because they will be hidden whtn the bird is assembled.
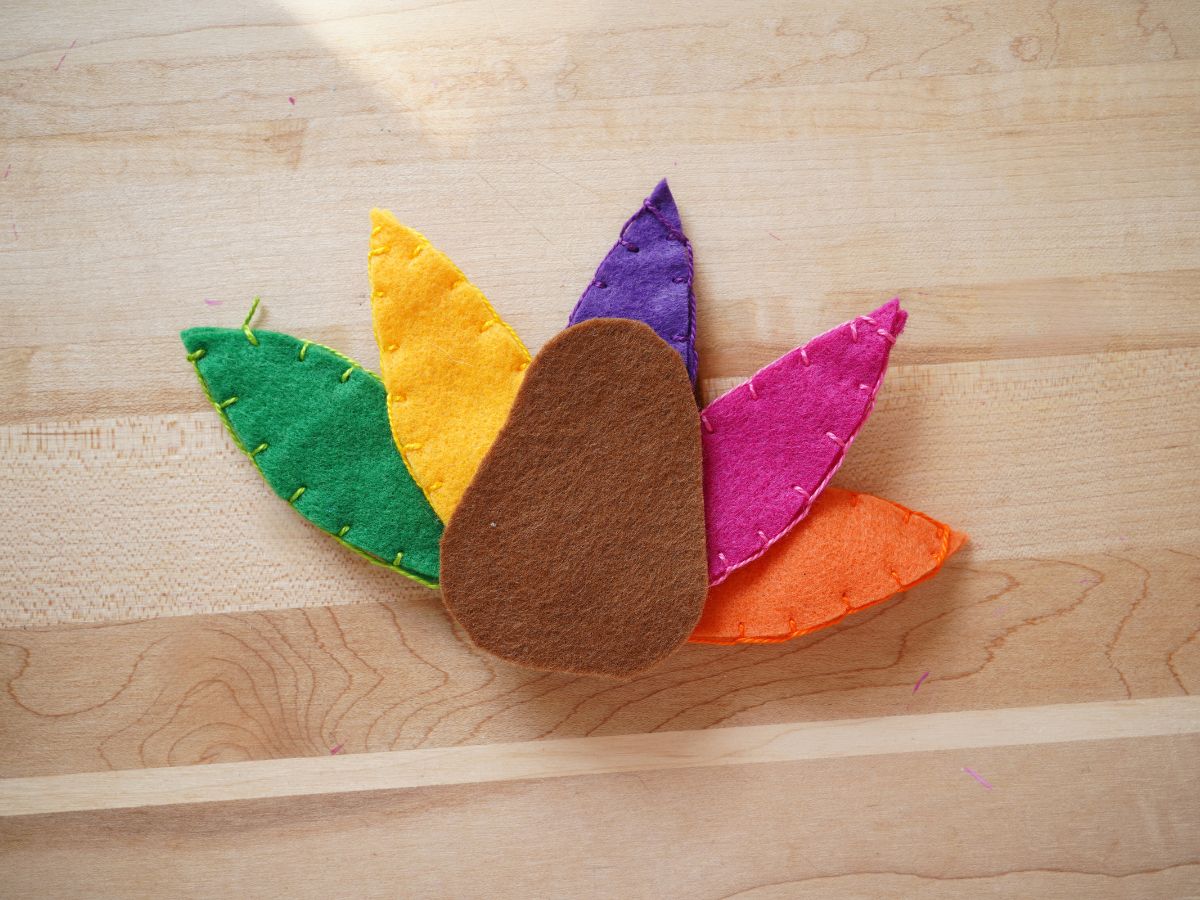
When the feathers are complete tuck them into the body. Overlap them in a pattern that you like best. Then place the second body piece over the feathers, tucking everything neatly inside. Now use a piece of brown thread and the blanket stitch to secure the turkey's body together.
When your turkey is finished it will be soft and have a little puffy body from the layers of feathers. I didn't add feet, because I felt the feet would distract from the colorful feathers.

I made a cute turkey for each place setting at our Thanksgiving table. They are so super cute! If younger kids are making this craft you can skip the sewing and use fabric glue. That would totally work. I know a couple of grandparents who would love to have a grandkid made turkey!
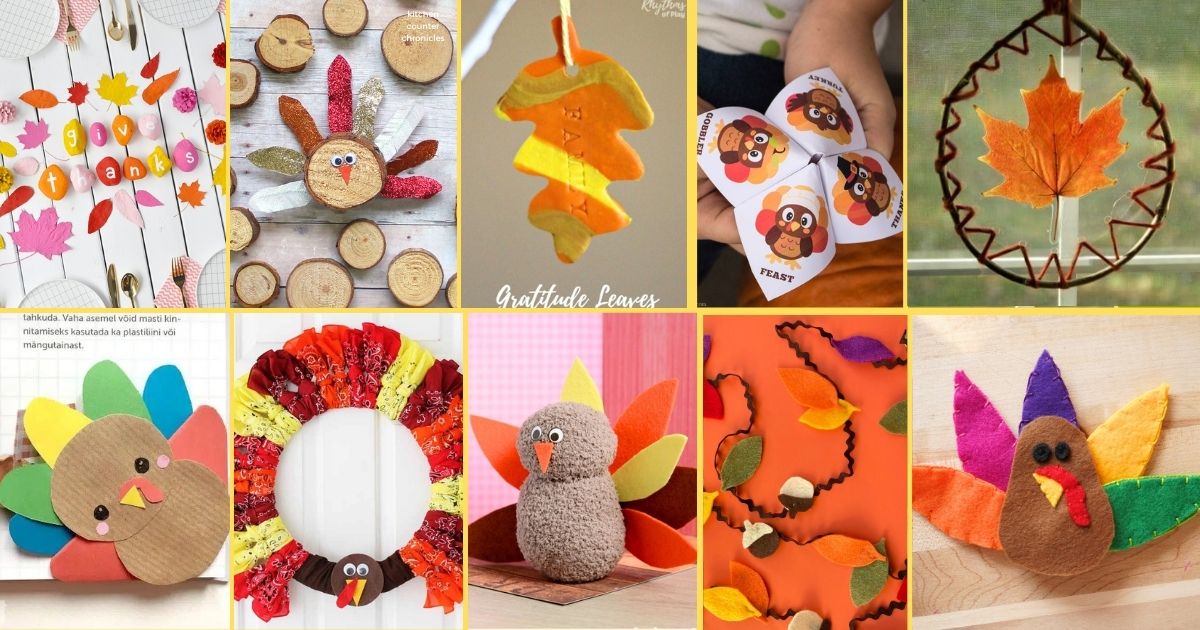
Check out all of our favorite Thanksgiving crafts for tweens to make.
Make sure you are following along...
FOLLOW KITCHEN COUNTER CHRONICLES ON
SUBSCRIBE TO KITCHEN COUNTER CHRONICLES TO HAVE OUR DELICIOUS RECIPES, FUN CRAFTS & ACTIVITIES DELIVERED DIRECTLY TO YOUR INBOX.