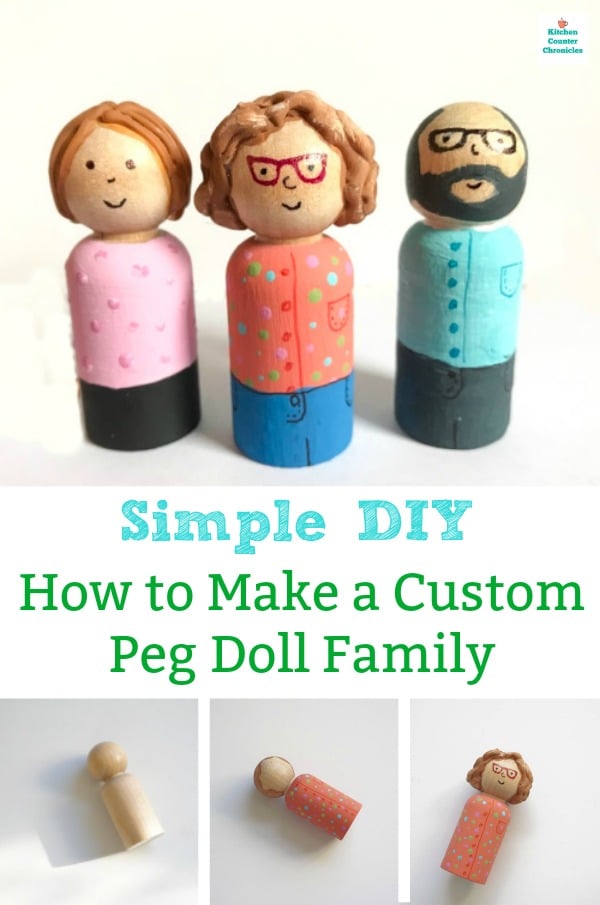
It is so much fun to make personalized craft projects. This family of peg people is a celebration of my family. I had so much fun making these folks that I couldn't wait to share all kinds of tips and tricks with you, so you can make your own peg doll family.
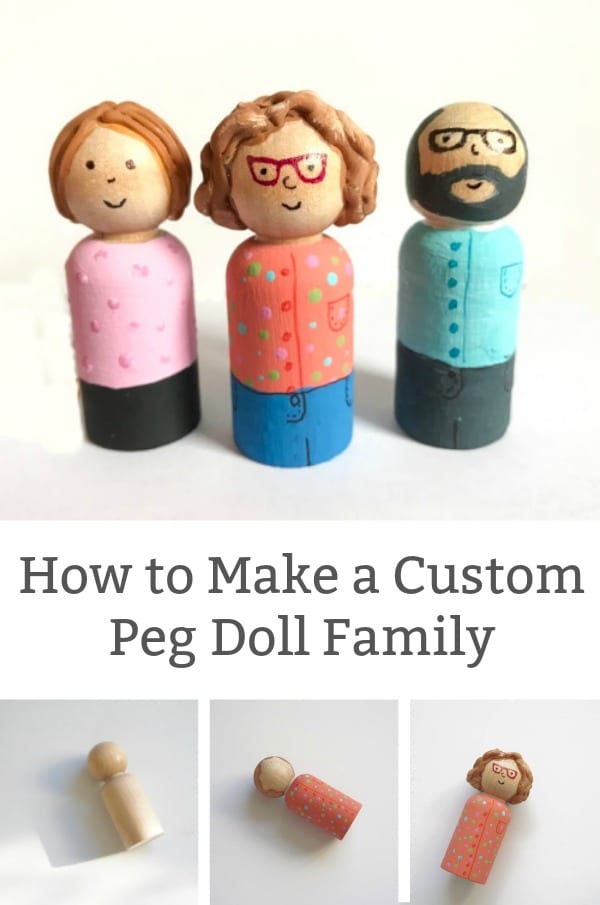
There is something so special about making personalized crafts. Especially when they honour your family or friends. I love little wooden peg people. My kids have always loved playing with them. We have used the blank wooden peg dolls for open ended play and art projects in the past. This time I wanted to take the time and figure out how to make peg people from a picture of someone. Capture all the personal details.
DIY How to Make a Peg Doll Family
wooden peg dolls
clear sealant (think Modge Podge)
acrylic paints - colours of your choice
glue gun
paintbrushes
permanent markers
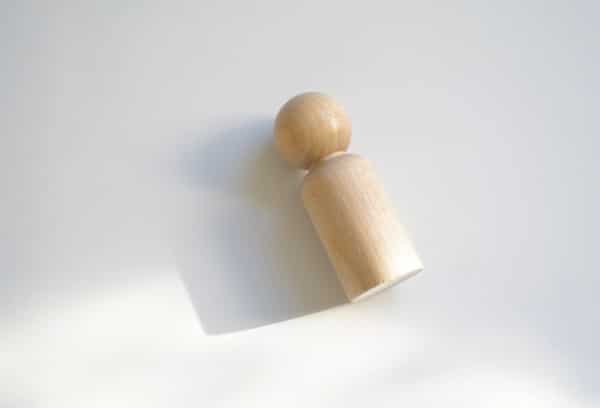
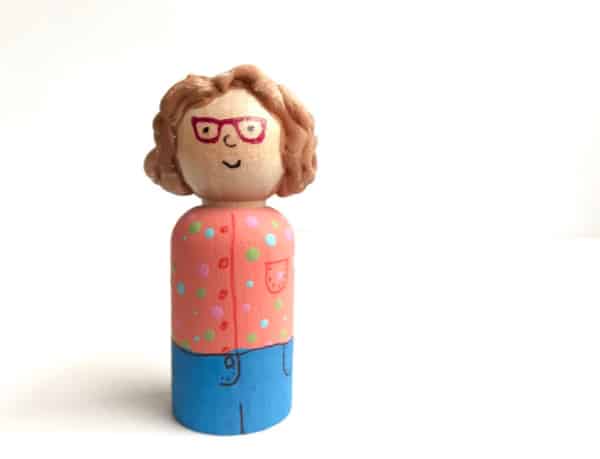
I started by painting the head of the peg person with a coat of clear sealant. My friend shared this tip with me and it is amazing. The sealant means that you can use markers on the doll heads, without the marker bleeding into the untreated wood and making a mess. Don't skip this step if you plan on using markers for the finer facial features on your doll.
You need to do a little prep work for this project. While the head is drying, find a picture that you want to work from. In my case, I used the Instagram image. Find a picture you love or sketch out what you want the doll to look like. Find a picture that captures all of the person's features. Do they wear glasses? What does their hairline look like? Do they have a favourite colour?
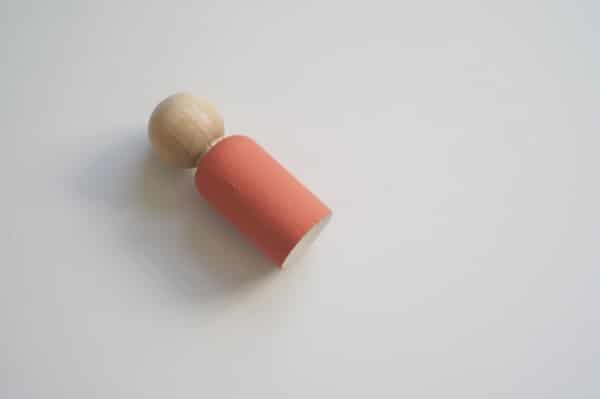
Once the doll head is dry, it is time to put the first coat of paint on the clothing. My top has polka dots over a solid base colour. So, I painted the solid colour first.
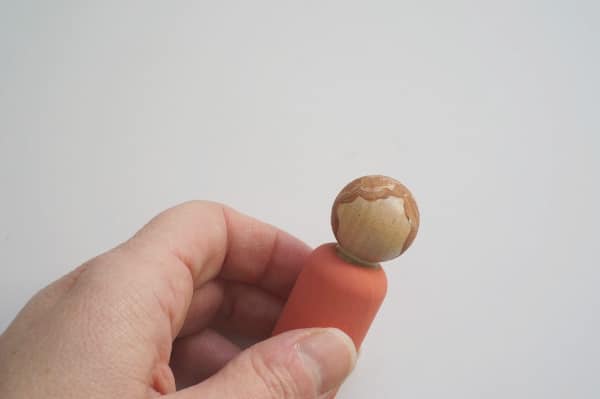
Then it was time to work on the hair. I began by drawing the hairline. For my doll, I used a combination of brown and white...can't forget the grey hair. Let the paint dry.
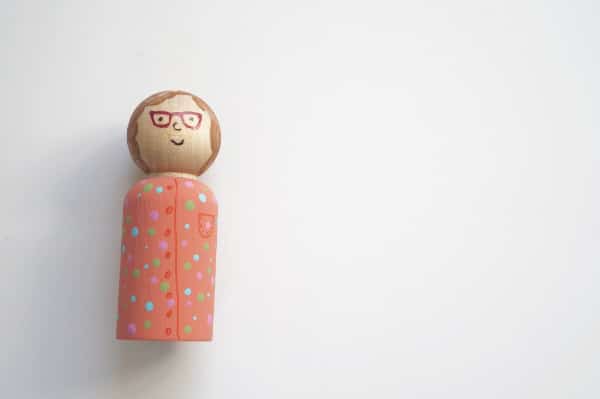
Once the hair was dry was time to work on the face and finish the shirt. Through a series of experiments, I found that glasses look best without arms. Be sure to draw dots for the eyes with a pencil before using the permanent marker. Simple faces tend to work the best. A simple smile, a little nose. Done.
For the shirt, I added a multi-coloured polka dot pattern. I also used a coordinating permanent marker to add the pocket and button details.
When I had the face drawn and the hair painted, I decided that there was something not quite right about my peg doll. My hair is a key part of who I am...I have frizzy, curly hair. The flat hair painted on the head wasn't working for me. It might work perfectly fine for you and your doll. I had to figure out how to make curly hair for a peg doll...I needed something more 3 dimensional.
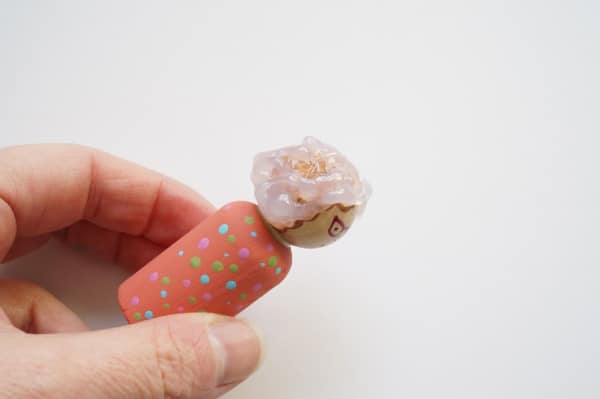
So, I used the glue gun to create the hair. For curly hair, squiggle the glue all over the hair that is painted on the head, and I used the hairline I painted on the head originally, as the guide. For straight hair, experiment with gluing long strands of glue to the head (see my daughter's peg doll).
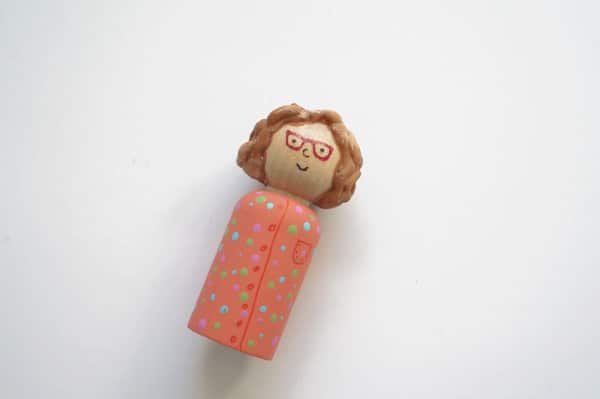
When the glue dried, I painted the glued hair.
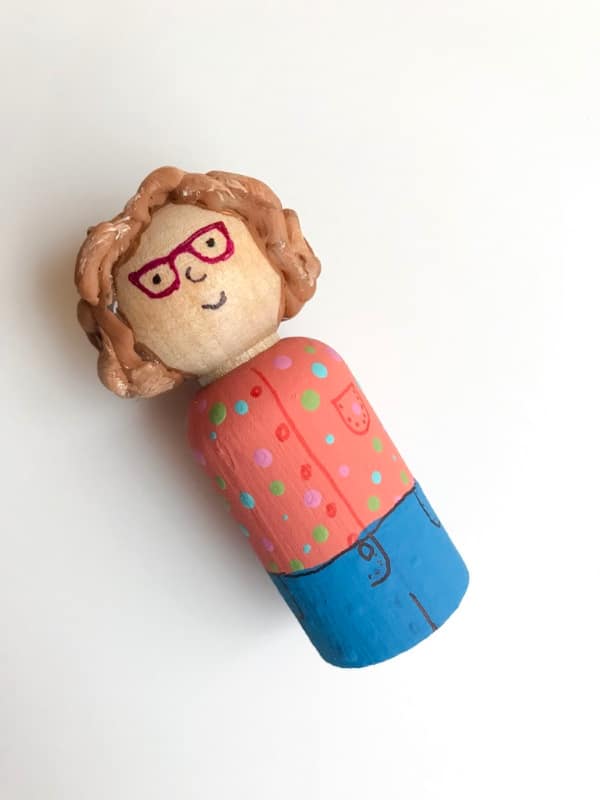
Once the hair was dried, it was time to return to the clothing. My kids thought that my doll needed pants. So, I added a pair of blue jeans. I have to say it did complete the look.
Now, that my peg "Jen" was made I set out to make the rest of my family.
For my husband's peg doll I followed the same steps. For his beard, I attempted to make a 3D beard - it didn't work. It looked kinda weird. So, I stuck with flat paint...so much better. He is wearing a favourite shirt and dark jeans.
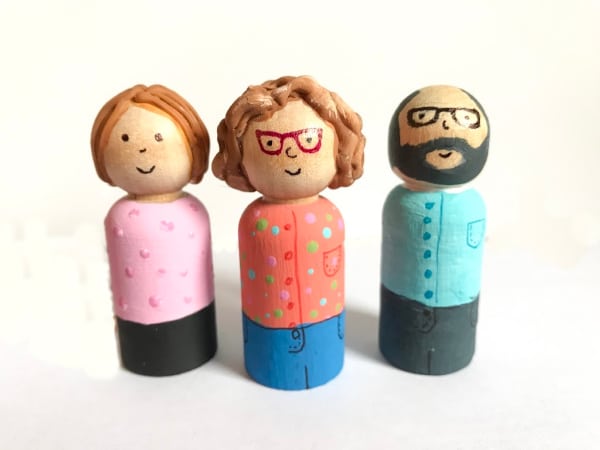
My eldest daughter's peg person was an experiment in making straight hair. Again, I used the glue gun. This time I kept the glue as straight as possible.
My youngest daughter wanted to make her own peg doll. She is still working on hers...she takes a lot of time to work on projects. Which is fine (one of the side effects of being a perfectionist). As a parent, it is important to respect our kid's needs. The doll will be done, she just needs a little more time. No worries.
Do you have a particular signature feature? Be sure to emphasize the details that make you who you are. Play up your best features and have fun.
Related Posts
Make your own felt acorns and turn them into beautiful nature inspired jewelry.
Find all sorts of ways to play with recyclables with this collection of eco-craft ideas