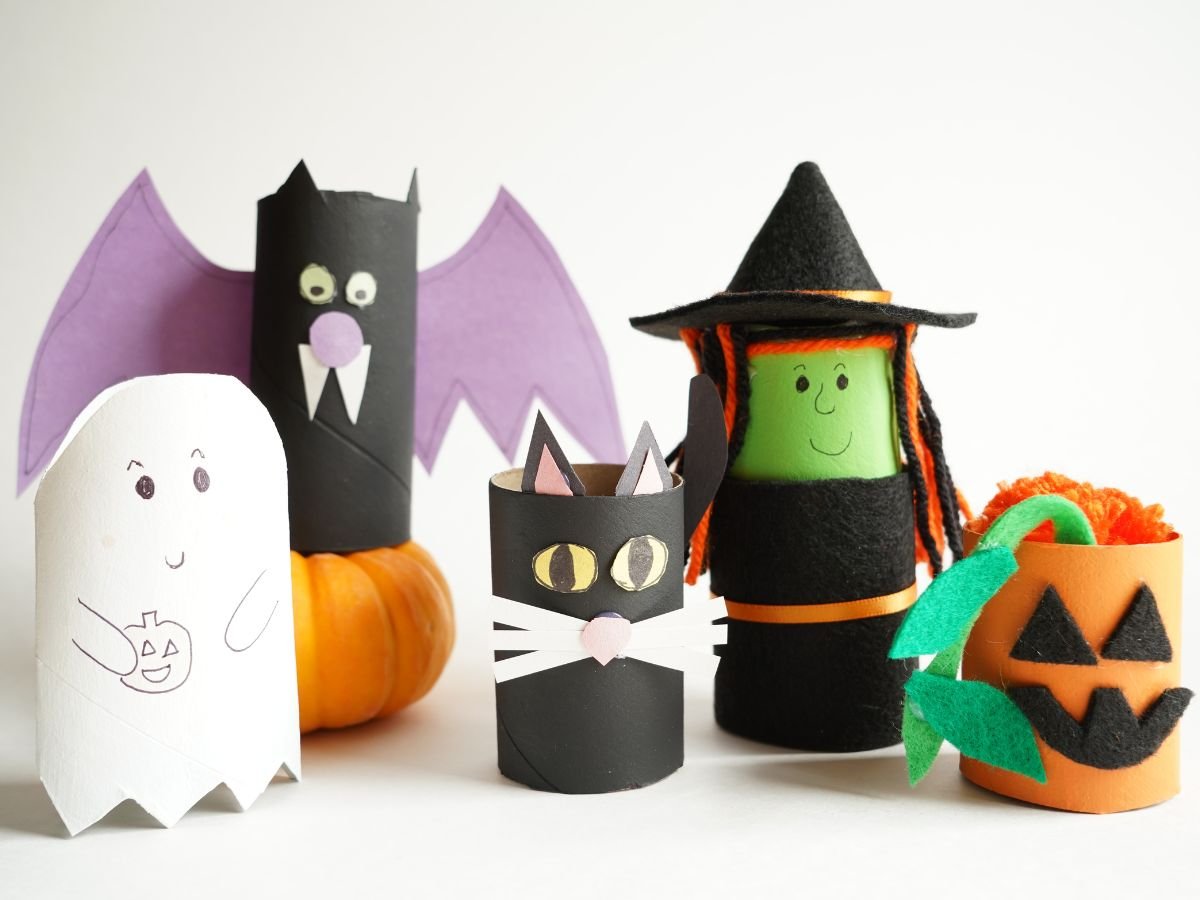
Boo! The kids are excited about Halloween, and you need a creative craft for them to make. I have the perfect Halloween craft! Gather up your old toilet paper rolls and bring to life a whole pile of Halloween toilet roll monsters. I'm sharing how to make a toilet paper roll Halloween witch, black cat, jack-o-lantern, bat, and ghost.

Disclosure: There are Amazon Affiliate links in this article which means, at no additional cost to you, we could receive compensation for our recommendations. You can read our full disclosure policy on our Disclosure Page for more details.
Jump to:
Tips for Crafting with Toilet Paper Rolls
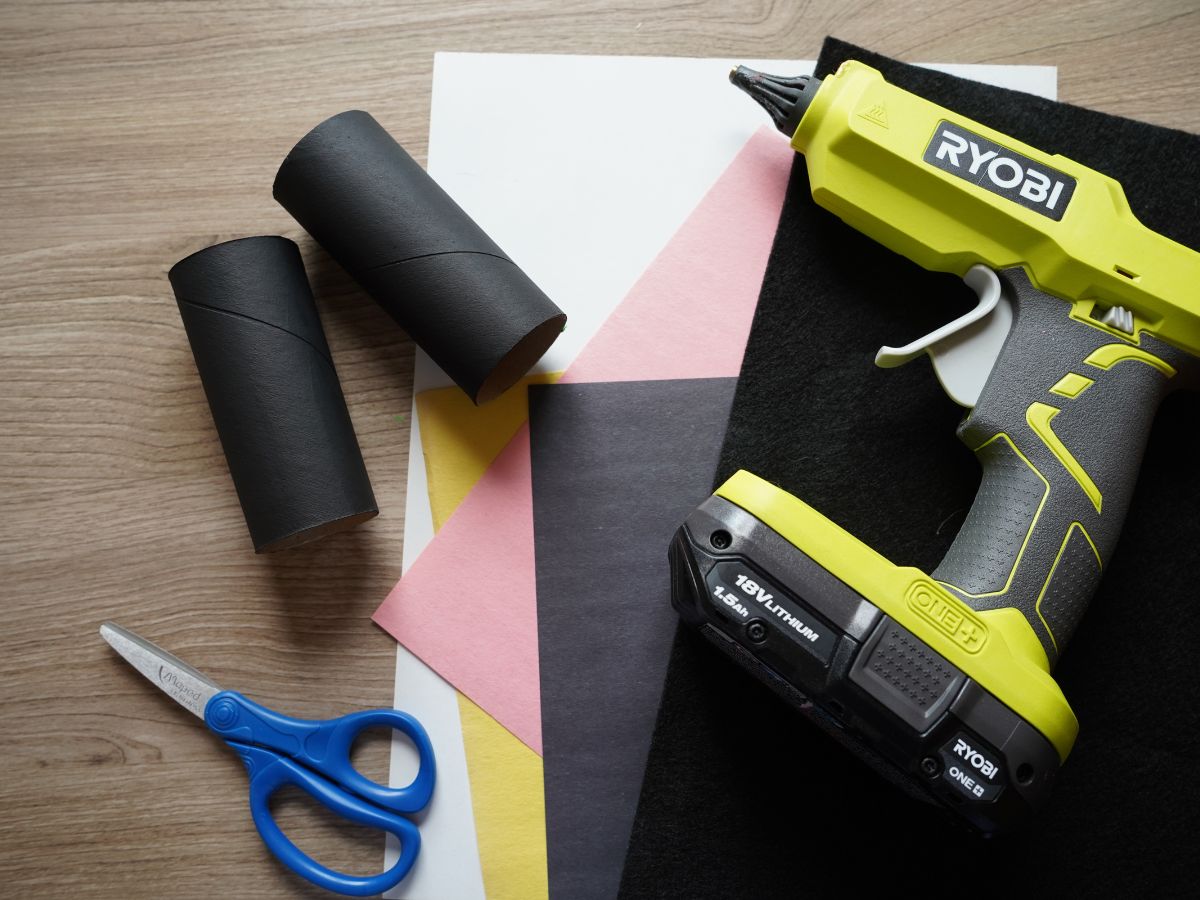
My top tip for crafting with toilet paper rolls is to collect your toilet paper rolls as soon as the roll is empty. Take the empty rolls into the craft room and store them there until we are ready to make a craft. I have a bin in my craft room where I store all of my toilet paper rolls and egg cartons. Of course, if you don't have any empty toilet paper rolls, you can purchase paper rolls from the craft store.
Halloween Toilet Paper Roll Characters
toilet paper rolls, cardboard rolls
our printable witch hat and bat wing printable template
acrylic paints - black, green, orange, white,
construction paper - yellow, black, green, white, and pink
black marker or pen
black felt sheet and green felt sheet
orange ribbon (or any scrap of ribbon)
orange yarn, black yarn
pom pom maker tool
scissors
glue gun
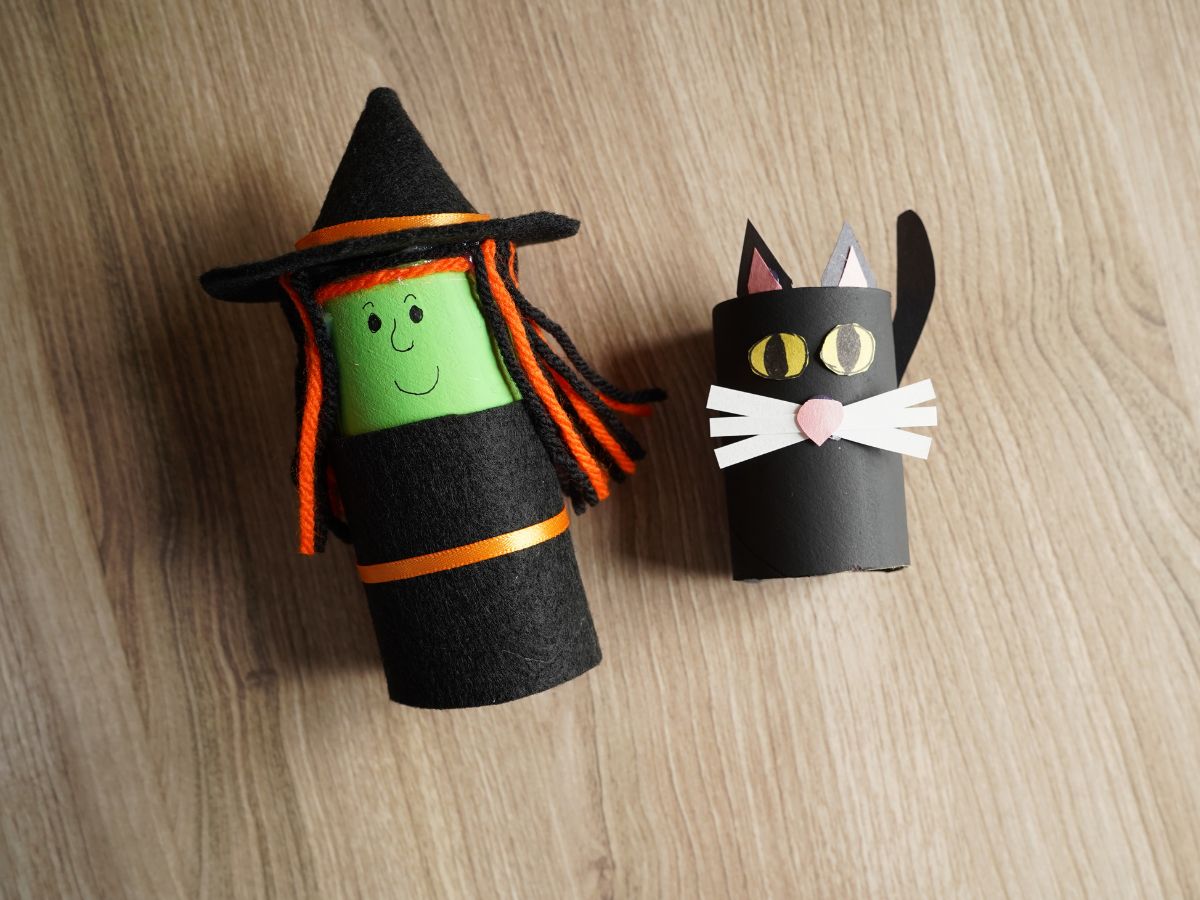
Toilet Paper Roll Witch
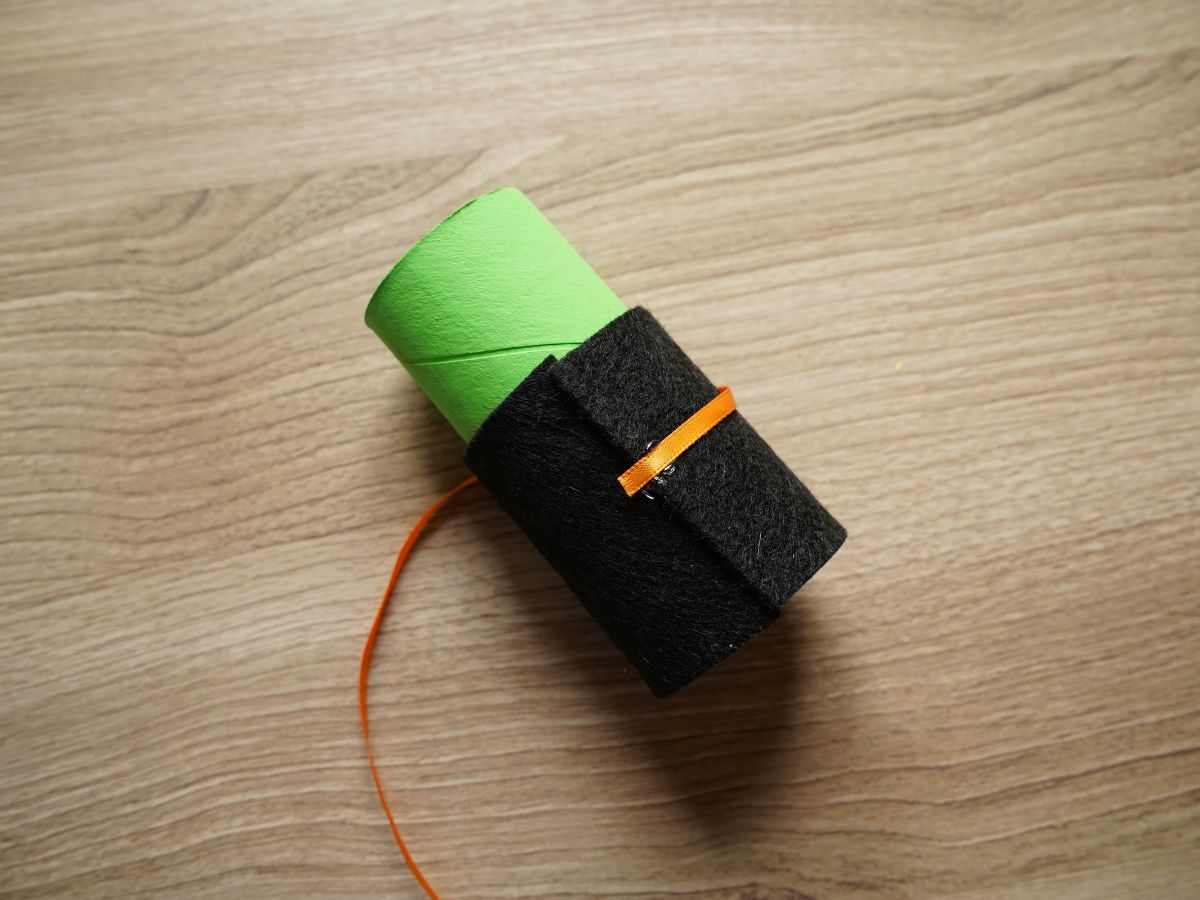
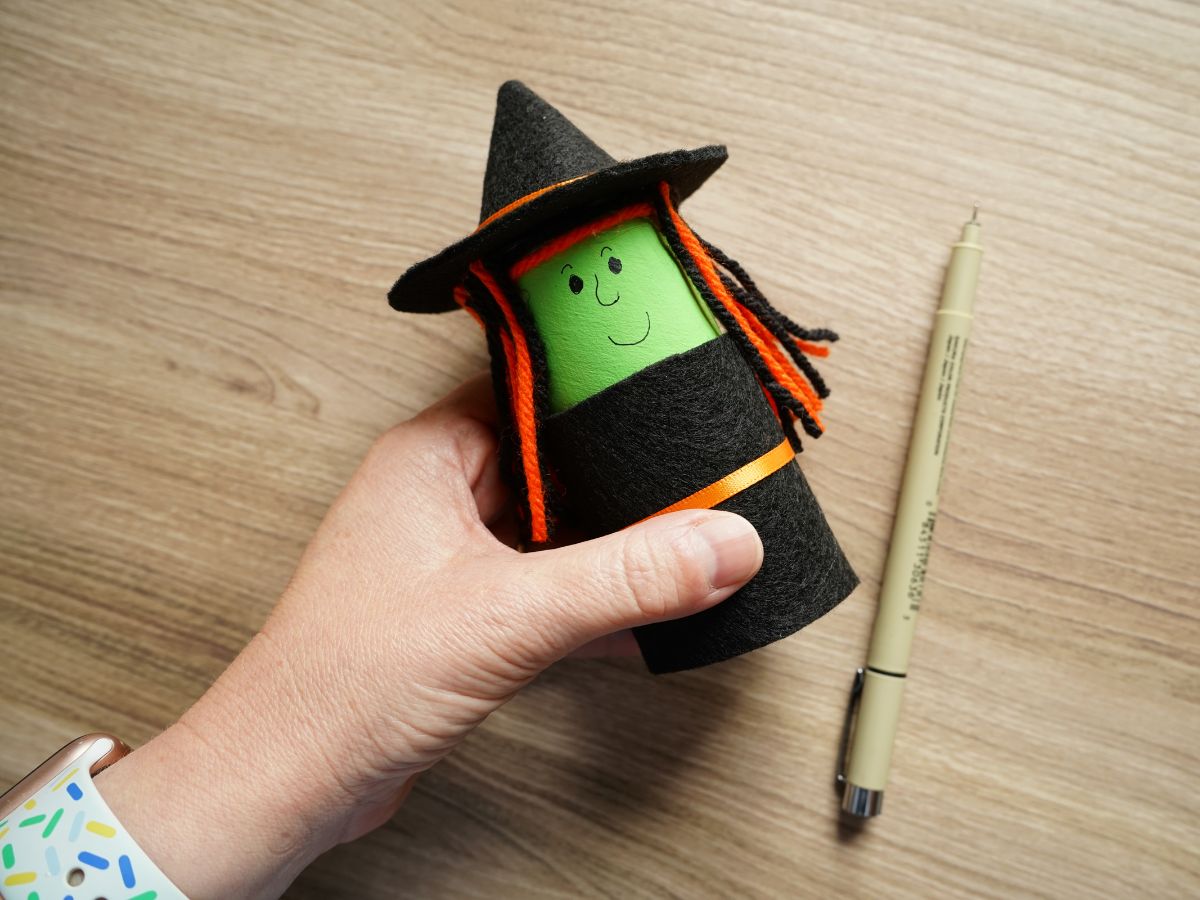
I thought I'd start with one of the most iconic Halloween characters - the wicked witch. We all know her signature green skin, so start by painting the entire toilet roll green. When the paint has dried, it is time to add all her witchy features.
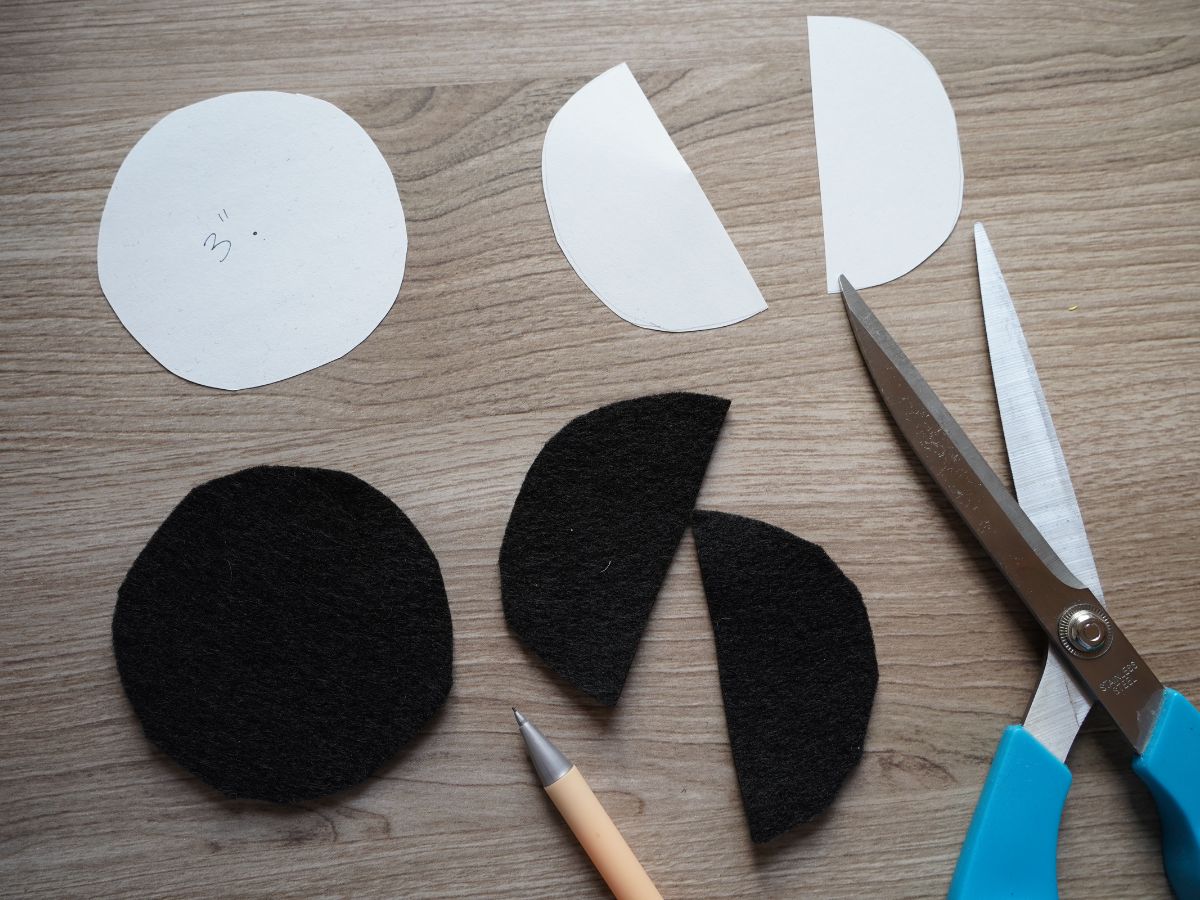
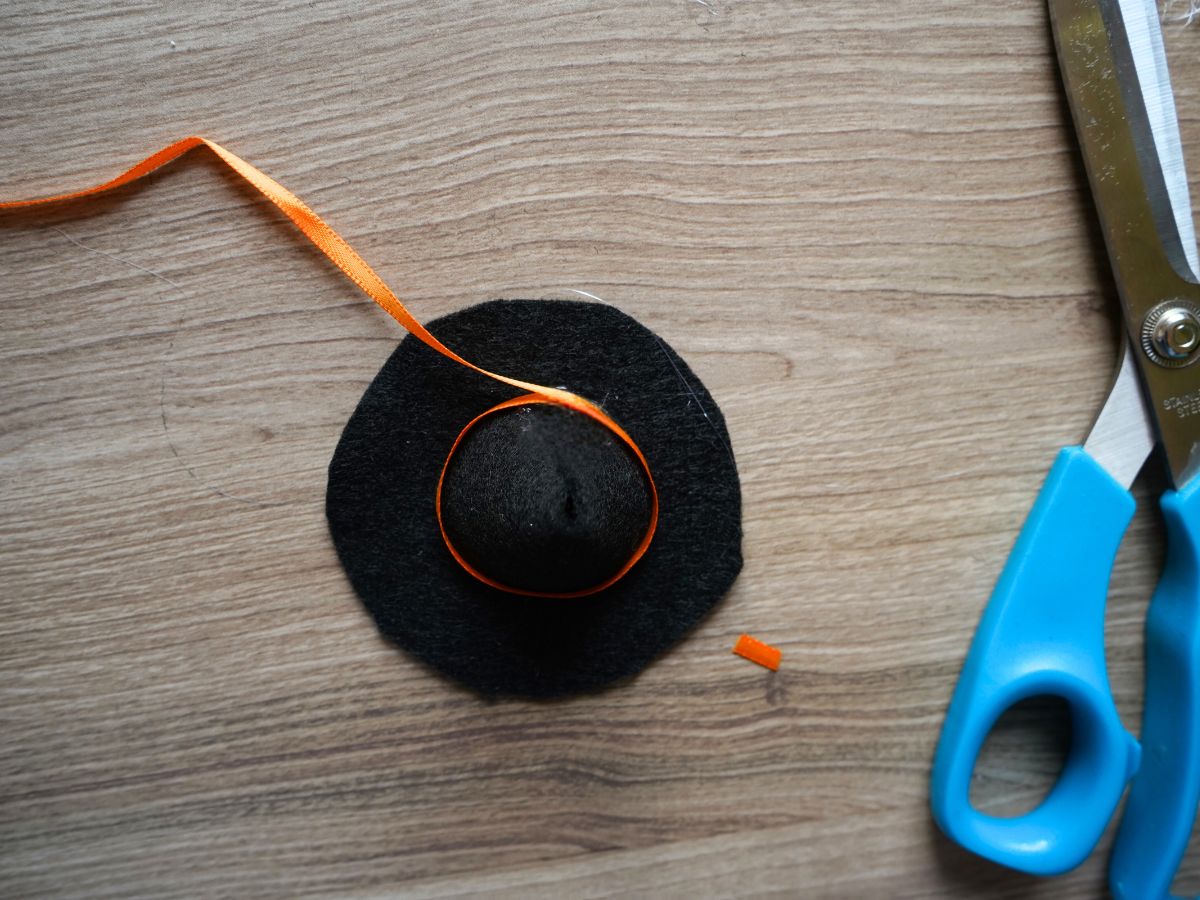
I decided to make the witch's hat and dress from black felt, but you could use black construction paper if that's what you have on hand. Print the witch hat template that I created. You will need to cut out two 3-inch circles of felt. One of the circles will be the hat's brim.
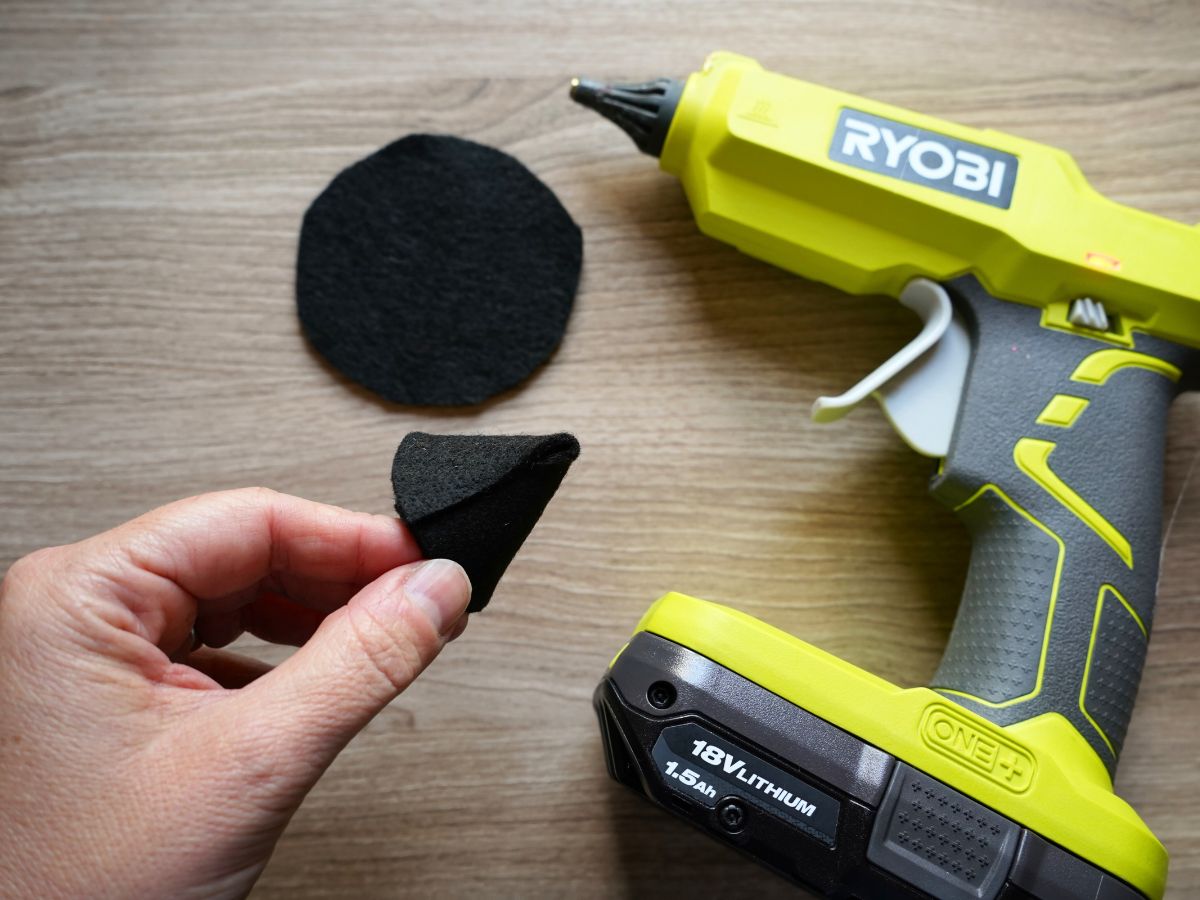
Cut the other circle in half and roll the circle to create the pointy top of the hat. Run a line of hot glue along the edge to seal the hat together. I also wrapped a strand of orange ribbon around the hat, securing it with hot glue. Set the hat aside.
Wrap a strip of black felt around the toilet paper roll, leaving about 1 ½ inch gap, for the witch's face. You can adhere the dress with a line of hot glue. I added a ribbon belt to the dress.
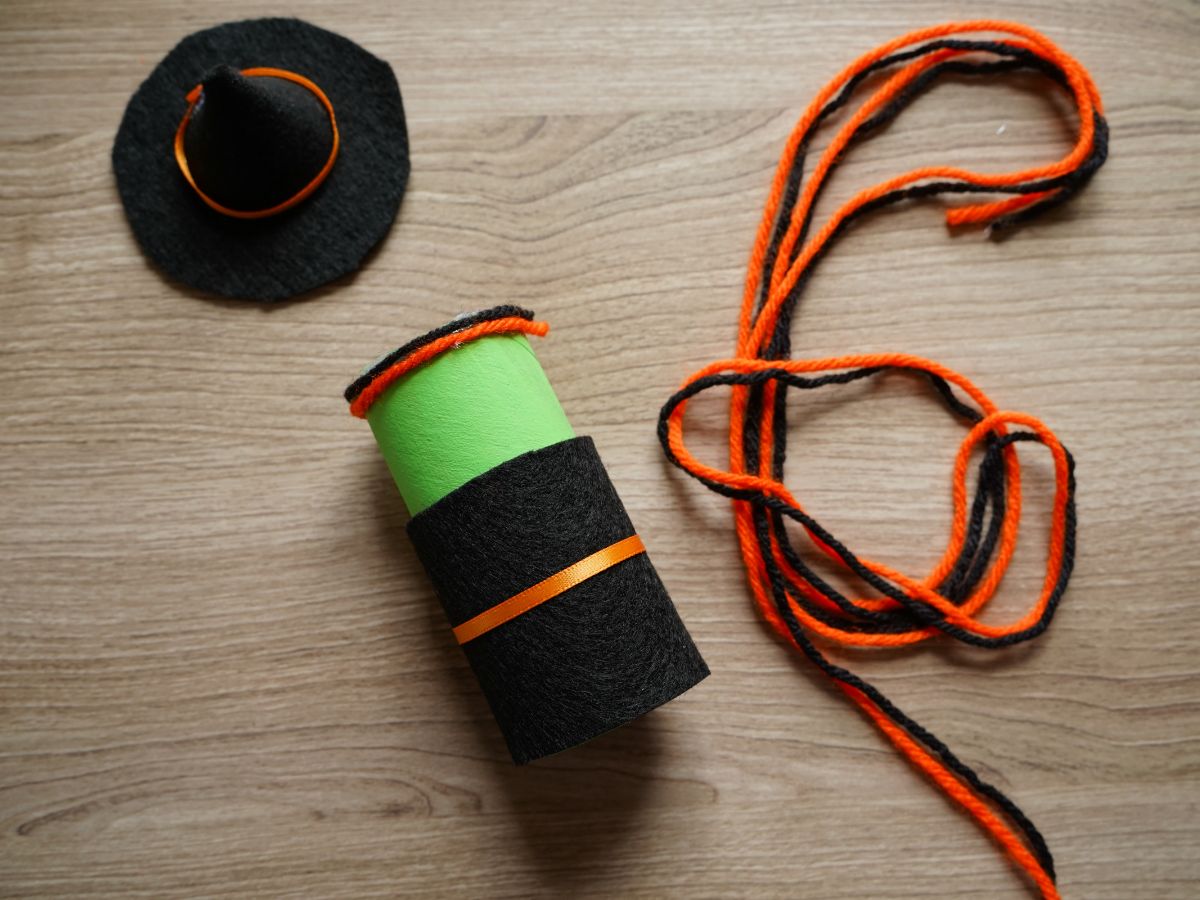
When the dress and hat are complete, it's time to work on the witch's hair. For this, I used strands of orange and black yarn. I ran a bead of hot glue for the bangs. And then I cut long lengths of yarn that I glued in place all around the head.
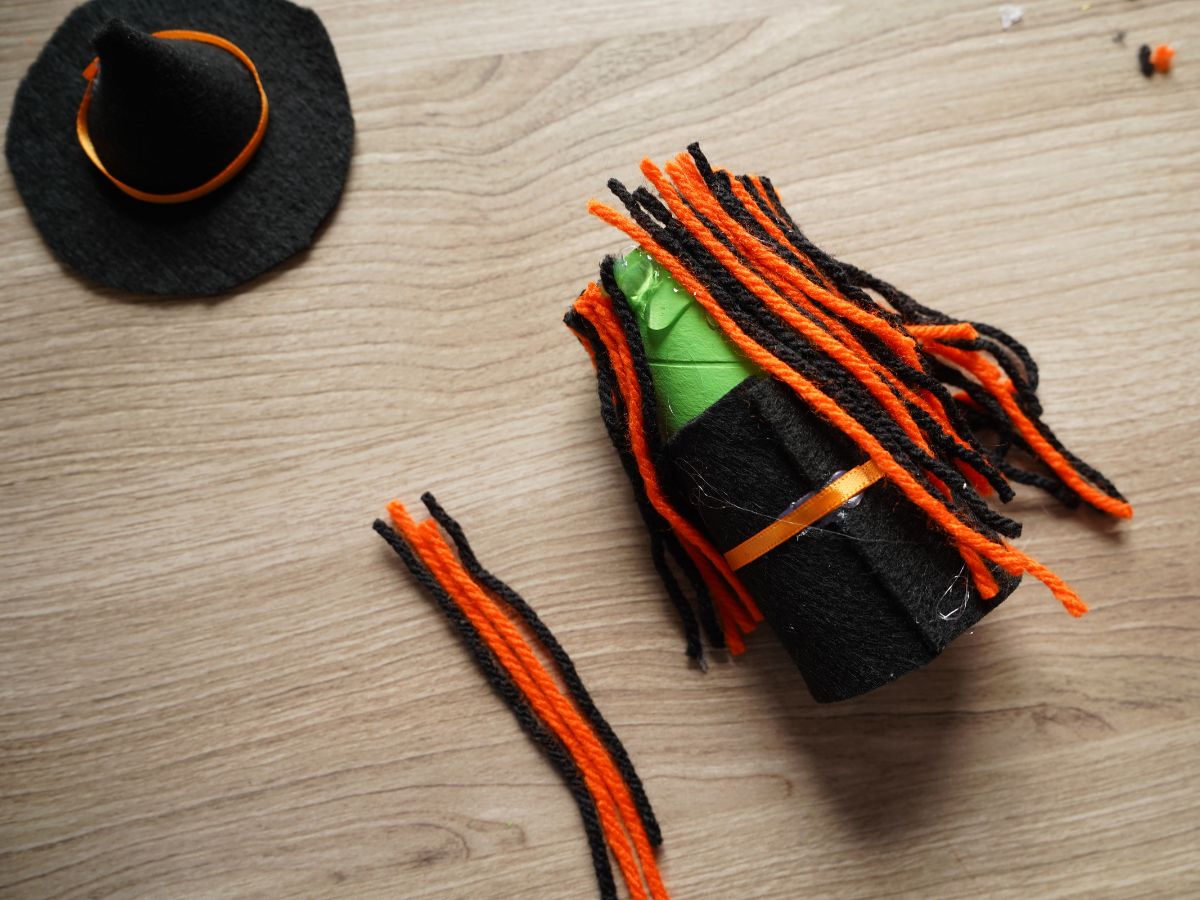
When they were all in place, I trimmed the hair at the top to be level with the top of the toilet paper roll, so the hat could sit smoothly. And, I roughly trimmed the hair's length.
When the hair was in place, it was time to add the witch's hat. I ran a line of hot glue around the top edge of the hair and pressed the hat in place. With the hat in place, I used a thin black pen to add the witch's face. I think she looks ready for a Halloween adventure.
Toilet Paper Roll Cat Craft
Now, we couldn't have a witch without her pet black cat. For the black cat, I painted the toilet roll black. When it was dry, I cut about a third of the roll off so that she is a little kitty.
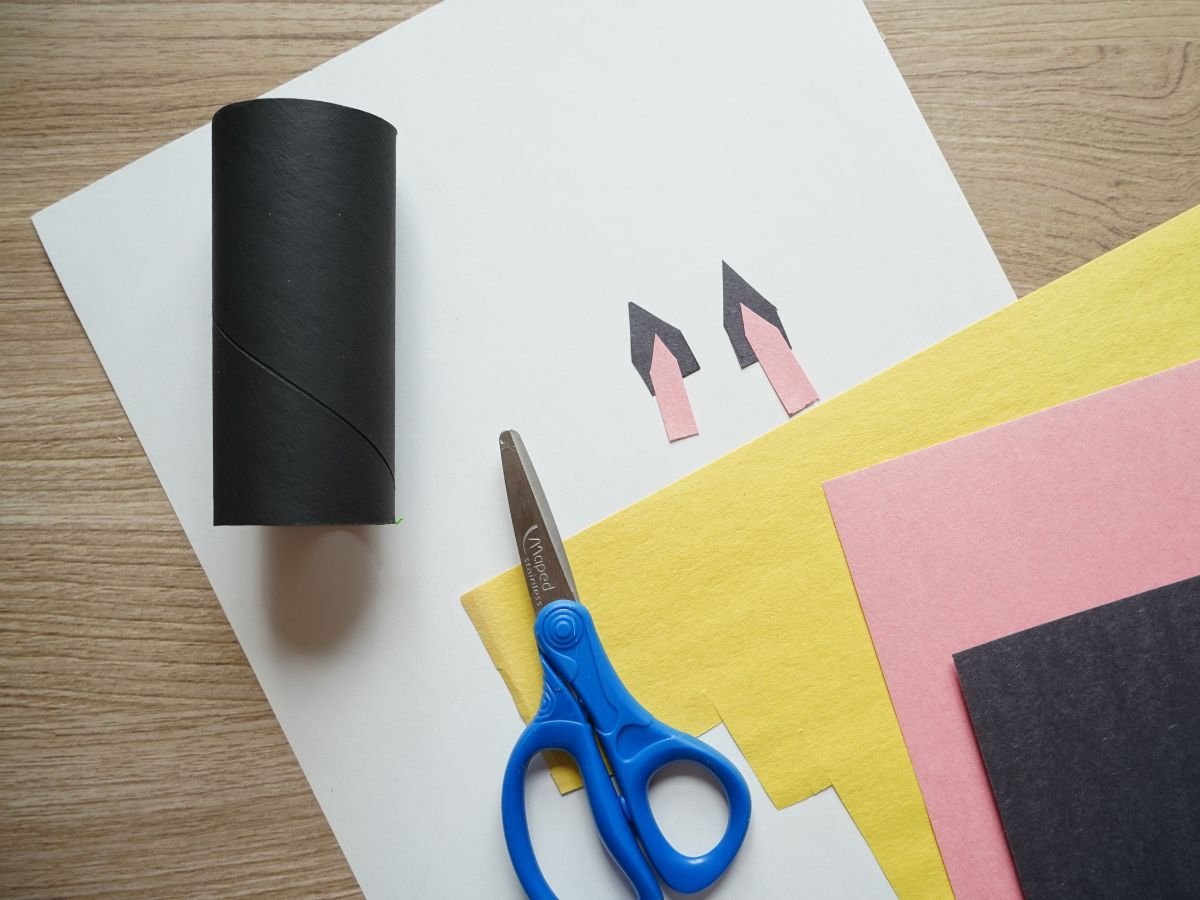
To make the cat ears, I used triangle-tipped pieces of black and pink construction paper. Don't forget the pink, inner ears. I glued the ears in place with the glue gun.
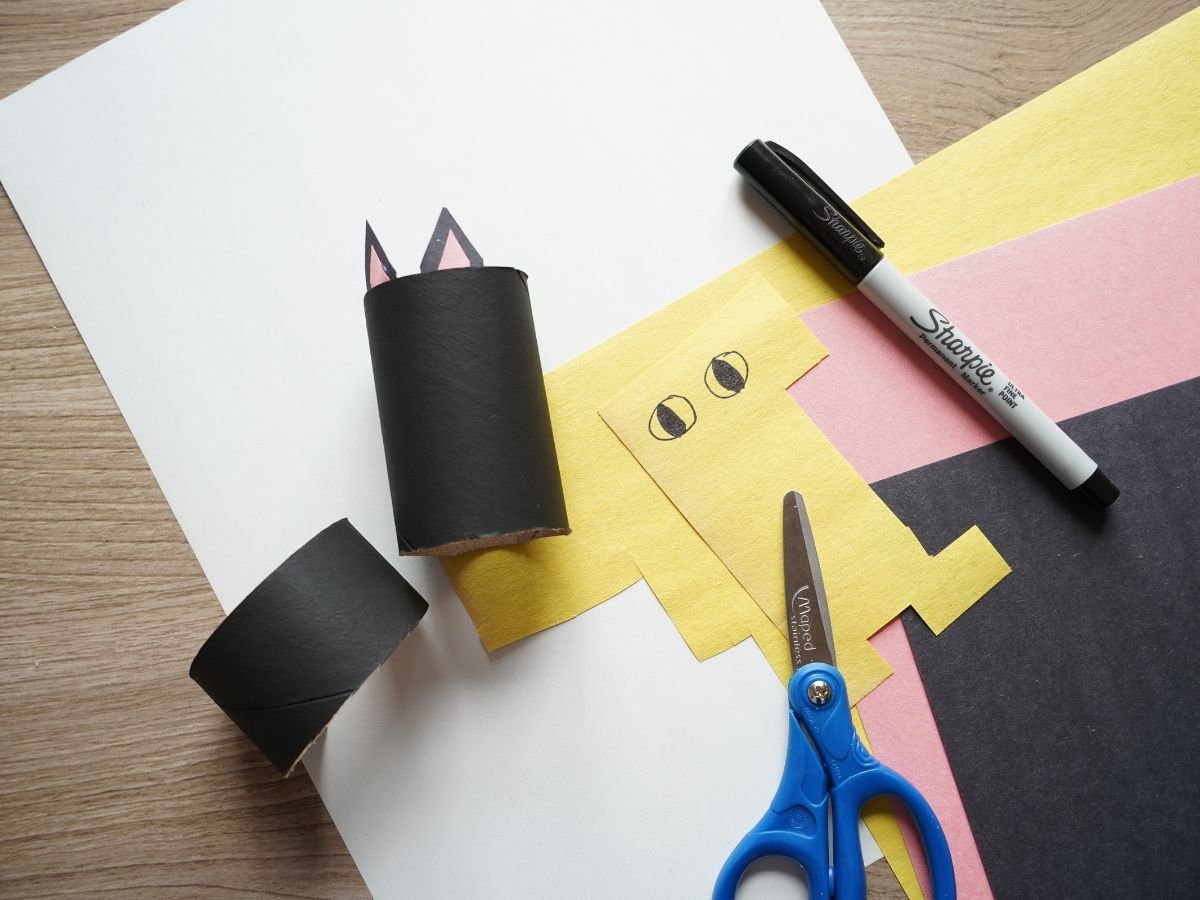
When it came time to make the cat's eyes, I decided to use yellow construction paper. Cut circles of yellow construction paper and draw on the slanted centre of the cat's eye with the black pen. I love how these eyes turned out. Glue them in place on the cat's face.
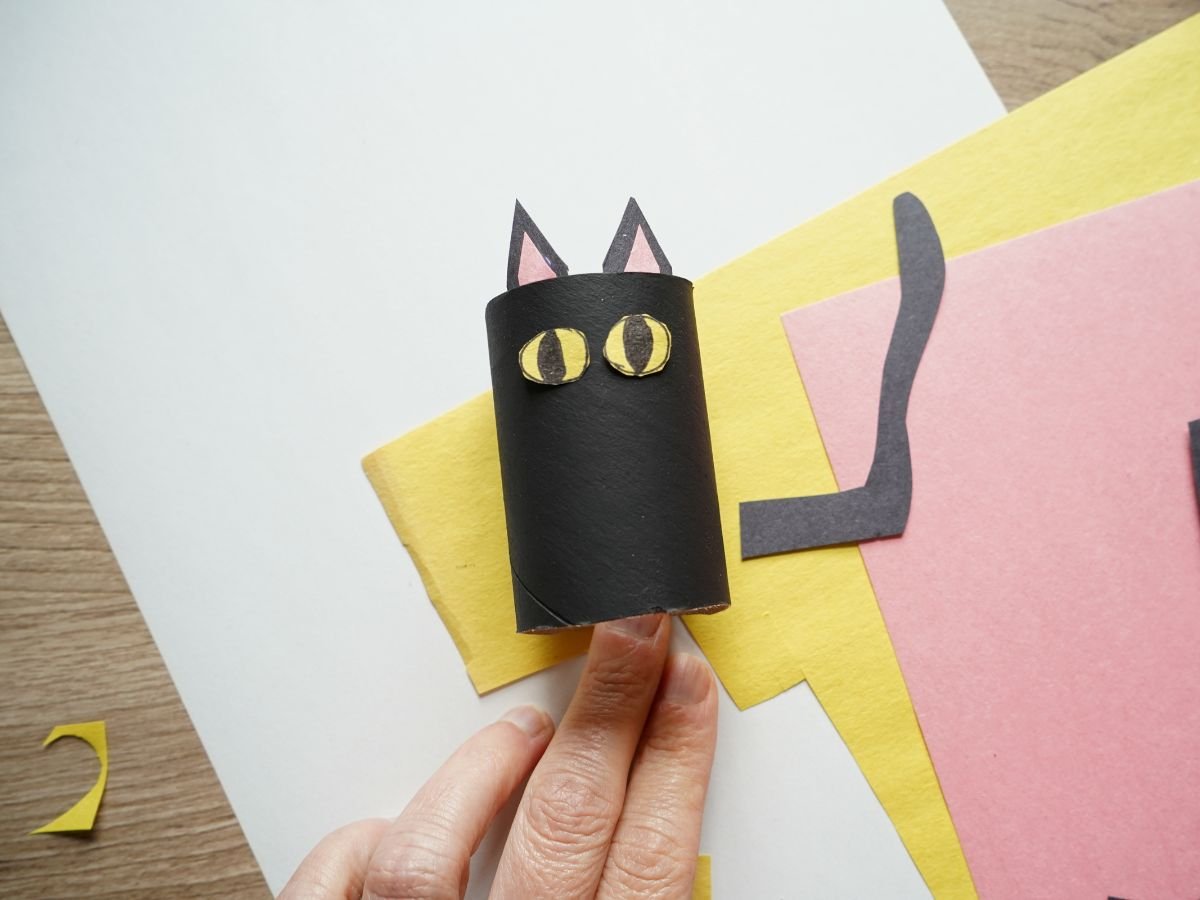
Then I added a black construction paper tail. You can make a winding tail of any shape that you like. I cut mine so that it could be seen from the front of the cat.
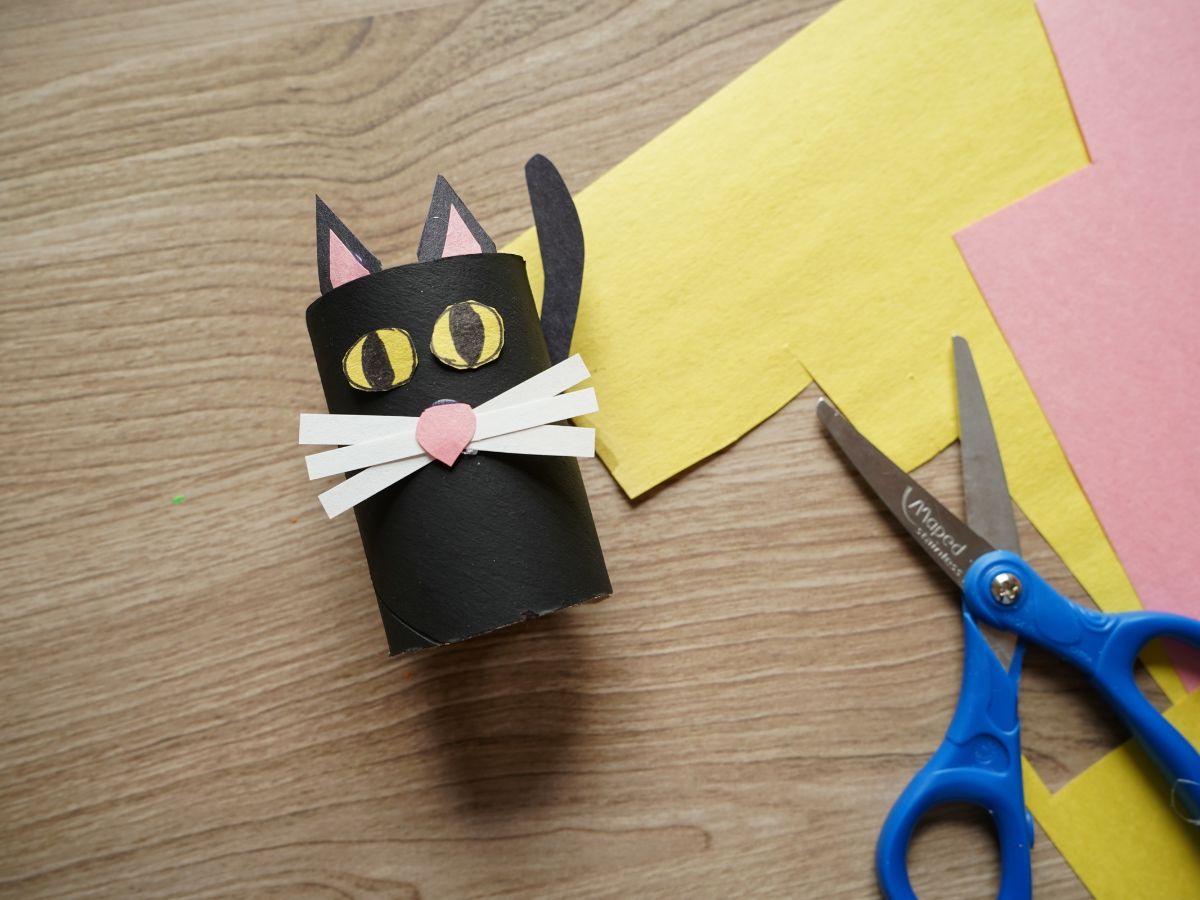
Finally, I created the cat whiskers with thin strips of white construction paper and a circle of pink for the cat's nose. All glued in place. What a pretty kitty.
Halloween Bat Toilet Paper Roll Craft
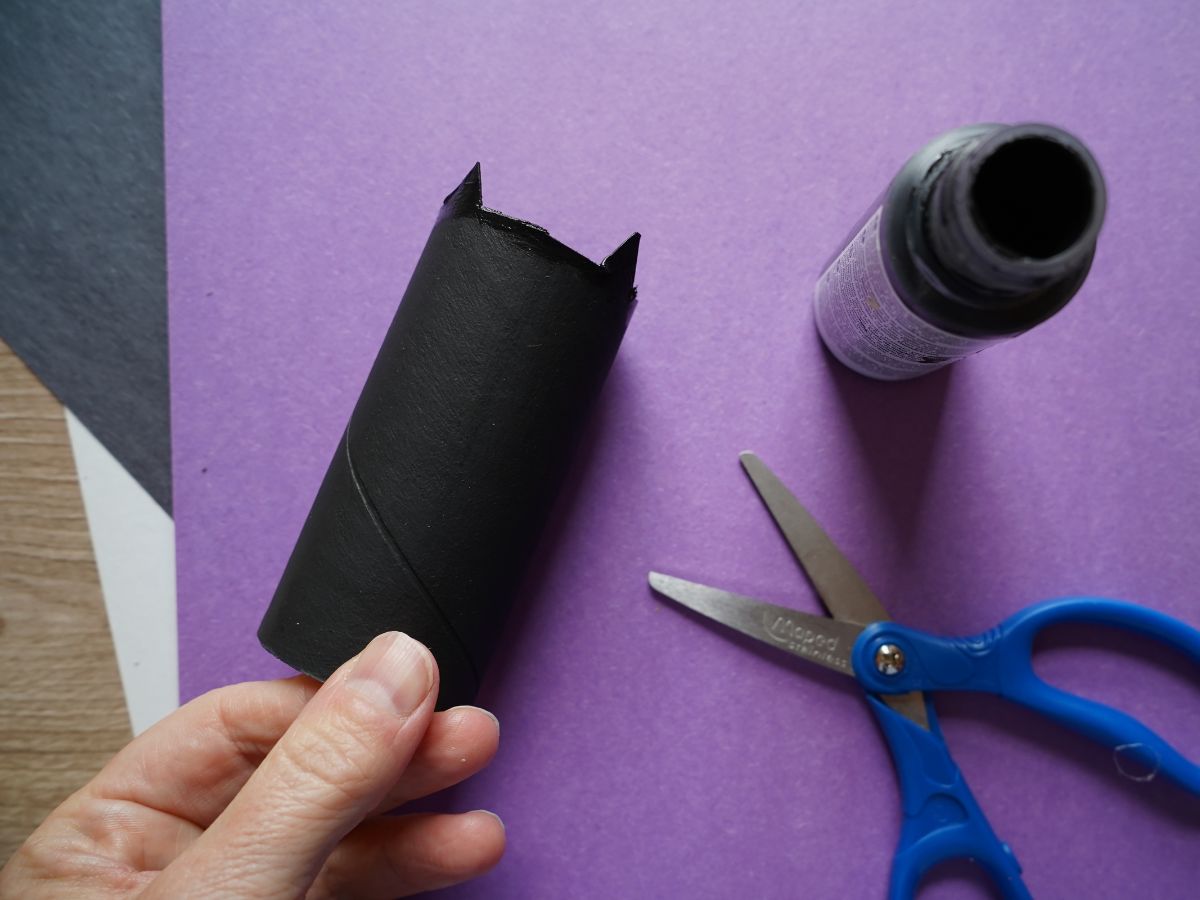
For the Halloween bat, I started by painting the toilet roll black. Then, when the paint dried, I cut the bat ears out of the top of the toilet paper roll. I trimmed two pointy bat ears. I painted the top edge of the ears and all around the inside of the toilet paper roll.
For the bat wings, you can use the printable template I created. Cut out the bat wings and then trace them onto a sheet of construction paper. I decided to make my bat wings purple. What color will you make your bat wings?
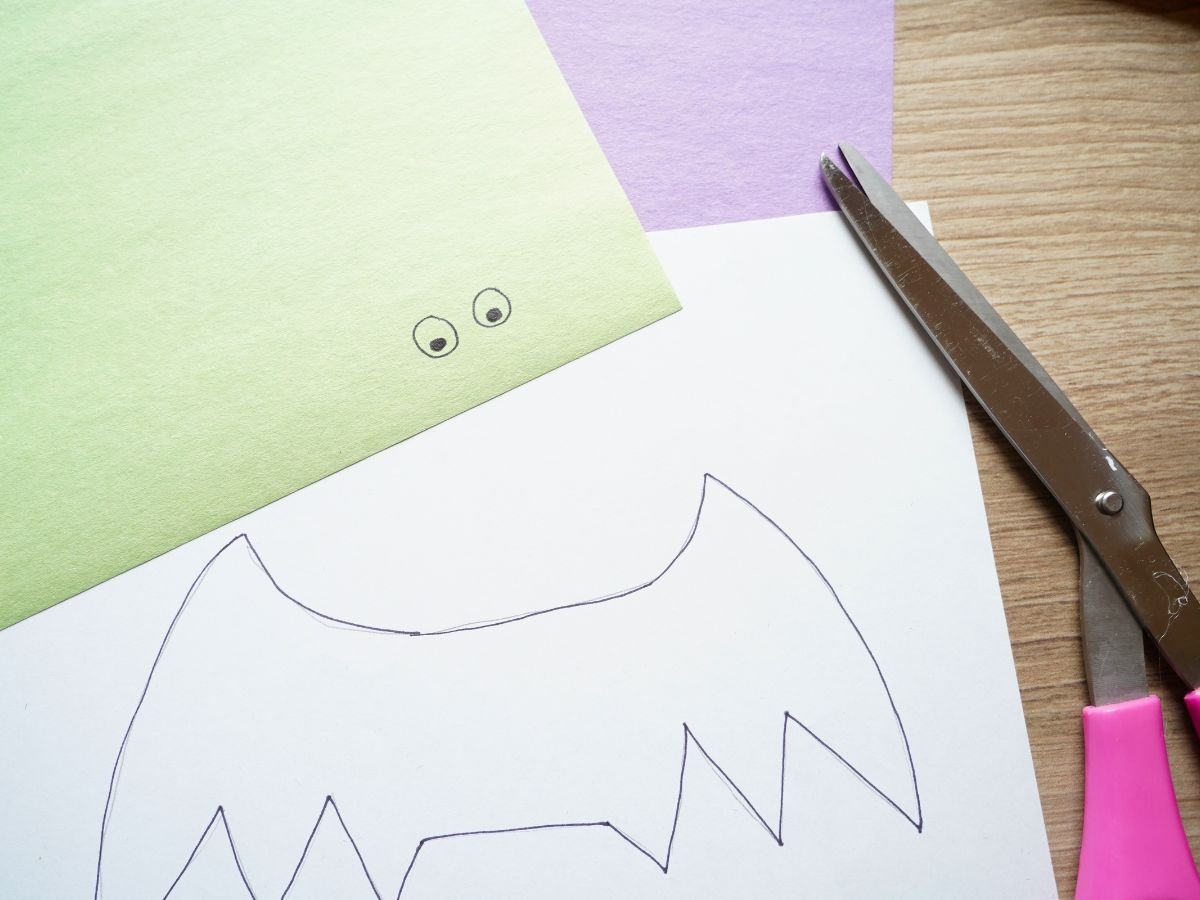
I then cut the bat's eyes from green construction paper and the bat's pointy fangs from white construction paper. Use the hot glue to adhere the eyes, teeth, and nose to the bat's face. I then ran a line of hot glue along the middle of the bat wings to adhere them to the bat body.

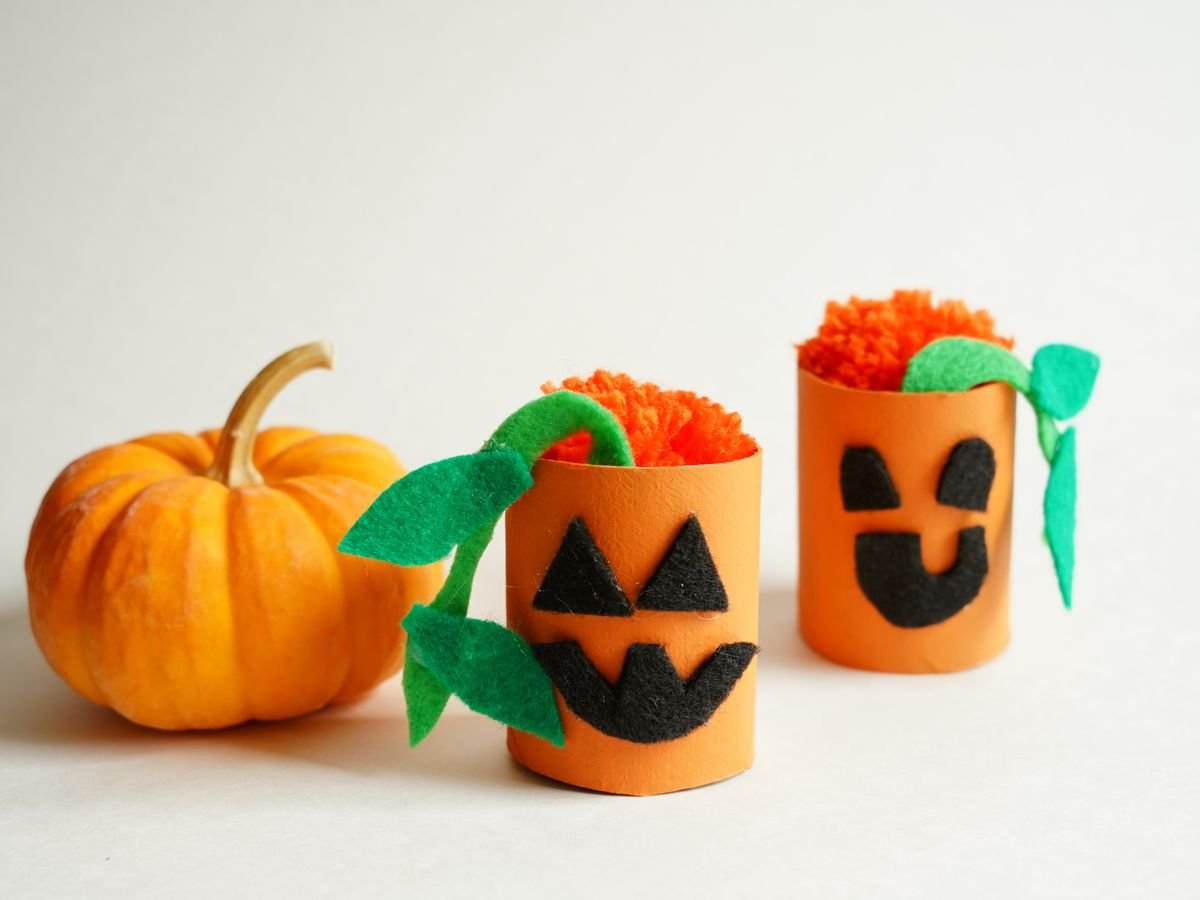
Toilet Paper Roll Pumpkins
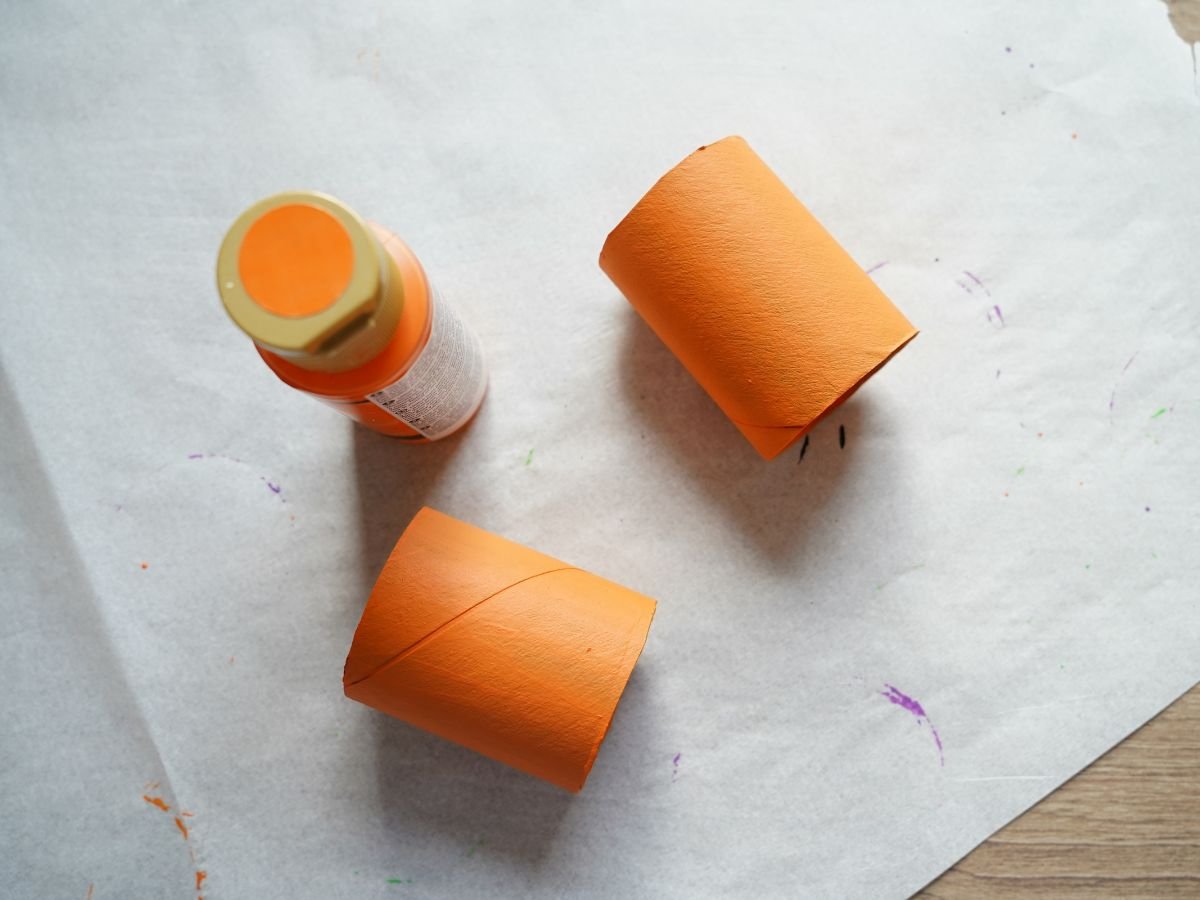
To make the toilet roll pumpkins, I started by painting a few coats of orange paint on the toilet roll. I needed a few coats to get the color and coverage that I wanted. When the rolls were painted, I cut the rolls in half and then painted inside the rolls, too.
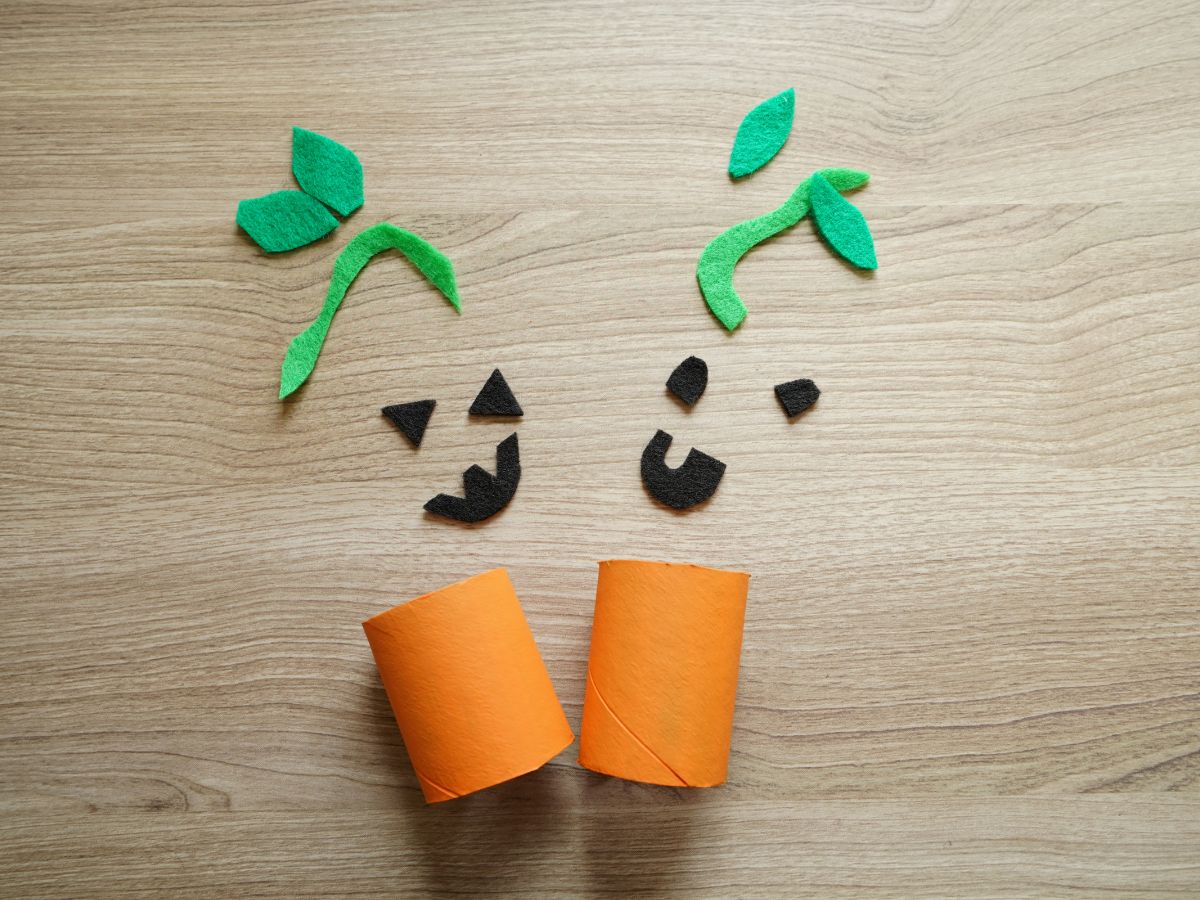
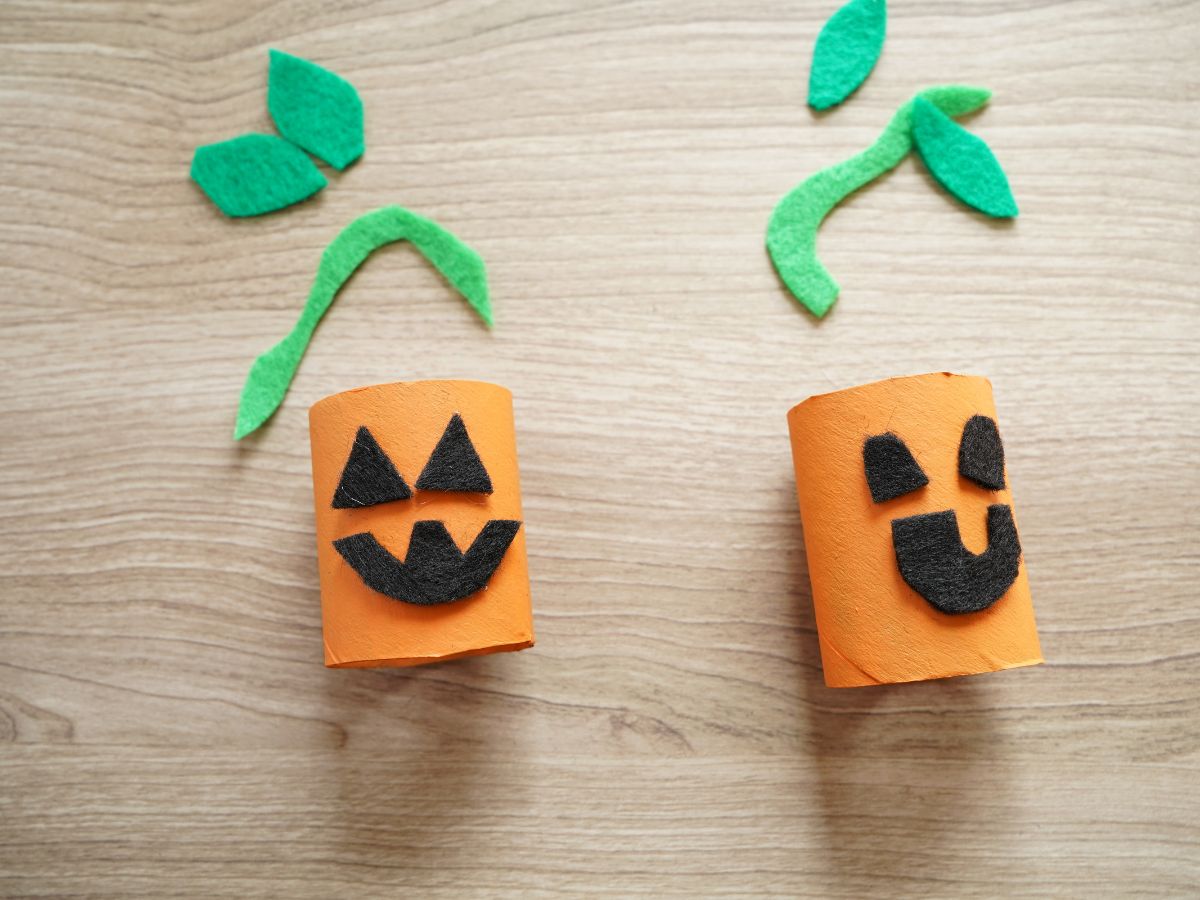
While the paint dried on the pumpkins, I cut all the jack-o-lantern face pieces from black felt. Again, you could use black construction paper for this one. I like the dimension that the felt brought to the face. Cut out whatever face you like for your pumpkin. Use the hot glue gun to adhere the pieces to the face of the jack-o-lantern.
Then, I cut the top of the pumpkin - the vine and leaves - from green felt sheets. I used the a dollop of glue to attach the leaves to the vine and then to stick the vine into the top of the jack-o-lantern.
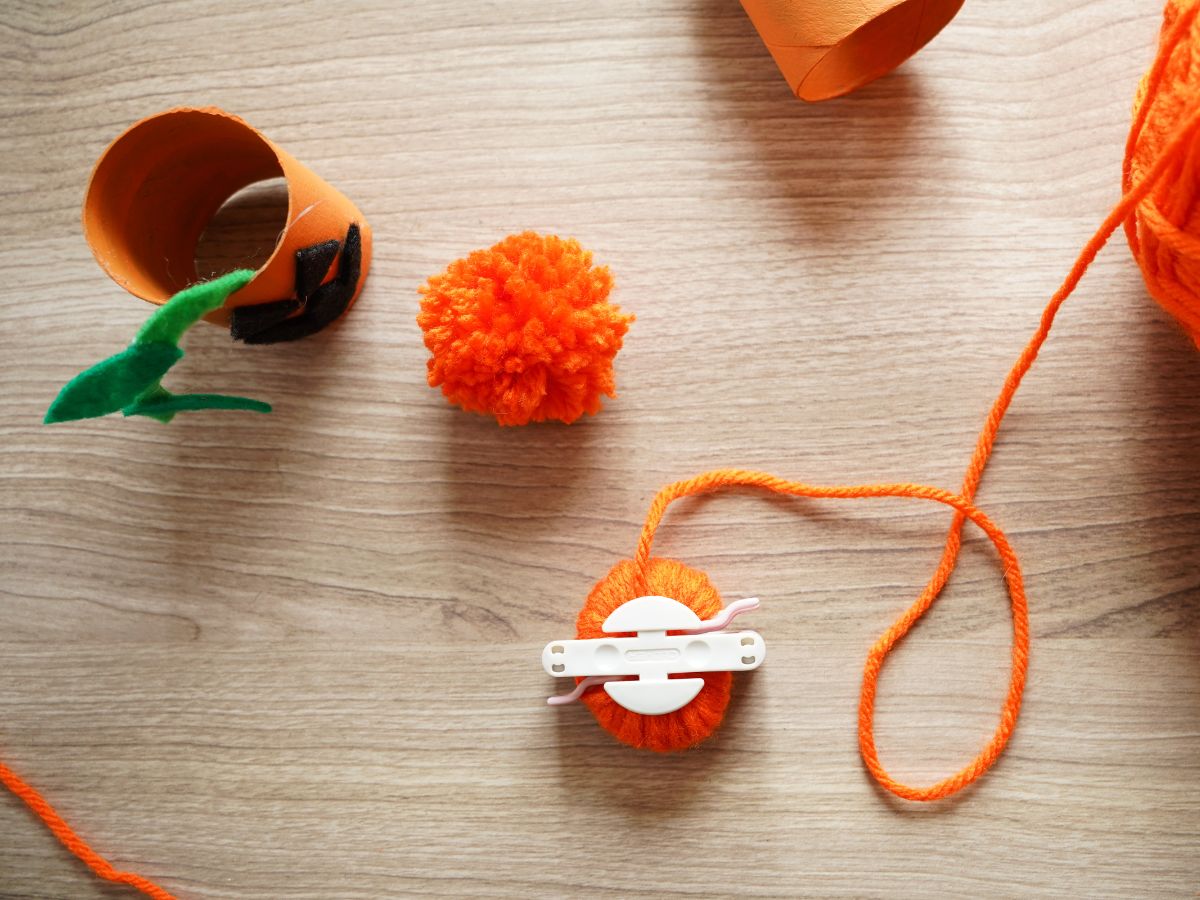
You could stop here, and the little pumpkin would be just fine, but I thought it needed something a little more. I made an orange pom pom, using the pom pom making technique I've shared before. I then ran a line of hot glue around the inside of the toilet roll and popped the pom pom inside. It was struck in place and made the top of the toilet roll jack-o-lantern look more finished.
Toilet Paper Roll Ghosts
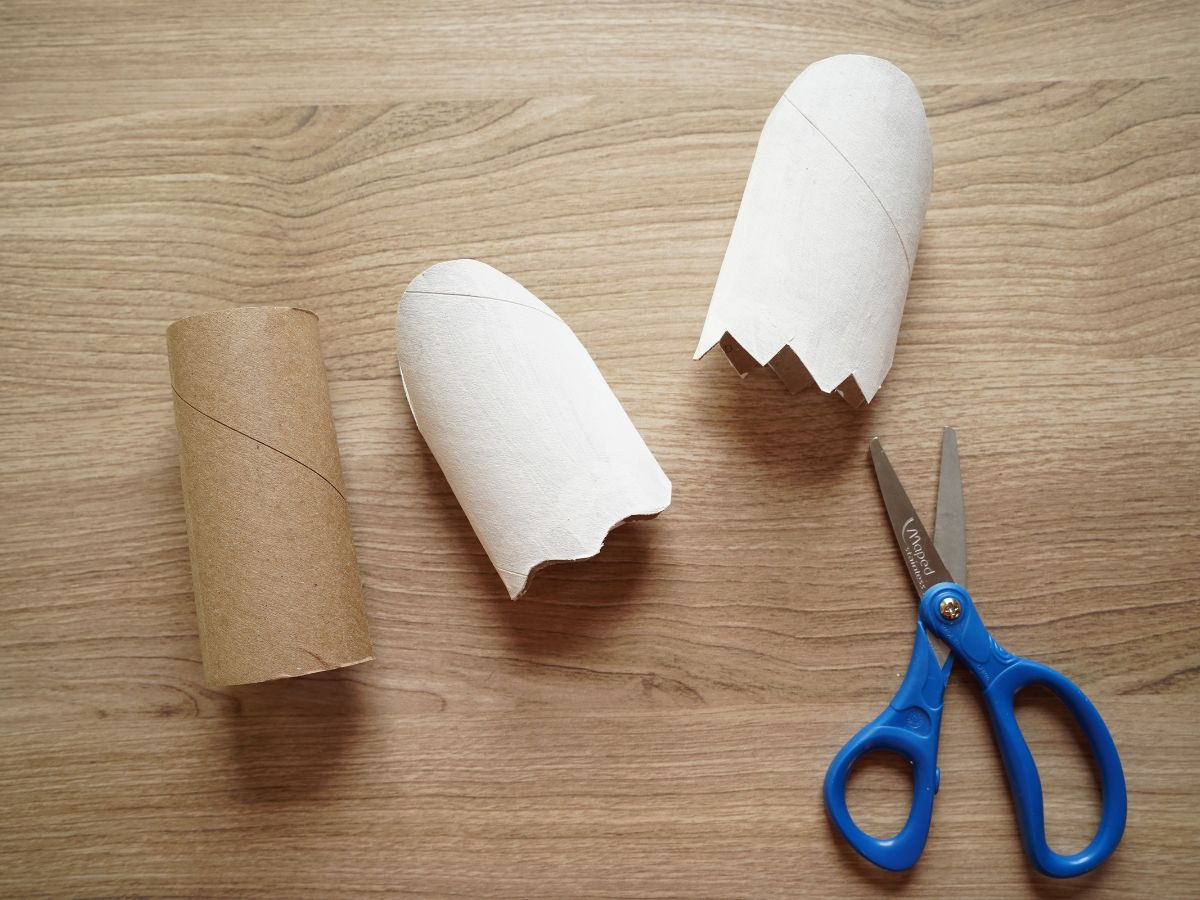
Start by painting the toilet roll white - inside and outside. Then trim the top paper roll, to make the head of the ghost. And, trim the bottom edge of the roll to make the bottom of the ghost. I like the wavy bottom edge. Now, paint the edges white.
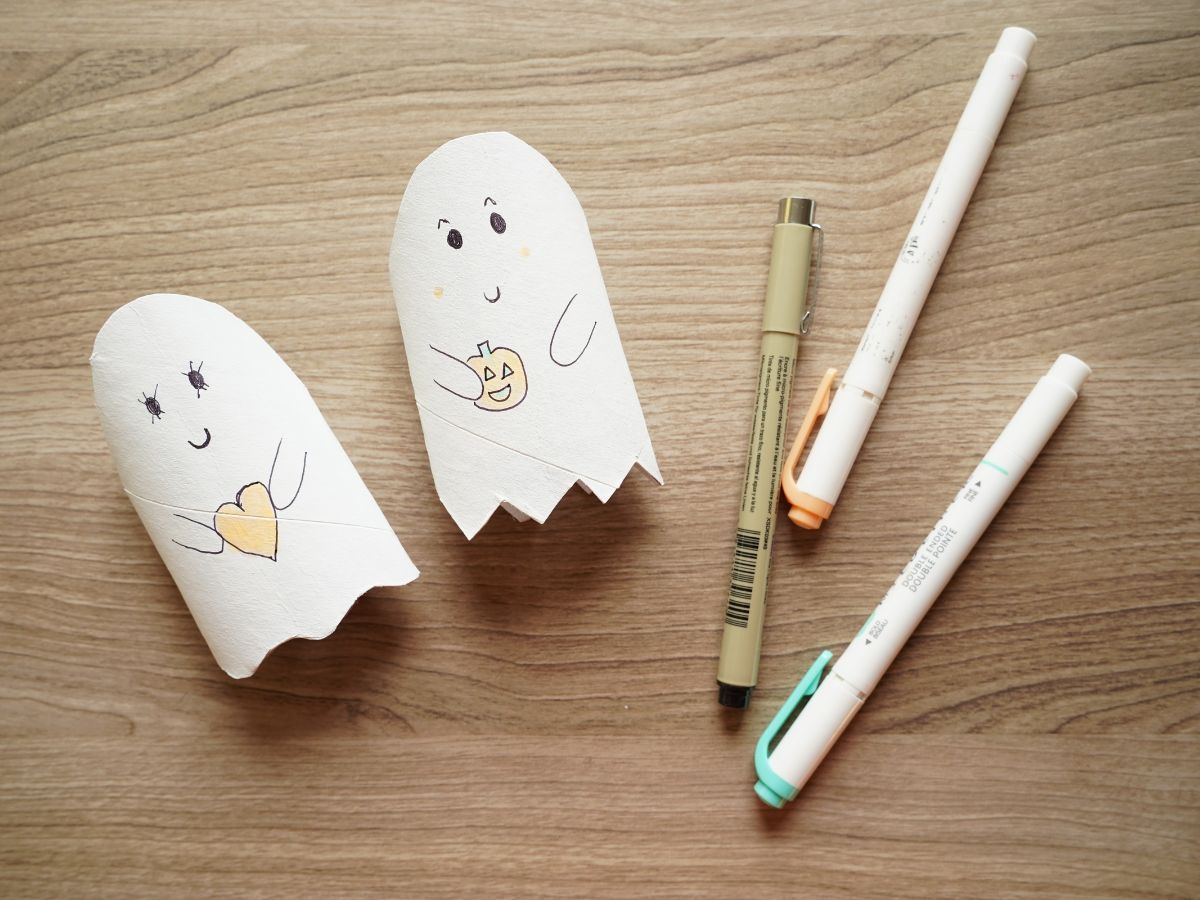
Your little ghost is ready for his or her personality. I added some little arms on mine, drawn on with a thin black pen. I used the pen to draw on the face. Then I used highlighters to color any cheeks or the little pumpkin the ghost is carrying. What will your ghost's personality be? Maybe they're holding a pumpkin spice latte?!
What to do with your Halloween toilet paper roll characters?
Well, the obvious answer is that the kids can play with the characters. I know that my kids loved playing with little people and would love to introduce these Halloween creatures to their other toys. You can also add these to your Halloween decor. Hang your bat and ghosts around the house. Add the witch and her cat to your mantle. Or, create your own little Halloween scene with our crafty Halloween haunted house.
Just have fun! This is a great after-school craft or classroom Halloween craft project. Let the kids get creative...or, have fun making these yourself. I know I had fun making my collection.
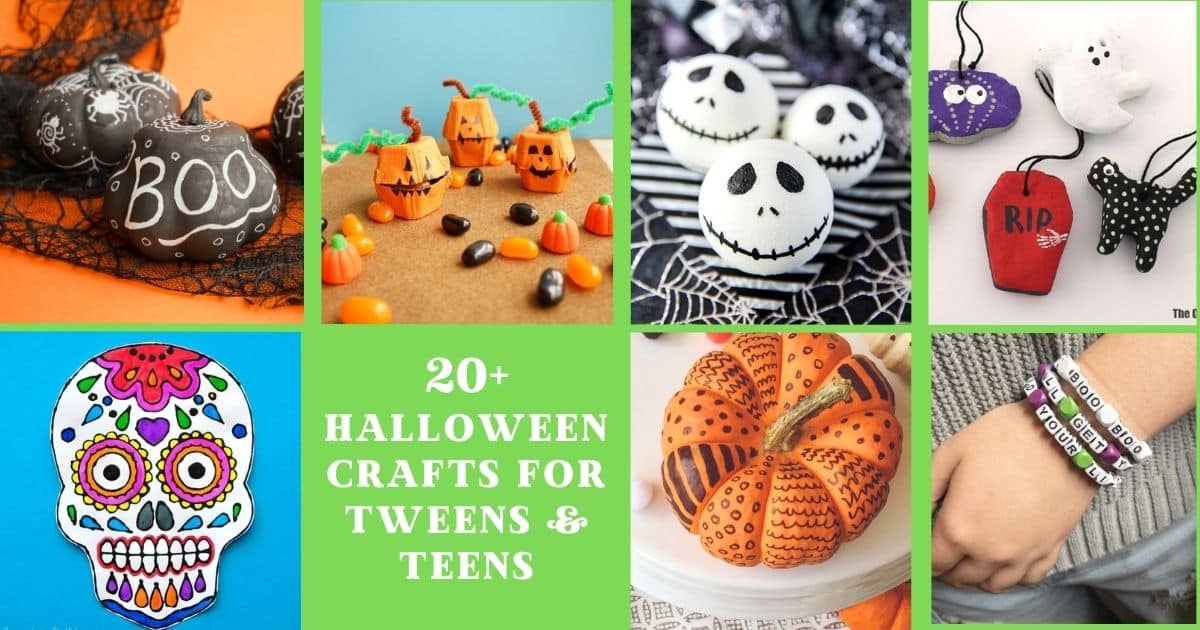
Check out all of the cool Halloween crafts for older kids to make
Make sure you are following along...
FOLLOW KITCHEN COUNTER CHRONICLES ON
SUBSCRIBE TO KITCHEN COUNTER CHRONICLES TO HAVE OUR DELICIOUS RECIPES, FUN CRAFTS & ACTIVITIES DELIVERED DIRECTLY TO YOUR INBOX.