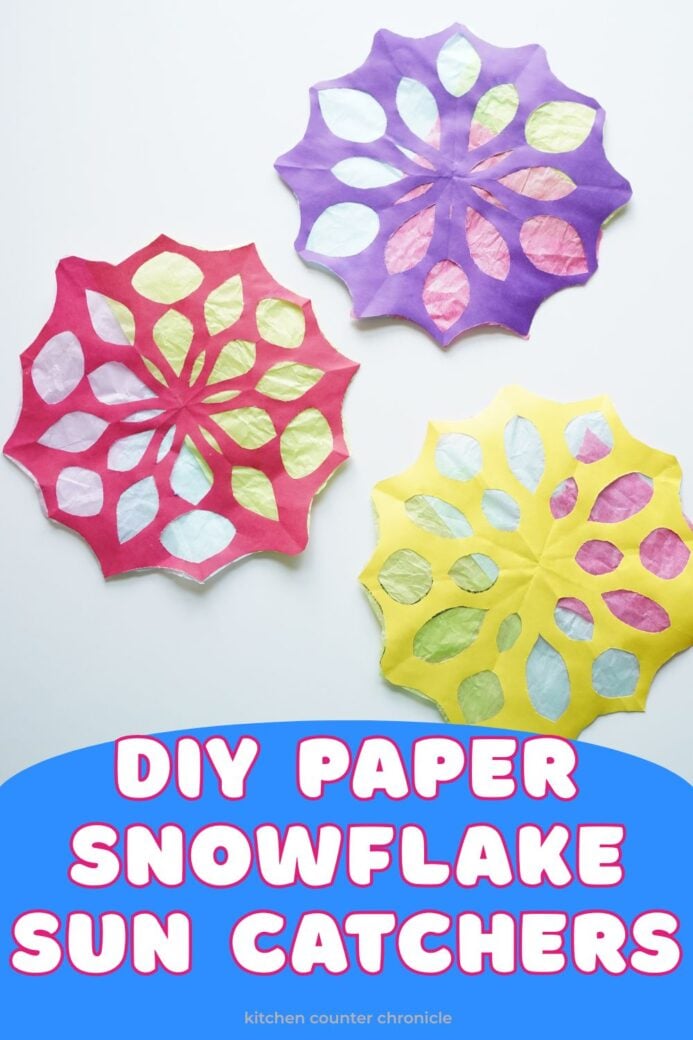
Do the gloomy days of winter have you dreaming of the bright and sunny days of spring? Do you wish you could find a way to capture the sunlight? Well, I've figured out how to do just that by making these beautiful winter snowflake sun catchers. This simple winter craft is fun for tweens and adults to make.
Disclosure: There are Amazon Affiliate links in this article which means, at no additional cost to you, we could receive compensation for our recommendations. You can read our full disclosure policy on our Disclosure Page for more details.
Have you ever made a paper snowflake? A few years ago, I shared a simple step-by-step tutorial for making paper snowflakes. At the time, my daughters and I made a flurry of paper snowflakes that filled our walls and our windows. I still have those brightly colored snowflakes packed away, and I bring them out every winter. This year, I wanted to turn them into paper snowflake suncatchers.
DIY Winter Paper Snowflake Sun Catchers
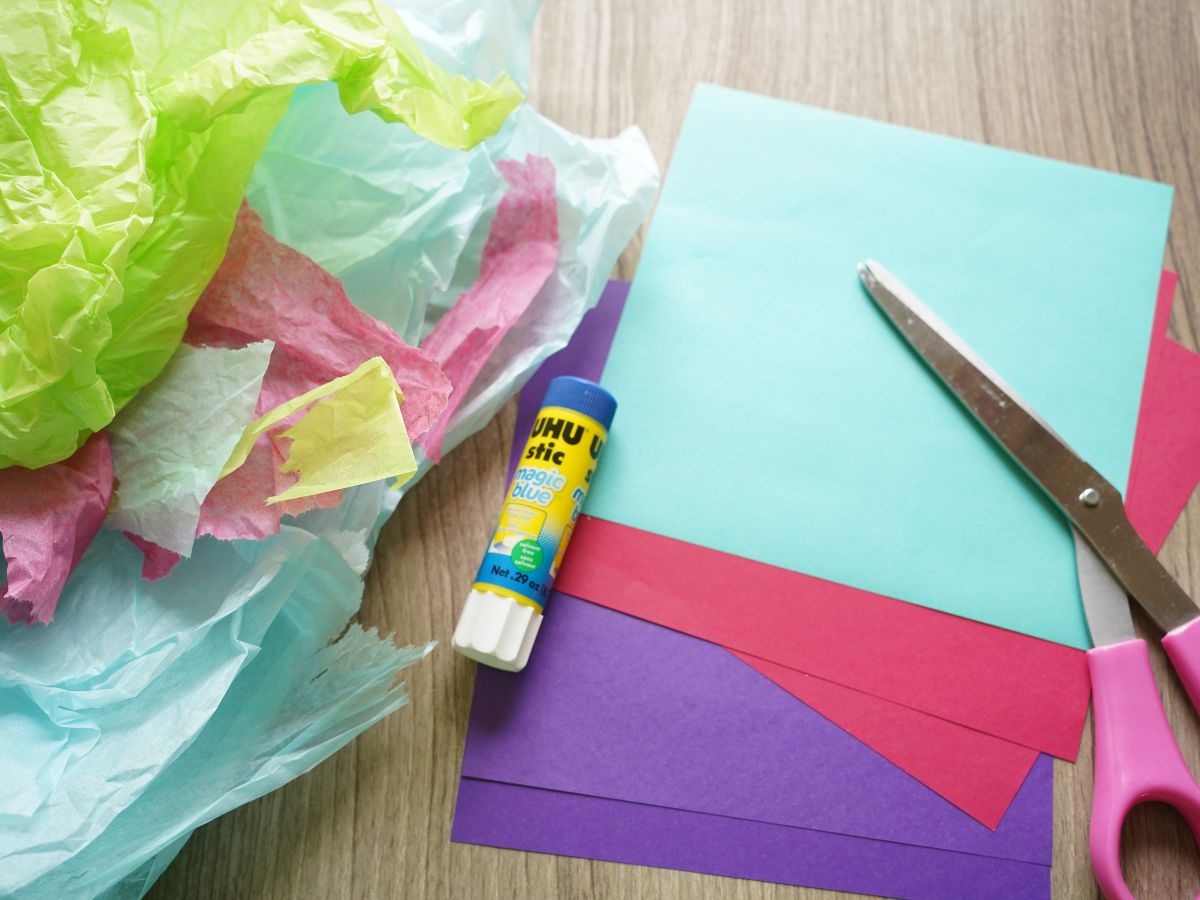
origami paper in various colors
scissors
scraps of colorful tissue paper
glue stick
To begin with, we need to fold a paper snowflake. I like to use origami paper to make my snowflakes. Because snowflakes are made from squares of paper, starting with origami paper is perfect. However, if you don't have origami paper, you can simply cut whatever paper you have into a square. Make certain the paper isn't too thick, because you will be folding it repeatedly. It's best to use regular printer paper, not a heavy cardstock, for this craft project.
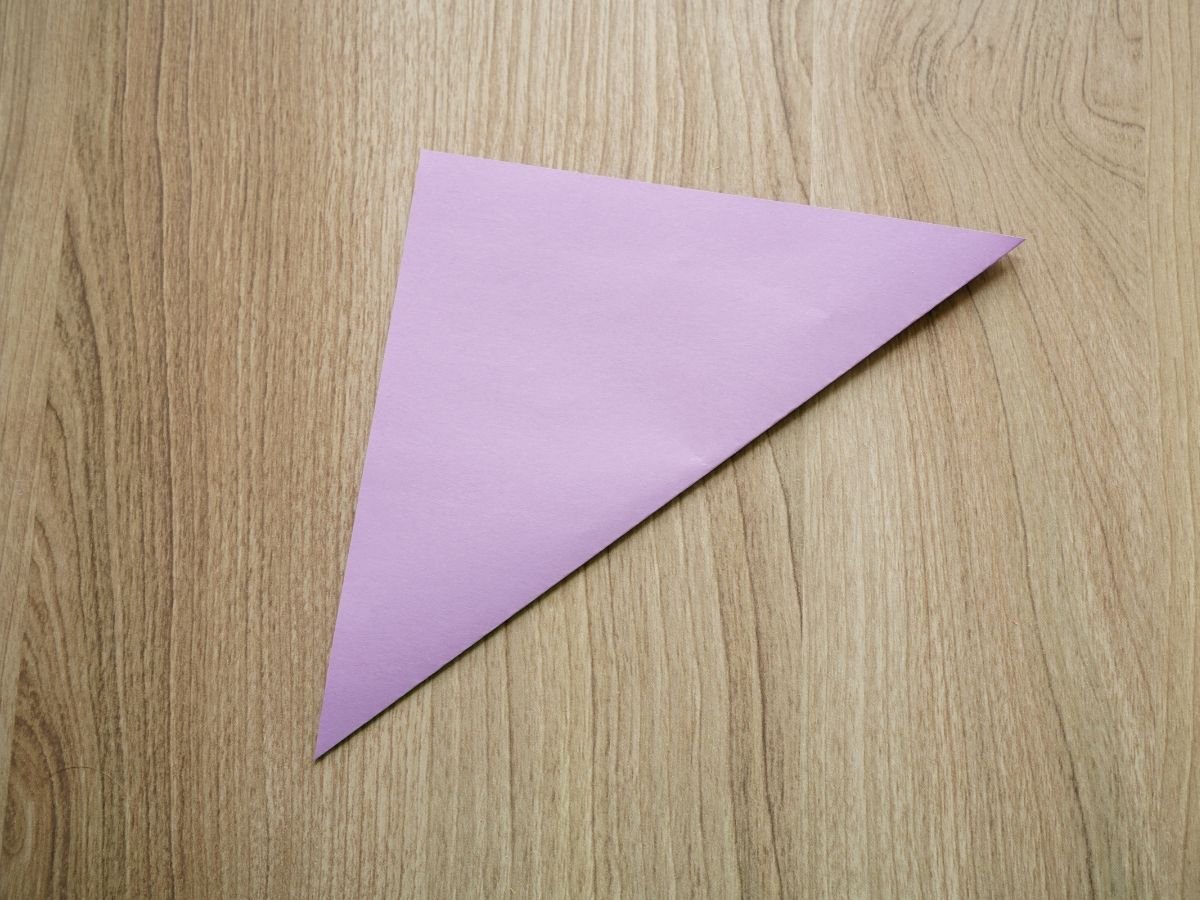
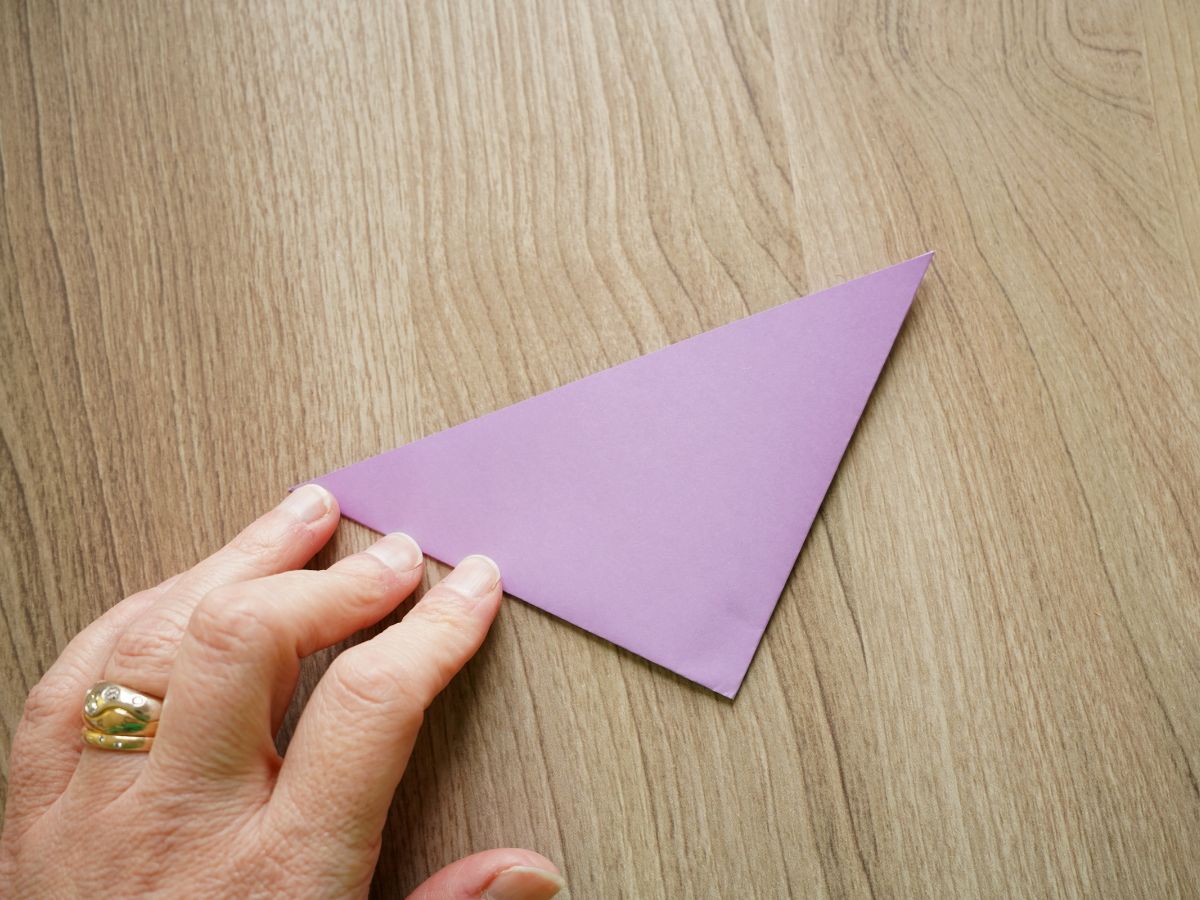
Okay, once you have your square of paper, it is time to start folding. Begin by folding the square in half, diagonally. Be sure to run your finger along each fold. Then fold the triangle in half again. This time bring the tips, along the folded edge, together. Now you have a small triangle.
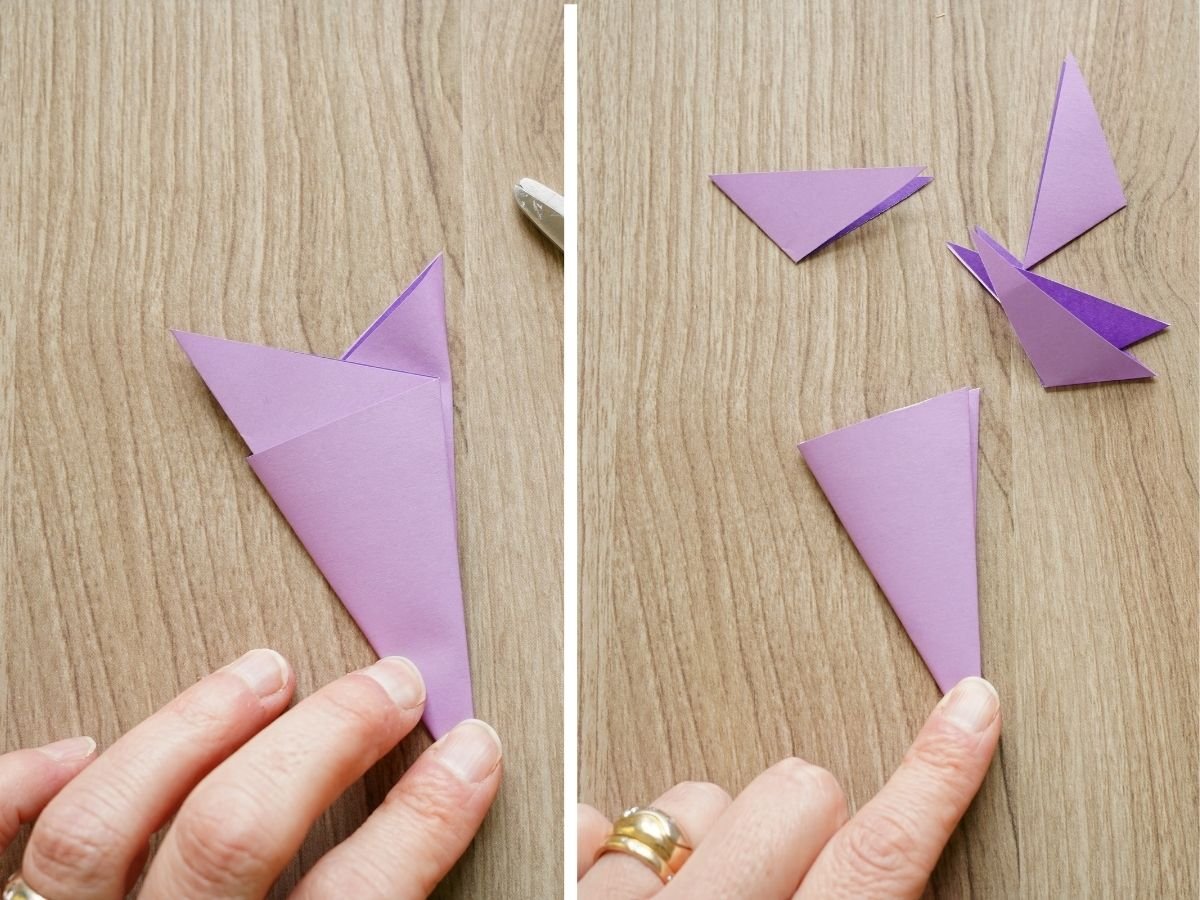
Fold this triangle into thirds. It may take a few tries to get the folds right. Keep folding and unfolding until you have folded the sides together in thirds, as in the image above. Trim off the "tails" at the top. Creating a narrow triangle.
When you have your narrow triangle, it is time to cut your snowflake. Now, for these suncatcher snowflakes, you want to cut away larger sections of the paper. So that you can make the "windows" of the sun catchers.
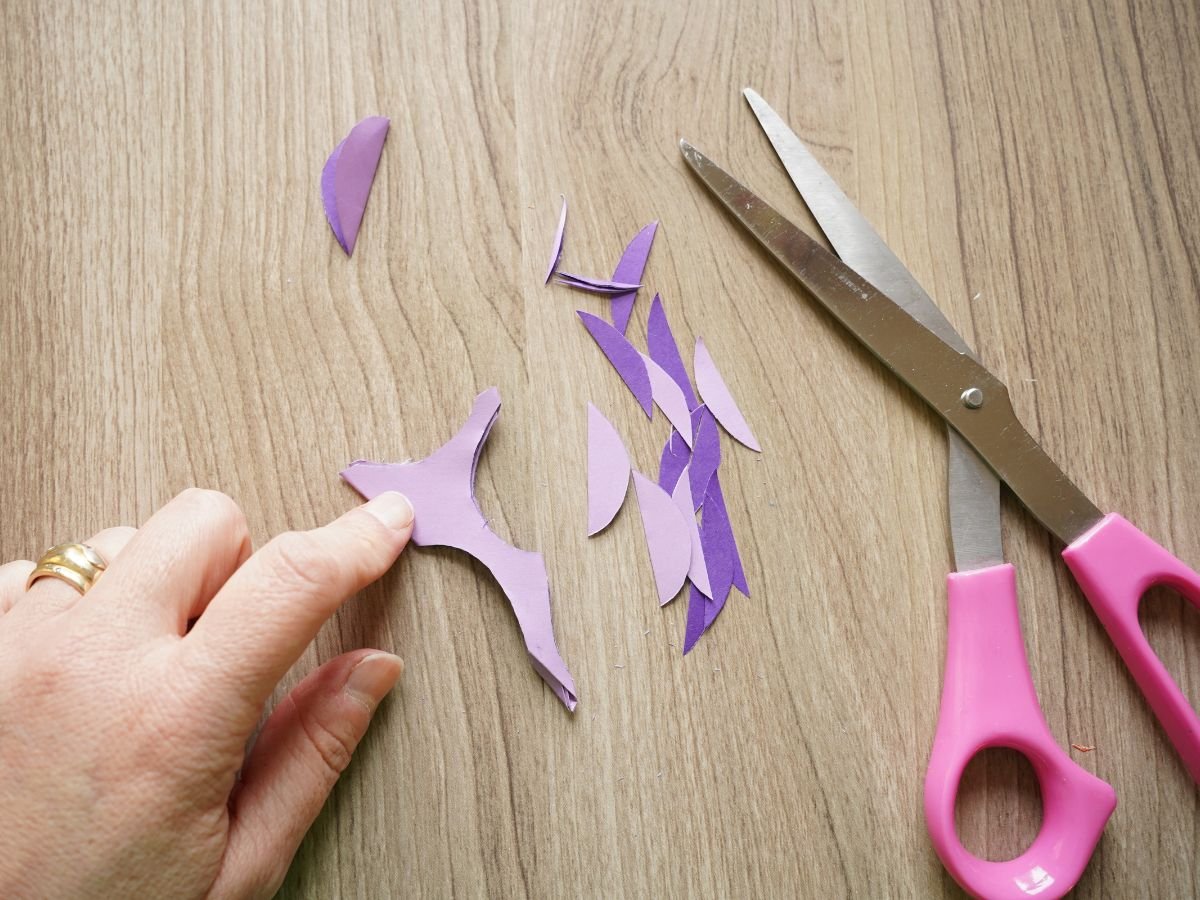
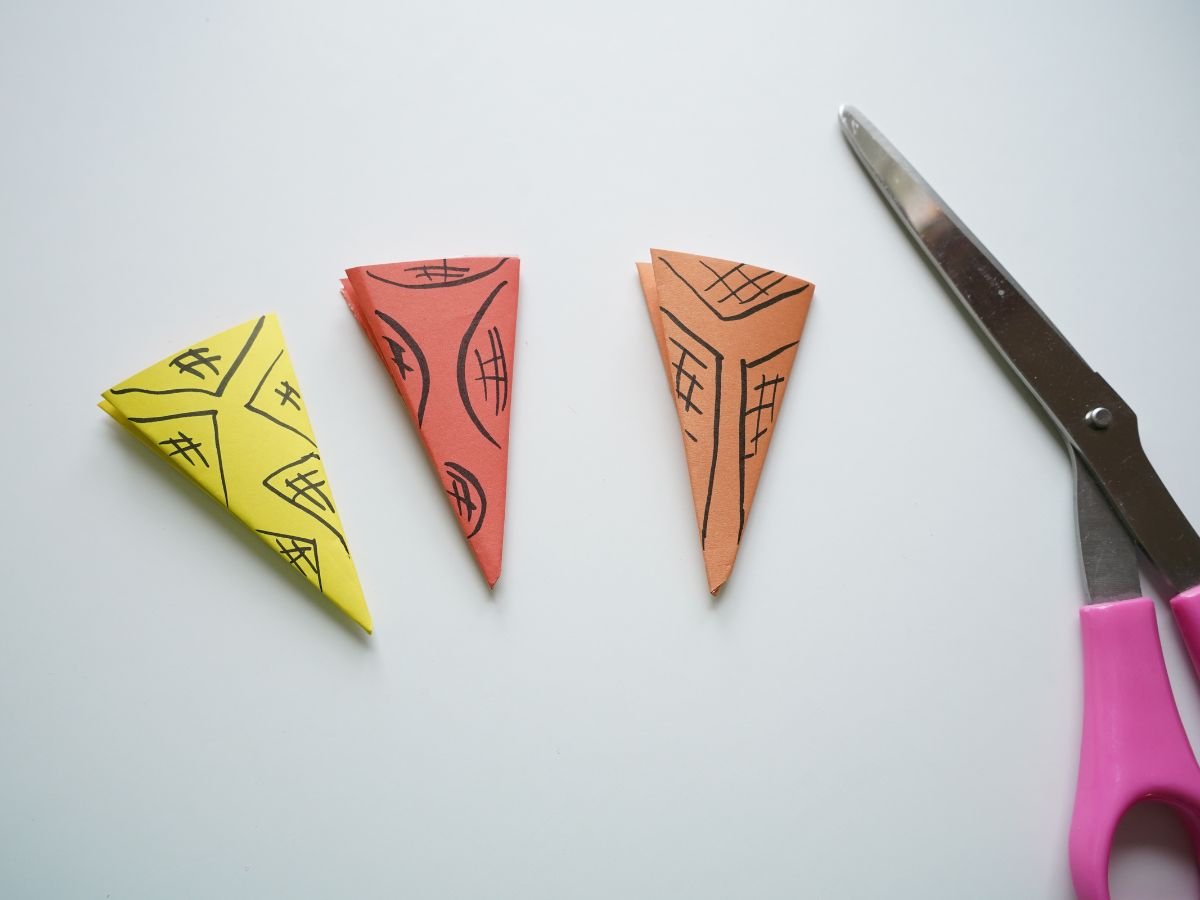
I've included an image with a few different possible patterns to cut. But play around with the cuts you make in your snowflakes. You simply want to have large "windows".
Now, unfold the snowflake and press along the folds to help the snowflake lay flat. Once the snowflake is fully unfolded, it's time to add the glue. Run a glue stick all over the backside of your sun catcher snowflake.
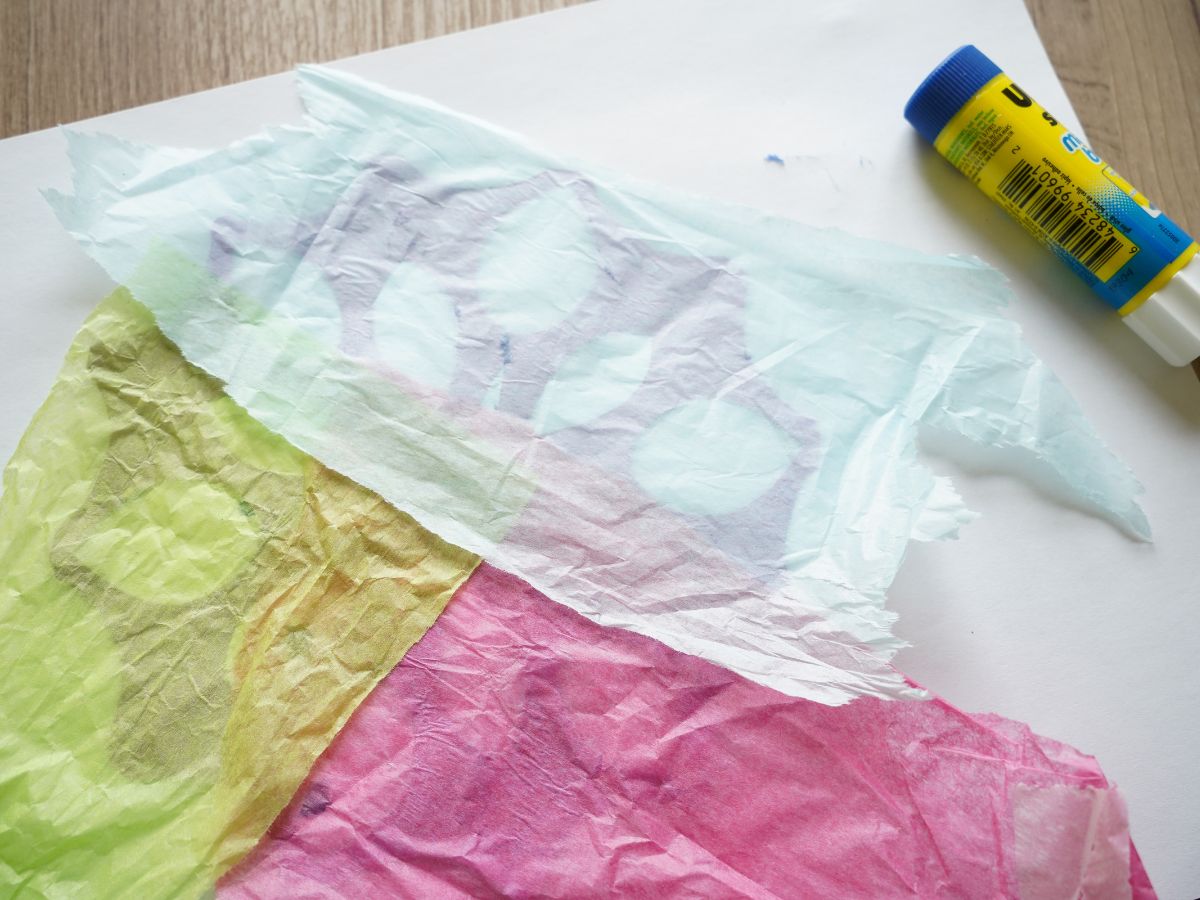
When the snowflake is covered with glue, rip strips of colorful tissue paper and press them into the glue. You can use as many different colors of tissue paper as you like. I liked using at least three different colors. You can overlap the tissue paper too.
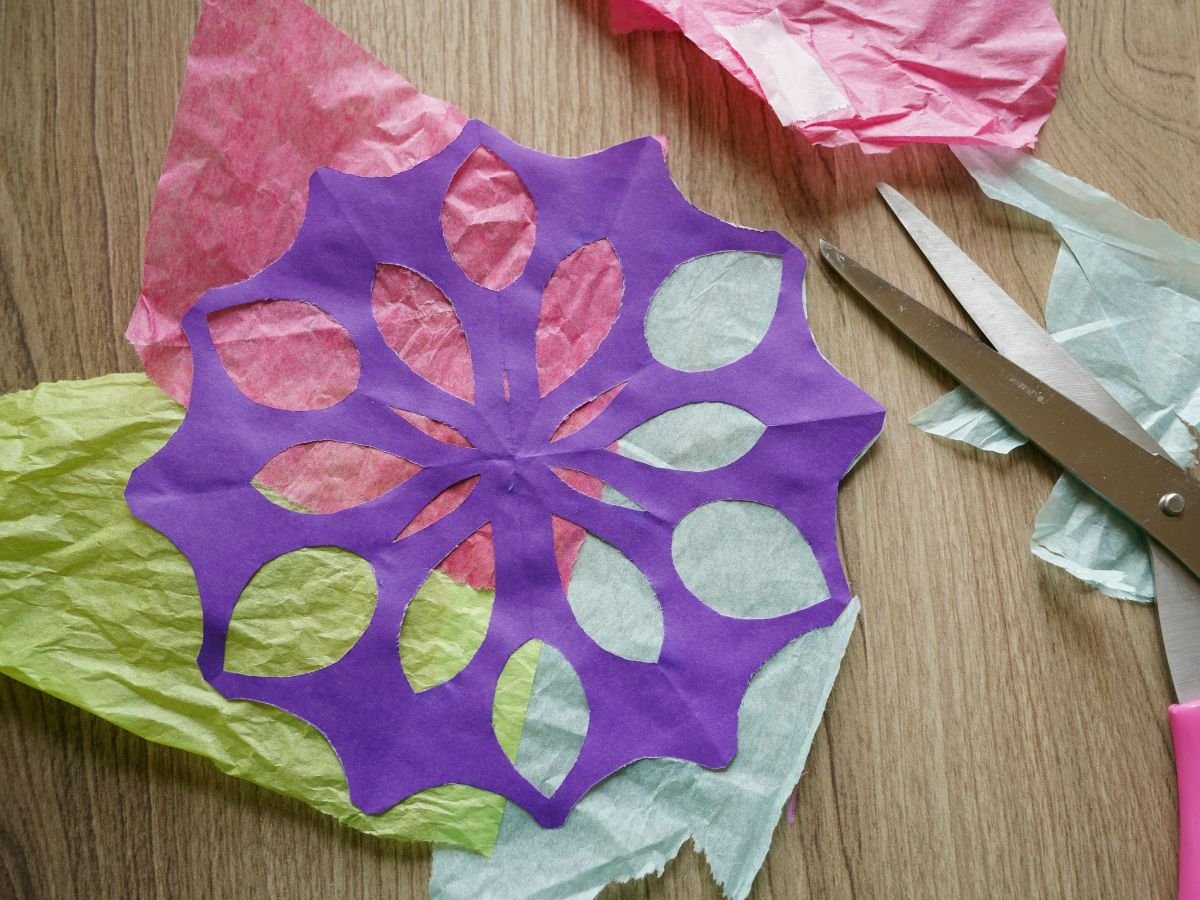
When the tissue paper is in place, flip the snowflake over and use your scissors to trim off the pieces of tissue paper that stick out around the snowflake. You will now have a lovely snowflake sun catcher to hang on your windows.
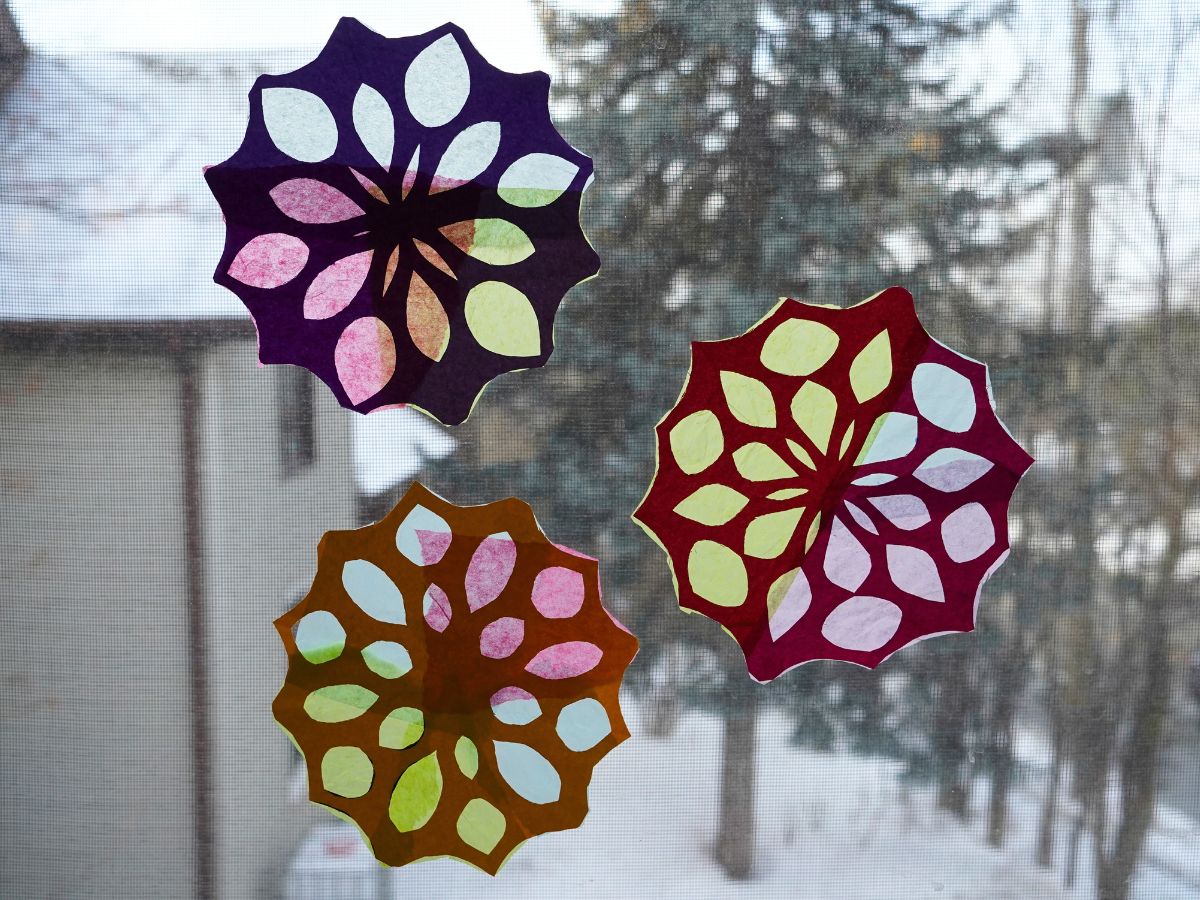
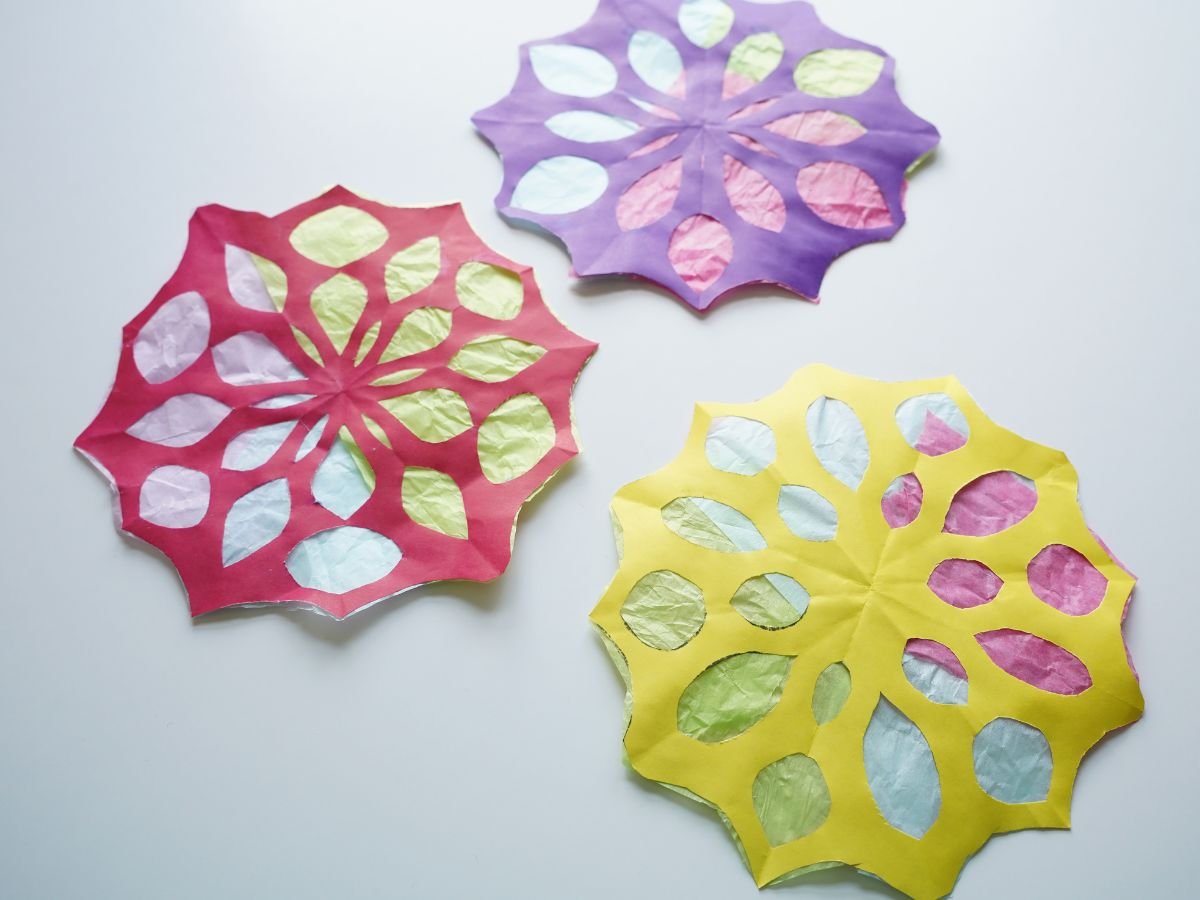
Play around with different colors of paper for the snowflake and have fun with the colorful tissue paper. I hung my snowflake sun catcher in my craft room window. I created a flurry of paper snowflake sun catchers that bring in all kinds of bright light. I really love how these turned out. They look nice handing along side my pipe cleaner snowflakes!
Where will you hang your paper snowflake sun catchers?
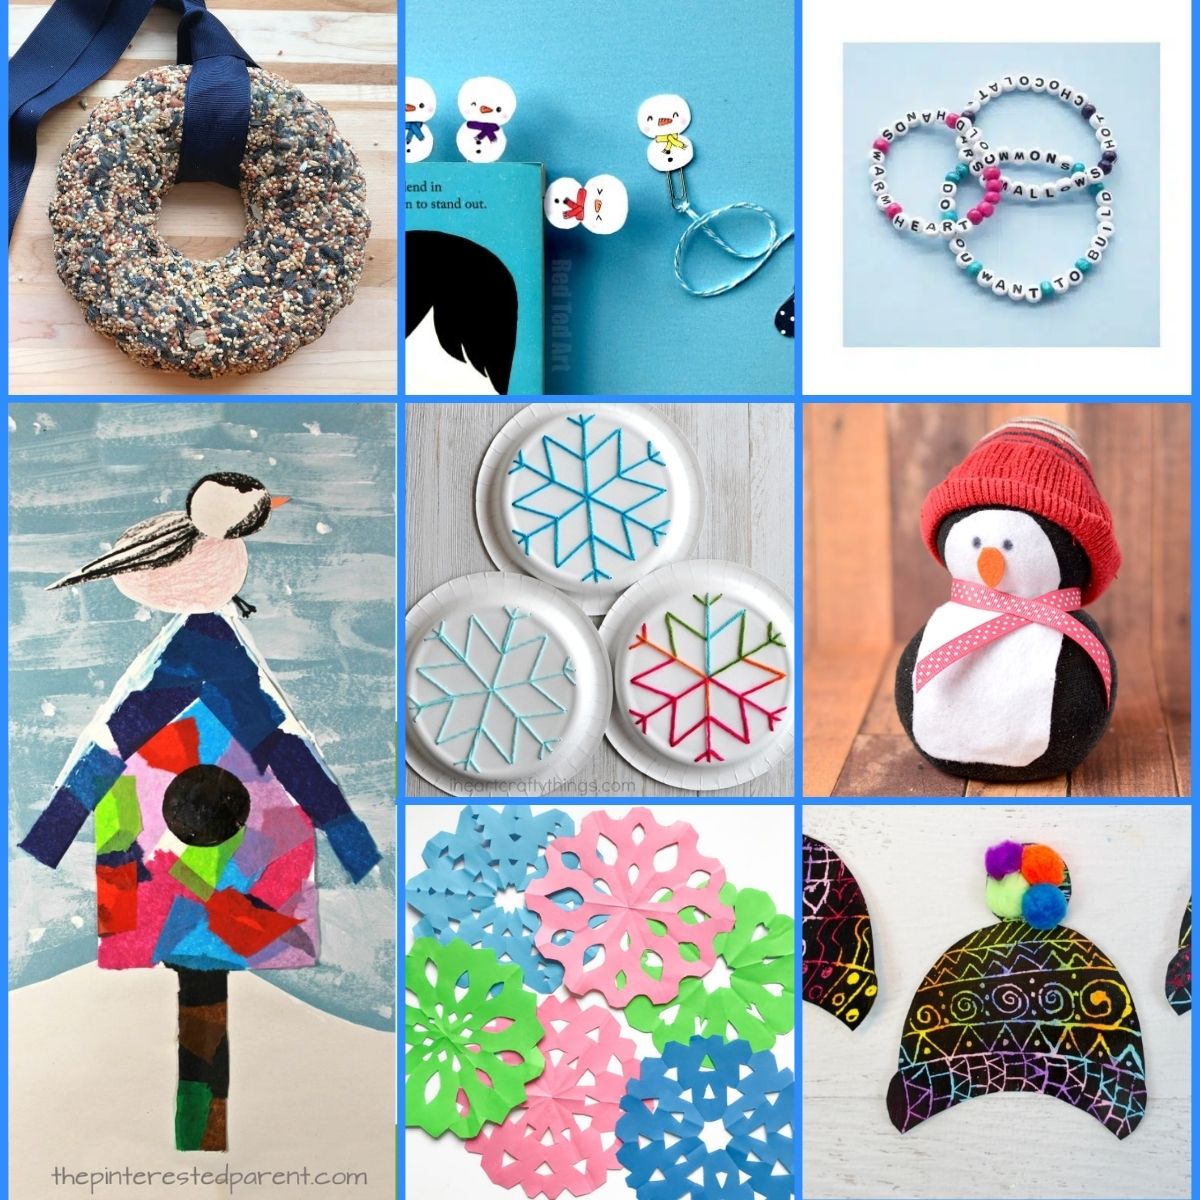
Check out this collection of winter crafts to make
Make sure you are following along...
FOLLOW KITCHEN COUNTER CHRONICLES ON
SUBSCRIBE TO KITCHEN COUNTER CHRONICLES TO HAVE OUR DELICIOUS RECIPES, FUN CRAFTS & ACTIVITIES DELIVERED DIRECTLY TO YOUR INBOX.