
Apparently, I am not the only person in our house who finds our piles of hair clips and elastics frustrating and annoying. Surprisingly enough, my daughters aren't fans of the disorder either. Yes, I have purchased many little containers and bags to hold the hair accessories. I have even strategically placed small numbers of these necessary items around the house where they are needed most...bedrooms, bathroom, and the front door. While the clips and elastics at the front door and in the bathroom find their home in a tiny drawer, the other clips are a mess in the bedrooms.
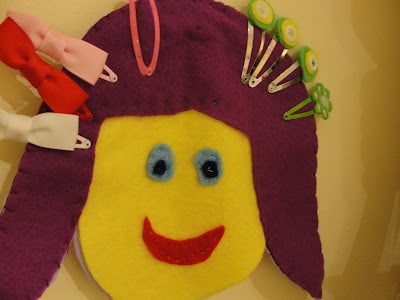
So, last week, after putting together my post on how to customize your own hair clips, when my youngest daughter said she had an idea for a way to organize the clips, I jumped at the opportunity to hear her out. Her idea seemed so simple."Why don't we make a head out of felt? The head can have hair, and we can store the clips on the hair." Genius! Here is what she did...she did this one.
DIY Hair Clip Hanger Felt Head
felt - we used yellow, light blue, dark blue, red, and purple (whatever colours you like)
paper
pencil
scissors
thread
rik-rak or ribbon
wall hook
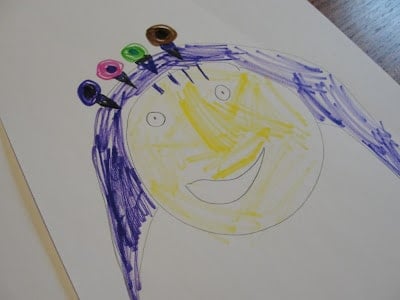
1. Sketch out a design for your face on paper.
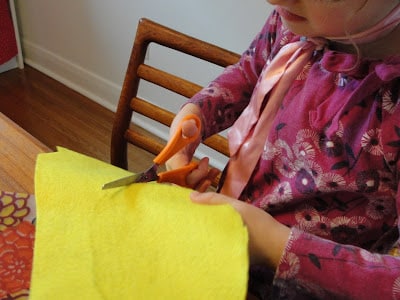
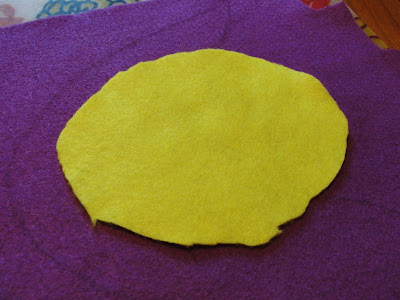
2. Using your sketch as a guide, draw the "head" on the yellow felt. Cut out the head.
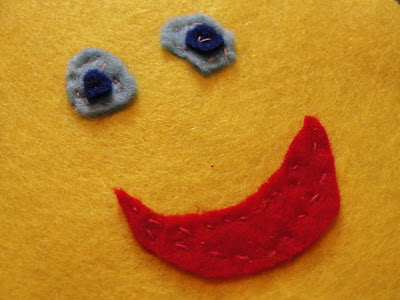
3. Draw the eyes on the blue felt, cut them out. Using a coordinating thread, sew the pupil to the eyeball, then sew the eyeball to the head

4. Draw the mouth on the red felt, and cut it out. Using a coordinating thread, sew the mouth to the head.
5. Position the head on the purple felt. Draw the hair as you like. Cut out the hair.
6. Position the hair in the appropriate position on the head and sew it in place.
7. Use a small loop of ribbon in place at the top of the hair...this will be the hook to hang your head from.
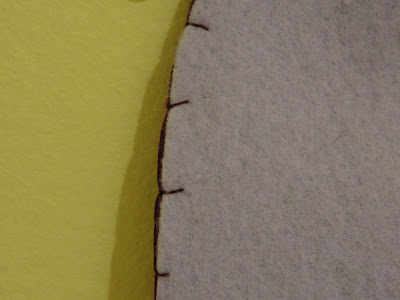
8. Trace the entire head onto another piece of felt. Blanket stitch the two pieces together, creating a neat backside for the head.
9. Position a hook (we used a repositionable 3M hook) on the wall.
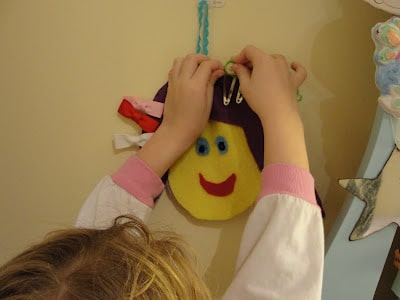
10. Clip hair clips in place and hang up your head...done!
I must say that this idea was pretty brilliant. I love it when a child has a vision and works through the steps to bring their idea to life. This was my daughter's first time using a real needle. Until now, she has been sewing using a cross-stitch needle...which doesn't have a sharp point. With some concentration and patience, she pulled it off. Now that the head is on the wall, I can't wait to see if it is actually used. It seems to me that when children have a hand in the creation of things, they tend to appreciate them more. This is true of food that they grow from seed and projects they imagine. What will my girls think of next?
Make sure you are following along...
FOLLOW KITCHEN COUNTER CHRONICLES ON
SUBSCRIBE TO KITCHEN COUNTER CHRONICLES TO HAVE OUR DELICIOUS RECIPES, FUN CRAFTS & ACTIVITIES DELIVERED DIRECTLY TO YOUR INBOX.

countertops maryland says
This is fantastic to share. I would teach this to my childs to keep them busy.
Lisa says
Such a great idea!!
KitchenCounterChronicles says
Thanks Lisa - she was ever so proud of her handy work!
Rebekah says
This is a brilliant idea!! Love the ingenuity from your daughter! Great sewing too!
KitchenCounterChronicles says
Sewing has become our fun go-to craft!
tricia says
That is an amazingly great idea! So impressive your daughter came up with it!
KitchenCounterChronicles says
Thanks Tricia - Love the creativity of little minds!
Ali says
That is so clever, I am pinning it so i don't forget it.
KitchenCounterChronicles says
Thanks for the pin!
PlayDrMom says
I love her process! So wonderful!
KitchenCounterChronicles says
It is so amazing to watch their little minds work out all the details!
maggy, red ted art says
Oh my! How lovely what a great idea. I love how you drew out a design first and then made it. SO ADORABLE and perfect. Lovely lovely lovely!
Thanks for sharing on Kids Get Crafty!
Maggy
Joyce says
That is genius! What a wonderful idea she had! And she did a great job at making her vision a reality. I bet it will be used, because you're right... when they participate in the making of something, they are more apt to continue to be a part of it. My little boy eats way better when he helps cook it.
pink and green mama MaryLea says
ADORABLE!! We made a brown haired Rapunzel out of fabric this fall to tame my 4 year old's growing barrette collection, but this is just adorable! I love how original it is to use your own daughter's artwork as the basis for the project!!!
Aleacia says
Such a cute idea! My girls aren't interested in hairclips now, but when they start I'll keep this idea in mind for sure!
The Iowa Farmer's Wife says
This is so cute! I just have ribbons hanging for my daughter's bows, but we may have to do this for the tiny ones! 🙂 Super cute!
Angelique Felix says
Pinning this right away Jen! Love it , love it, love it, what a great idea!
Peggy-Sue says
Man - that is SUCH a great idea!! Crazy cute and practical too! Love it!
Kristina says
This is darling! I find ribbons and clips all over the house. We might one of these in every room!
andie jaye says
i love this! what fun that it came from a little mind! and if you ever wanted to expand it, you could add some yarn braids! thanks for linking up last week!
andie @ crayonfreckles
Mom to 2 Posh Lil Divas says
oh, I have so many clips - makes me crazy when they get lost all over the house. I find them in the craziest places! This is such a cute idea.
Kerry from @ScienceSparks says
A genius idea! When my daughter has some hair (she may well be 15 by then!) we shall give this a go!
Thanks for linking to Fun Sparks
Laura@art4littlehands says
Adorable. I love that it was her design and it turned out so beautiful too! Thanks for sharing at Monday Madness. Hope to see you again tomorrow!
RedTedArt says
(and pinned, love it!)
cathy@nurturestore.co.uk says
We have such a boring old bowl to keep our hair clips in - I want one of these now!!
Mom to 2 Posh Lil Divas says
I commented before but this is such a cute idea! Thanks for sharing on The Sunday Showcase! 🙂