
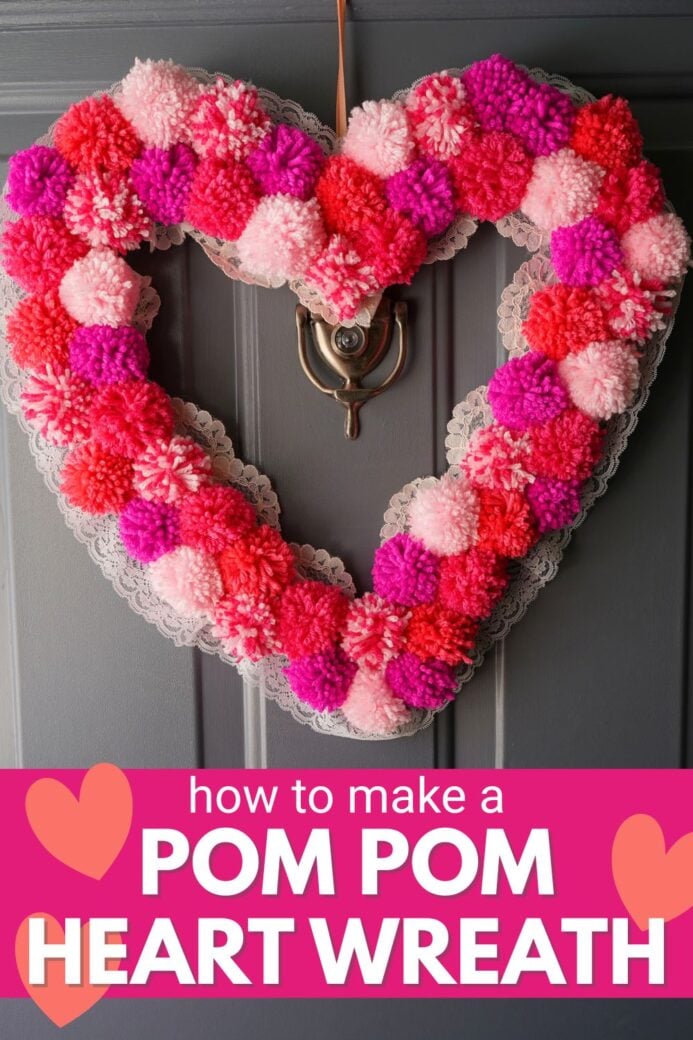
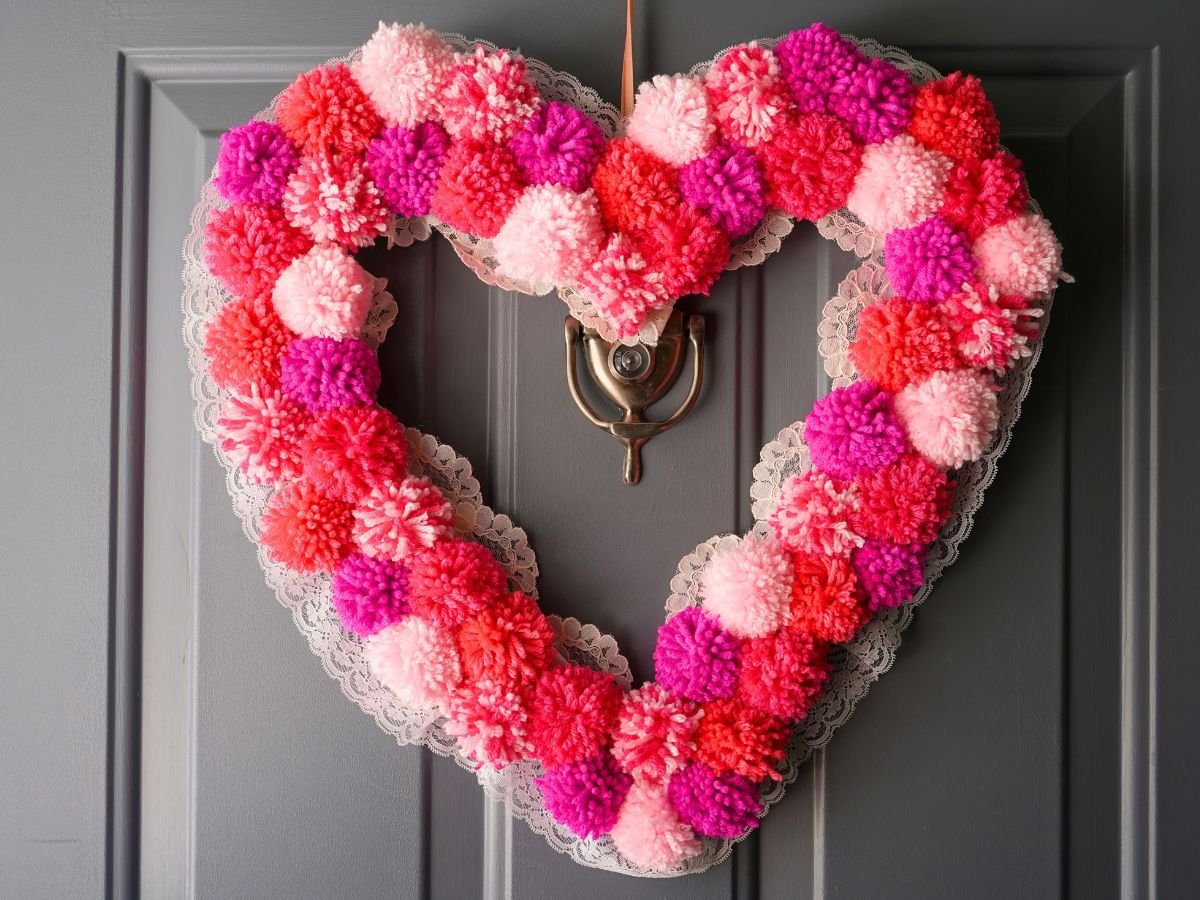
Pom poms are so pretty, and they can be used to make the most lovely wreaths. While I have made a pink pom pom wreath in the past, this year I wanted to share how to make the prettiest pom pom heart wreath. You're going to want to hang this one up year after year.

Disclosure: There are Amazon Affiliate links in this article which means, at no additional cost to you, we could receive compensation for our recommendations. You can read our full disclosure policy on our Disclosure Page for more details.
When I finally tried making my own yarn pom poms, I discovered just how easy they are to make. And, I discovered a new addiction! Once you learn how to make pom poms, you will want to make them in every shape and size. If you still don't know how to make pom poms, I have shared a how to video over on my Youtube channel, or you can follow along with the pictures below.
This Valentine heart pom pom wreath was inspired by the heart-shaped chocolate boxes from my childhood. Back in the 80s, a heart-shaped box of chocolates was super special. Some of them were velvet, and they typically had a lace ruffled trim around the heart. I wish I had kept one of those boxes. The Valentine boxes we can buy today don't compare. I wanted to recreate that style of chocolate box for this wreath. Giving it a ruffled trim.
How to Make a Pom Pom Heart Wreath
foam core
craft knife
cutting pad
assorted pink and peach acrylic yarn
scissors
pom pom making tool
glue gun
lace trim - about 3 inches wide
coordinating ribbon ¼ inch wide

To begin with, we need to cut the heart wreath shape from foam core. I always have scraps of foam core. My wreath is about 8 inches wide (at the top) and 12 inches long. Sketch a heart onto a sheet of foam core. You will need a 2 ½ inch wide heart shape for this wreath. So, the heart sketch you draw can be either the outer line of your heart or the inner line. It depends on how large you'd like your wreath to be. Use your craft knife to cut out the heart shape. I prefer using a craft knife on a cutting pad, because using scissors to cut foam core can crush the foam core instead of cutting it.

Now that you have your heart wreath form, it is time to make a pile of pom poms. As I said previously, I have shared a how to make pom pom Youtube video that you can check out.
I like to use the Clover pom pom tool. It's my favorite. While you can make your own pom pom making tools, I prefer using the Clover tool. I can make endless pom poms, and it's so easy to work with.
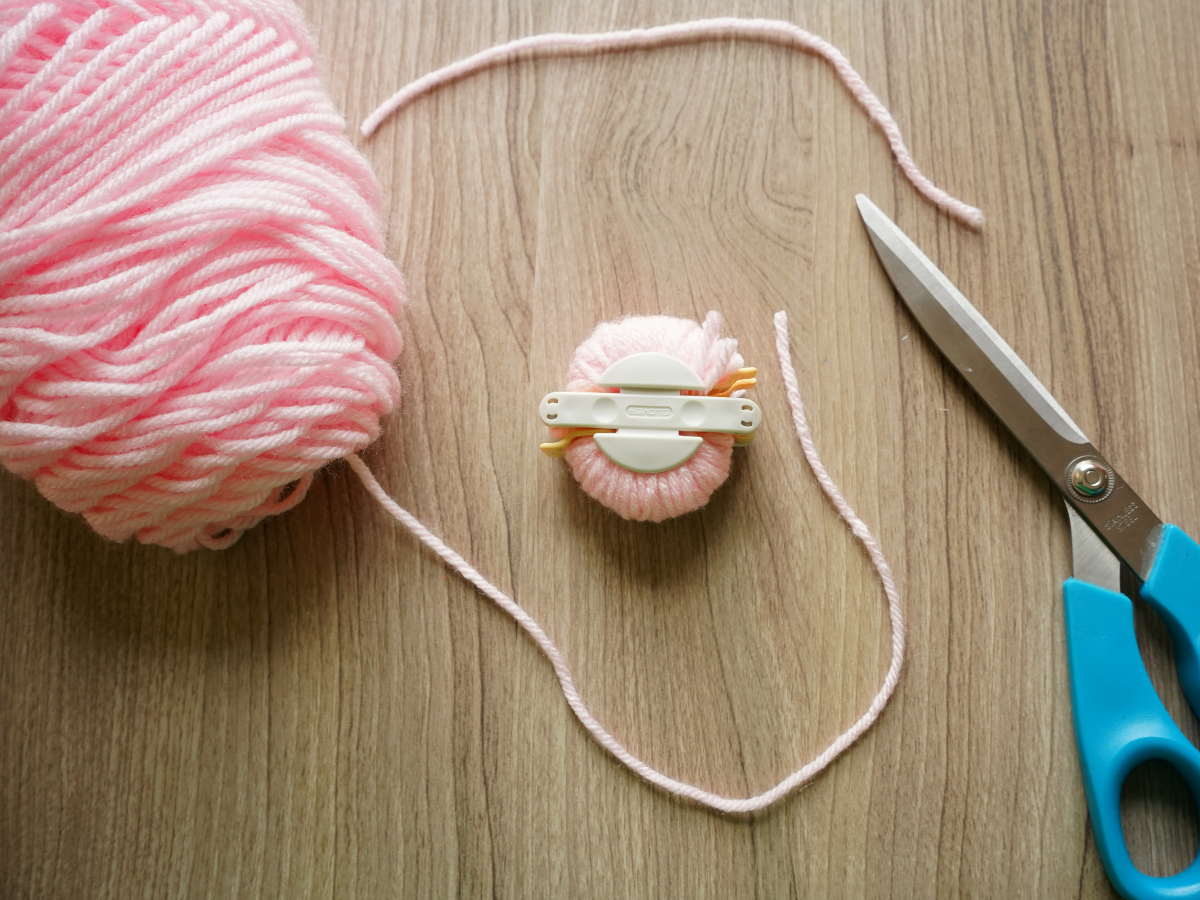
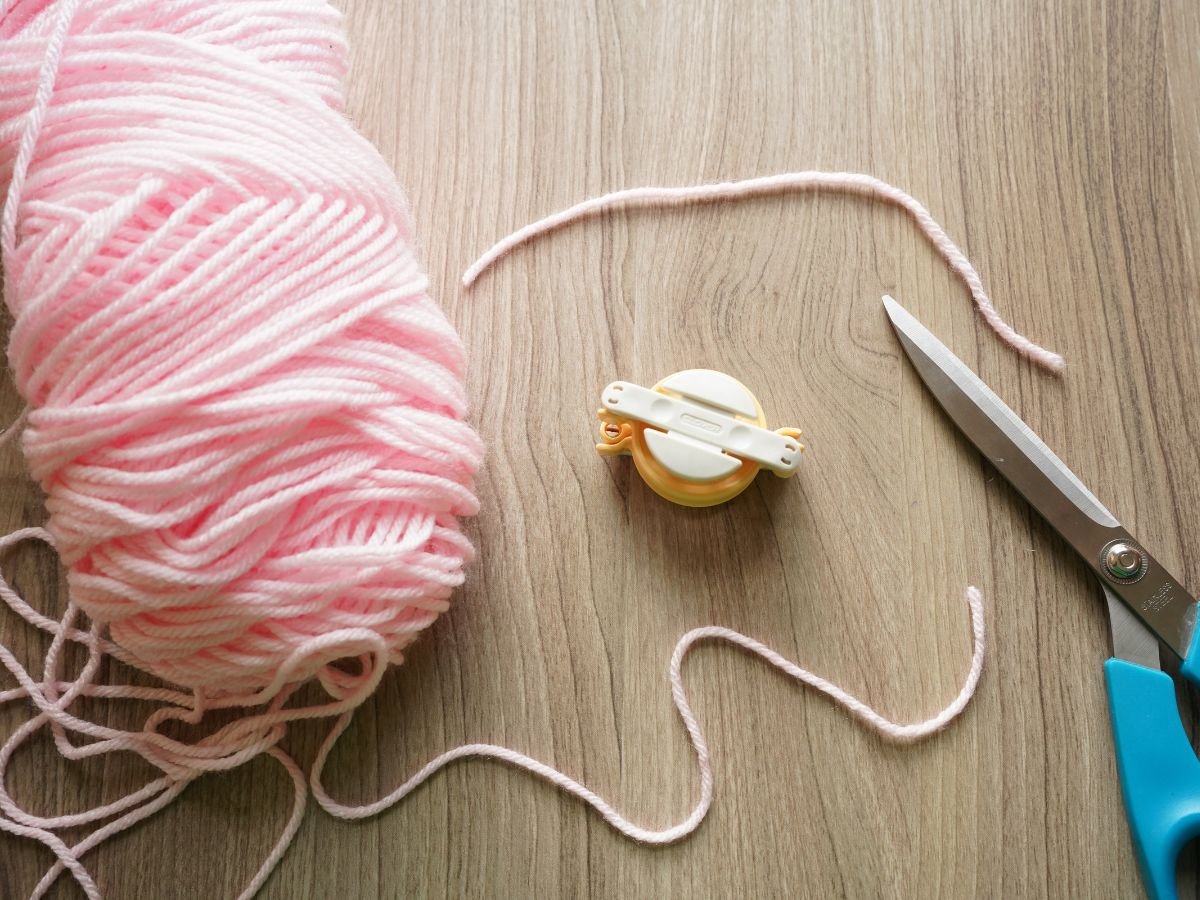
Start by cutting a 6 inch length of yarn, set it aside. Now open the two sides of the tool. Then wrap the yarn around one half of the tool. Close the side when you have wrapped it and continue to wrap the second side of the tool. When you've wrapped the second side of the tool, close it and cut the yarn. You now have a fully wrapped and closed tool.
Use the scissors to cut the yarn, along the center channel on each side of the tool. Keep the tool closed as you clip the yarn.
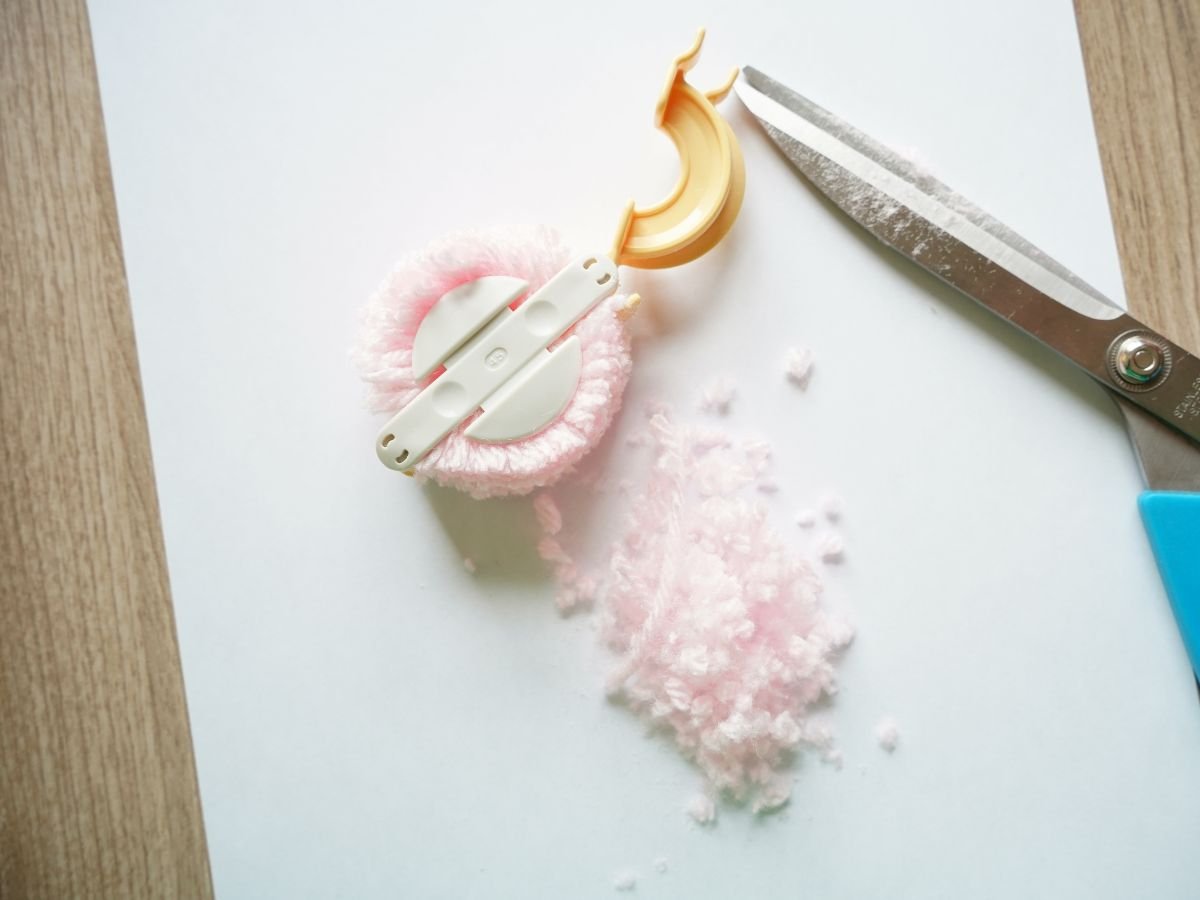
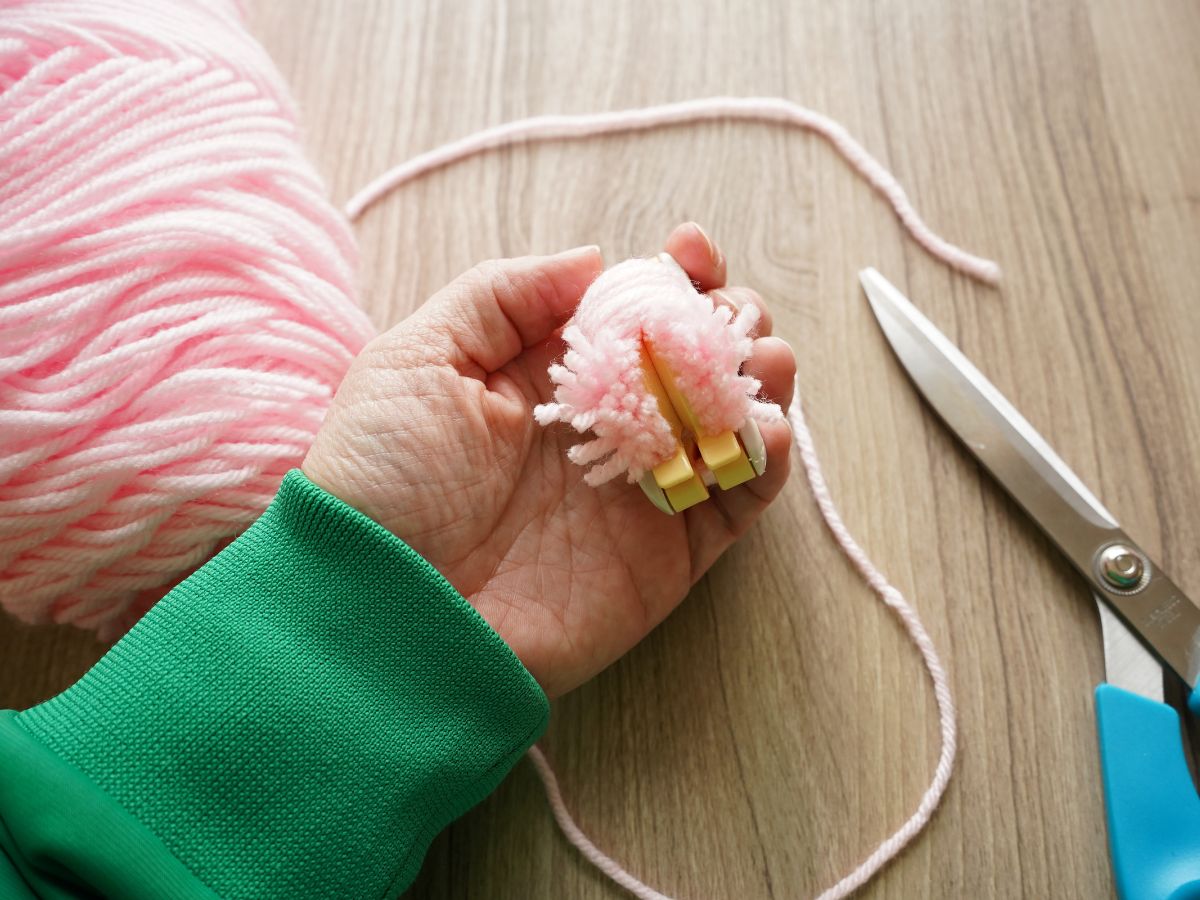
When you've clipped all the way around the tool, wrap the length of yarn around the circle, and tightly tie a double knot in the length of yarn. This will secure your pom pom. Open the pom pom tool, and the pom pom will pop out. Use your scissors to trim the pom pom into a nice round shape.
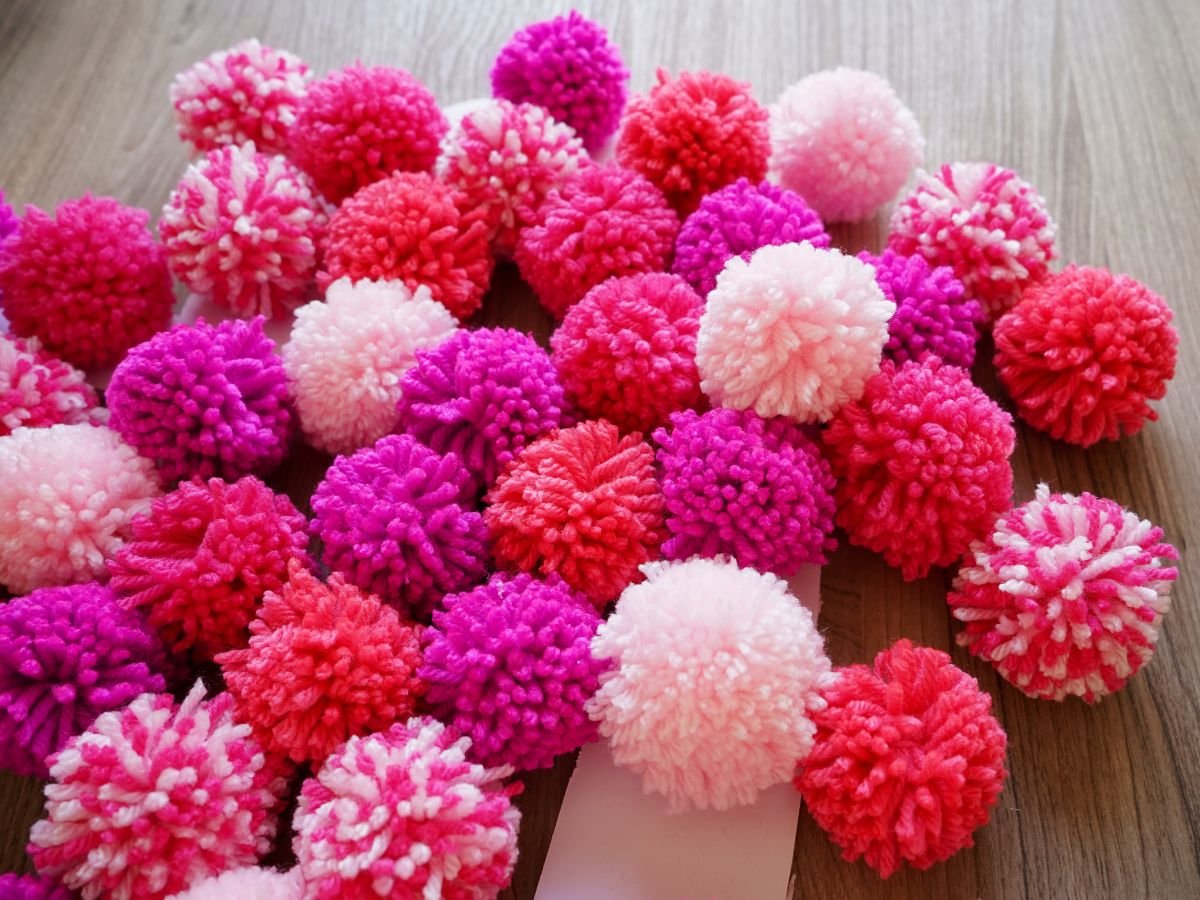
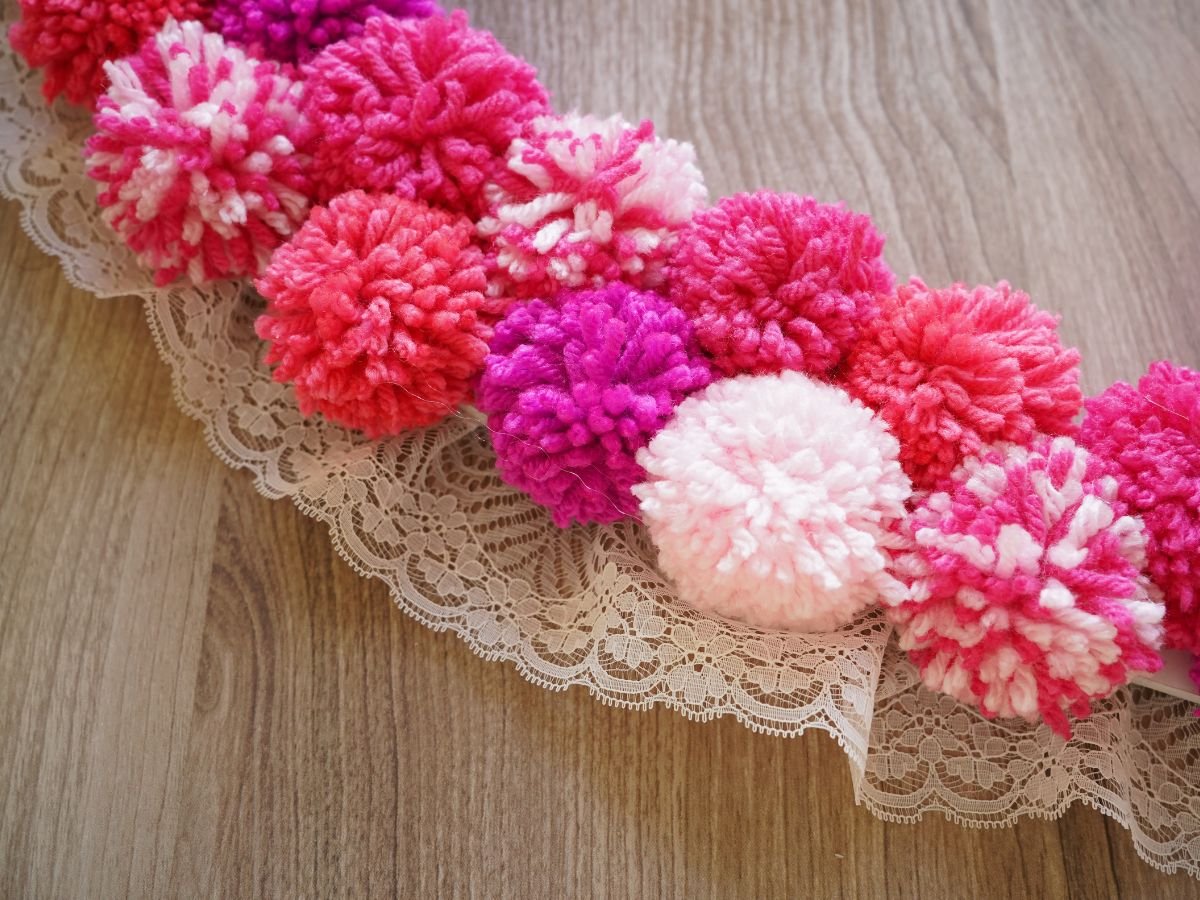
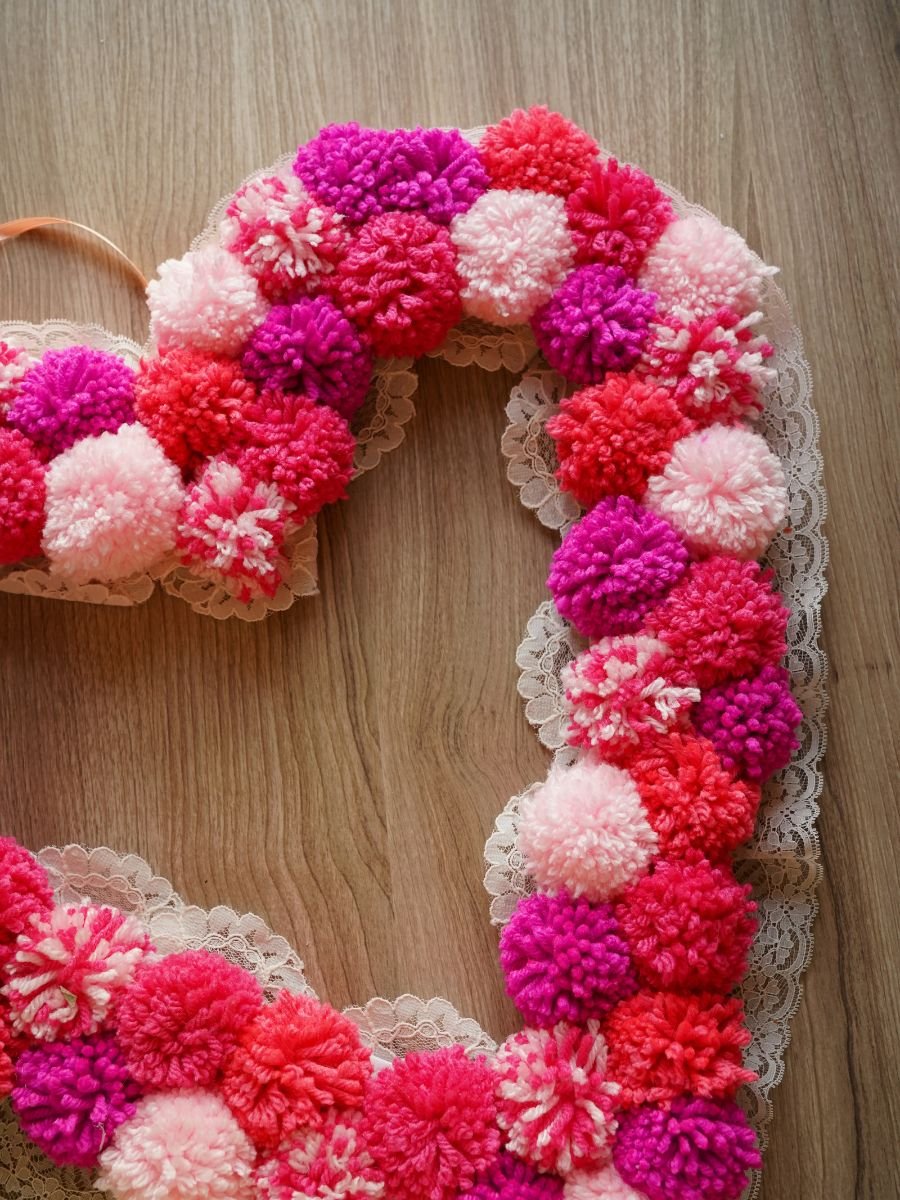
Make a pile of pink and peach pom poms. I even made some by combining two of the yarns together. Just hold the strands of two colors in your hand and wrap them at the same time. This will create the combination color pom poms. You can lay out the pom poms on the wreath form to get an idea of how many pom poms you will need. In reality, I always end up needing to make a few more pom poms as I go.
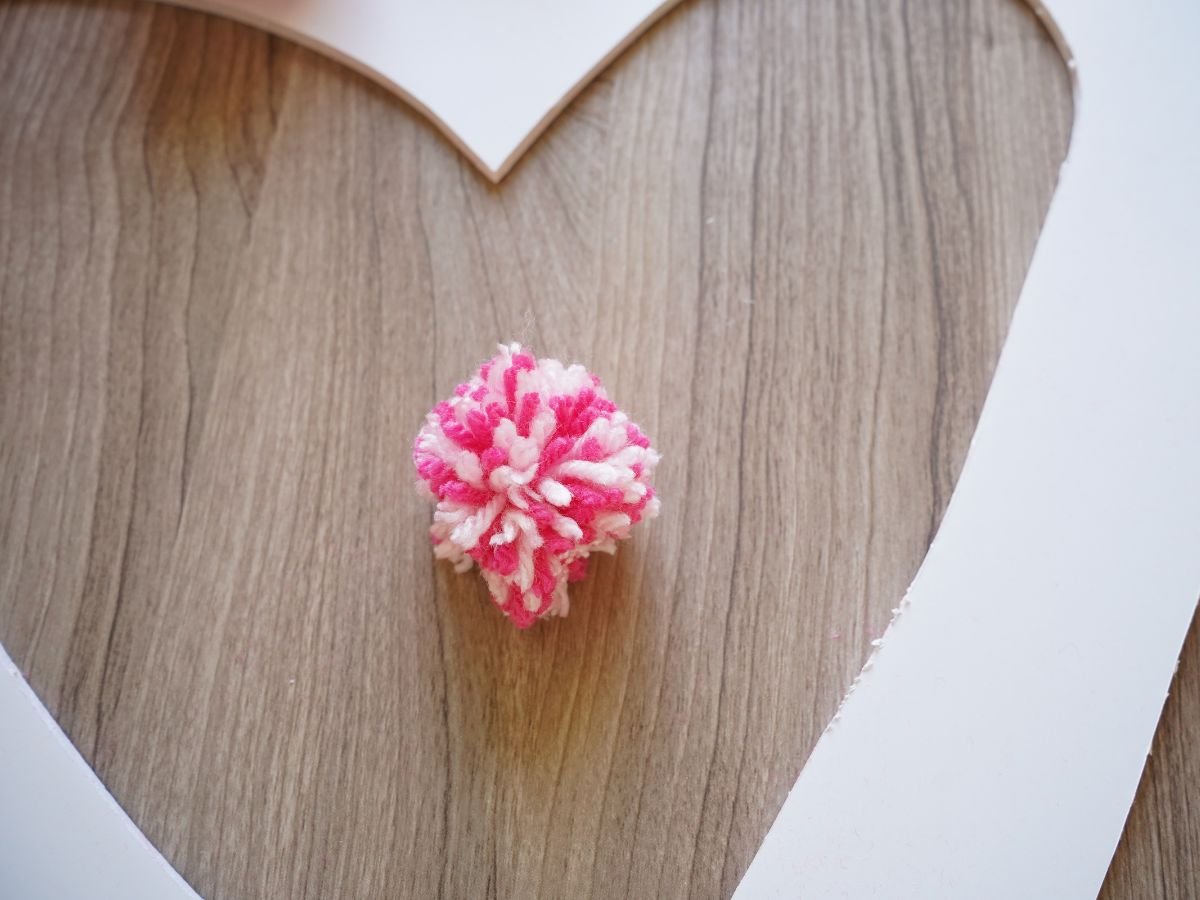
Okay, it's time to start adding the pom poms to the form. I wanted the inner tip of the heart to be pointed. So, I trimmed one pom pom into a point. And, glued that pointed pom pom to the inner tip of the heart.
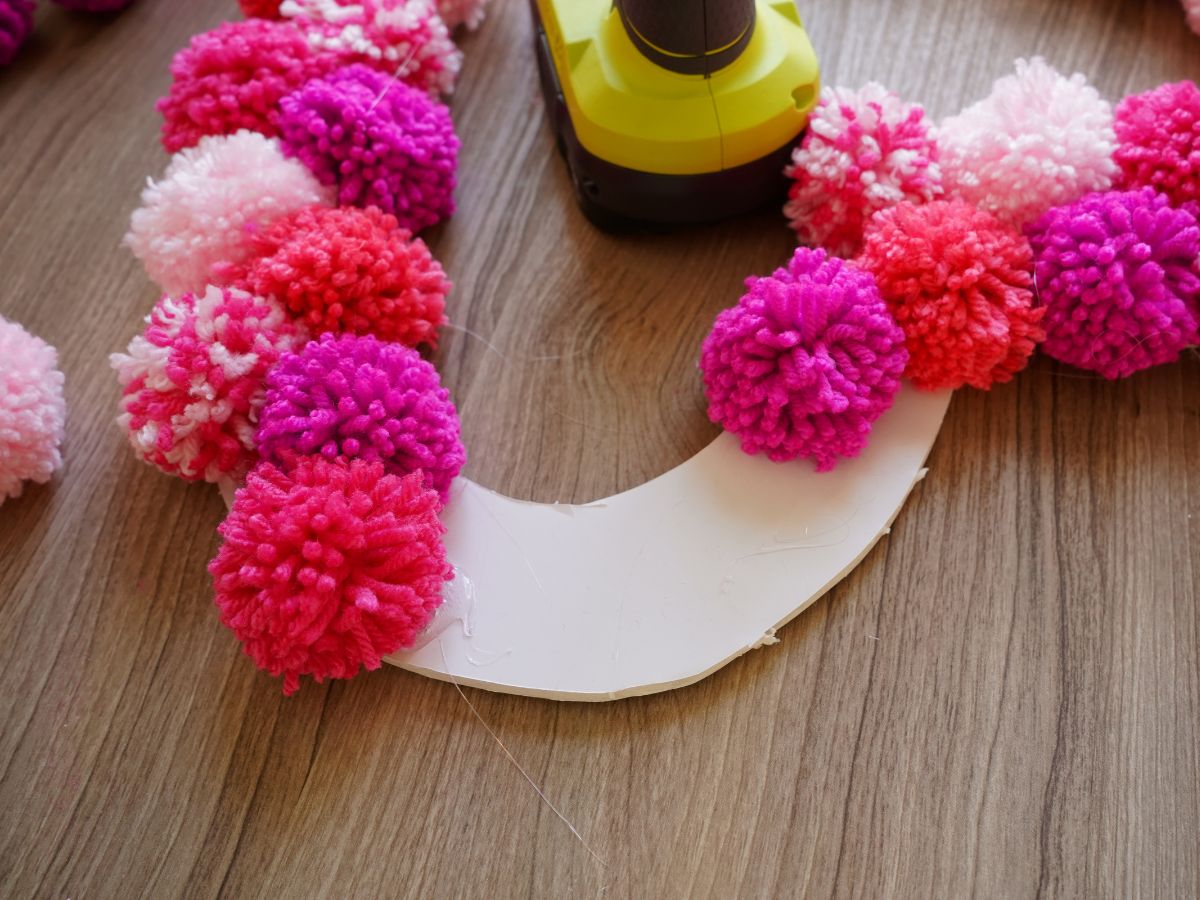
Then carry on adding pom poms to the wreath. I like to put the glue on the wreath form and press the pom pom into the dollop of glue. Working one pom pom at a time. Mix up the colors and the positions of the pom poms.
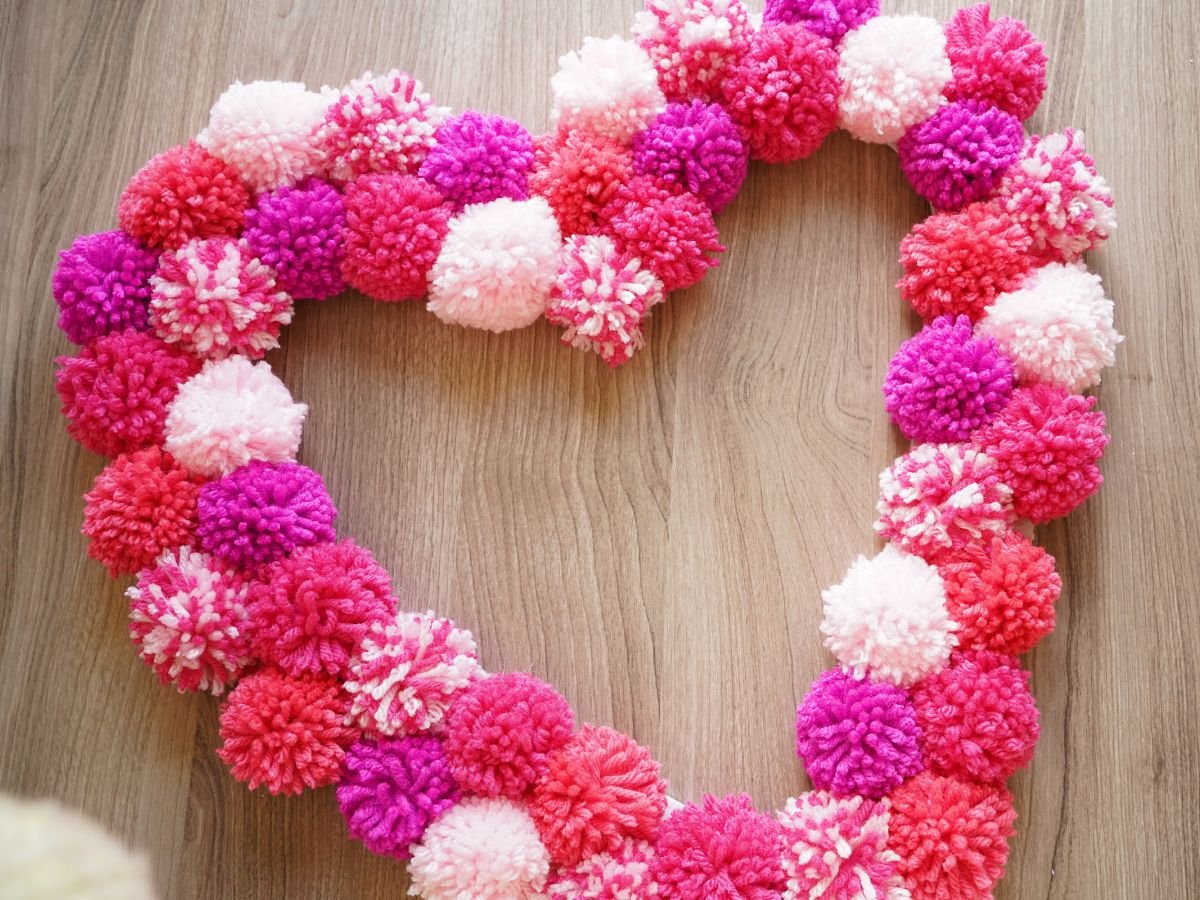
When the wreath is full of pom poms, take a step back and see if there are any blank spots that need another pom pom tucked in. When you're satisfied with the shape, it's time to add the lace trim.
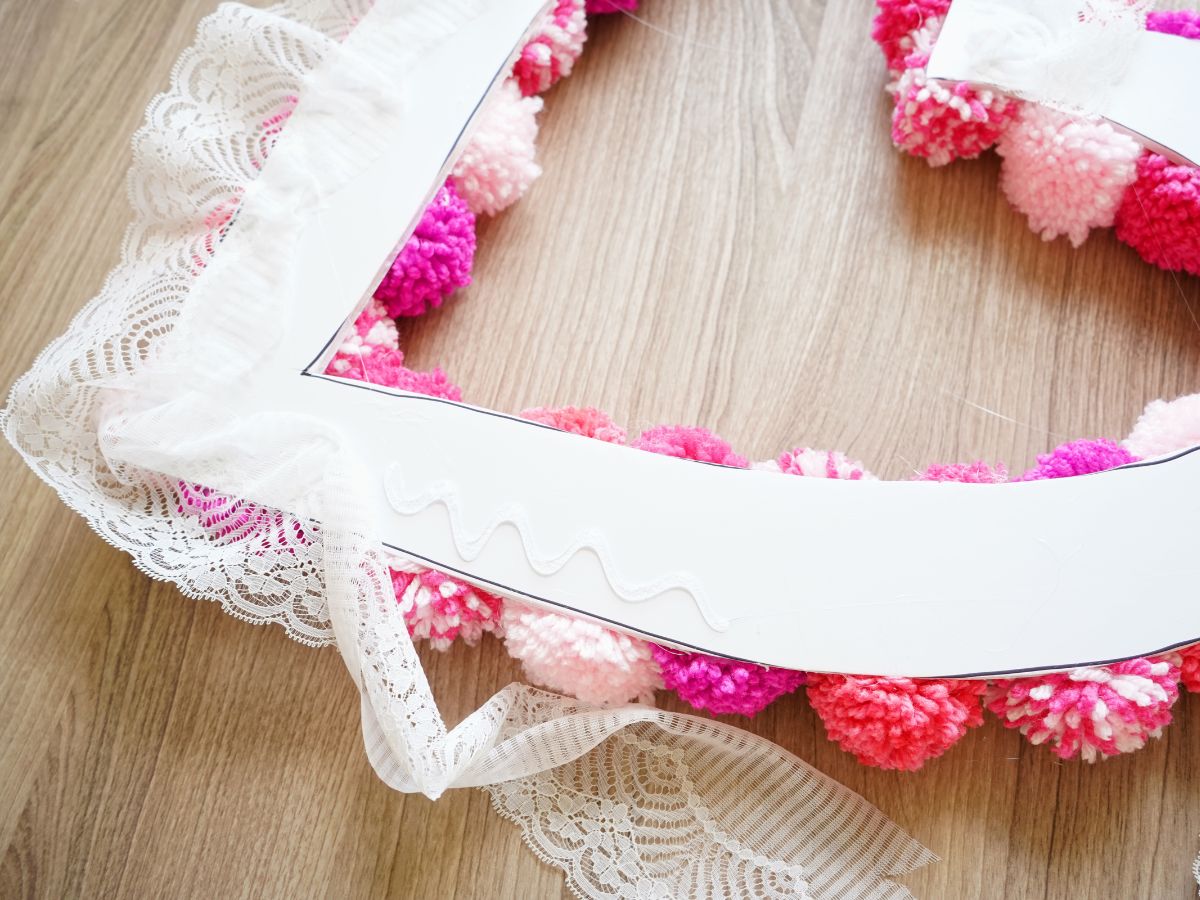
Flip the wreath over so you can attach the lace trim to the back of the wreath. I used an old lace trim that I happened to already have in my craft room. It was a little over 3 inches wide, so I had to trim it down. Before you start gluing the lace in place, hold the trim in place and flip the wreath back around. You want to be sure the lace createss an edge around the pom poms that can be seen peeking out from the pom poms. When you have the trim in the position you like, it's time to glue it in place.
Add a line of glue to the back of the foam core. Press the lace into the glue. Now, the glue is hot, and the trim will be thin. I use an old pencil to press the lace into the glue. To avoid burning my fingers. Glue will build up on the pencil, which is why I have a dedicated hot glue pencil. Work your way around the heart, ruffling the lace trim as you like, all the way around the outer edge.
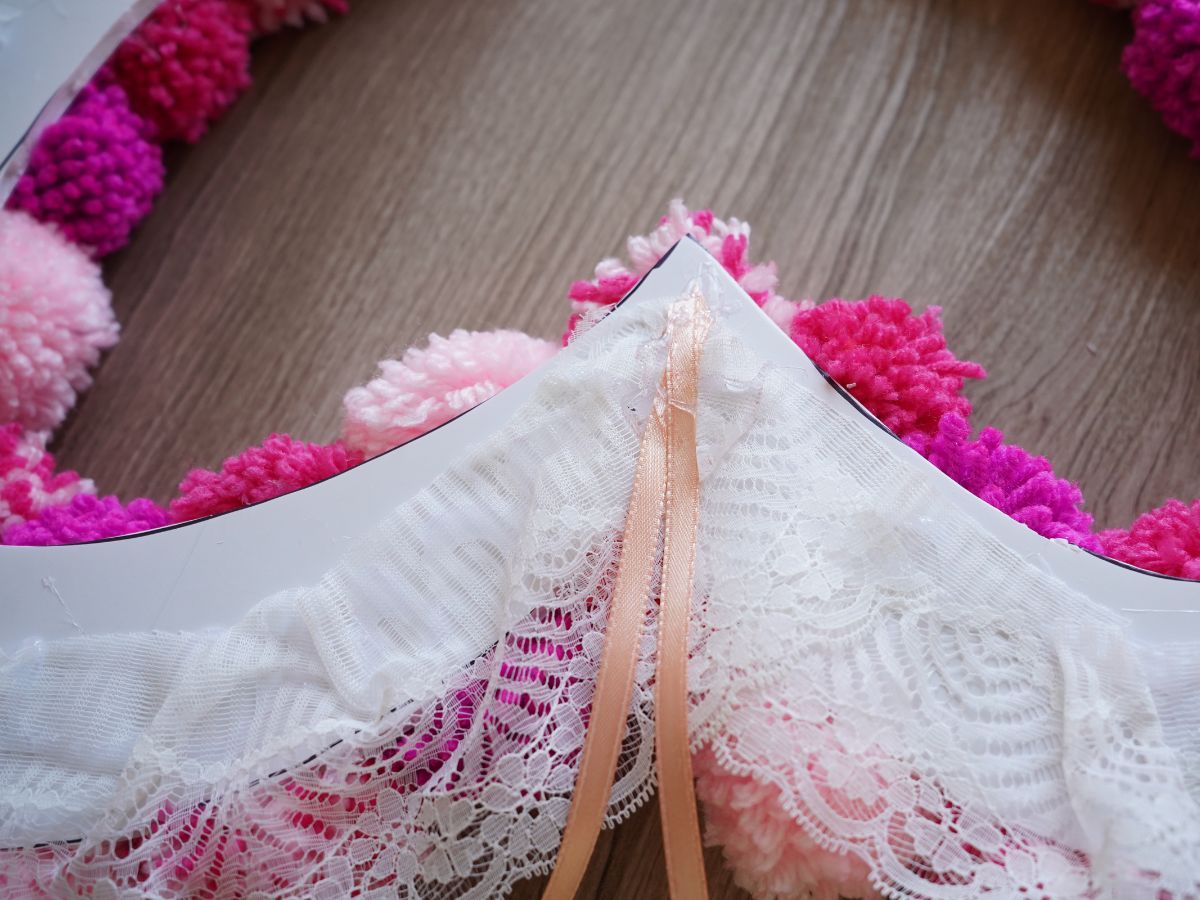
When the outer edge is done, it's up to you if you want to do the inner edge. I simply repeated the same steps to glue the lace trim on the inner edge of the heart. I liked the look of the trim on the inner and outer edges of the heart. But it's totally up to you.
When the trim is on the wreath, you can add a loop of ribbon to the top of the wreath. This loop is how you will hang your wreath, so cut a length that works for the spot where your wreath will hang. Again, use the hot glue to secure the ribbon in place.
Now your lovely Valentine heart wreath is ready to welcome guests to your home. I also think I might make some smaller pom pom heart wreaths to hang inside my kitchen.
What do you think? Where will you hang your heart wreath?
Check out all of our creative Valentine's Day crafts for tweens, teens and adults to make
Make sure you are following along...
FOLLOW KITCHEN COUNTER CHRONICLES ON
SUBSCRIBE TO KITCHEN COUNTER CHRONICLES TO HAVE OUR DELICIOUS RECIPES, FUN CRAFTS & ACTIVITIES DELIVERED DIRECTLY TO YOUR INBOX.

